
To clean a commercial ice maker, turn it off, remove the ice, wash and sanitize all parts, then rinse and restart it.
Learning how to clean a commercial ice maker protects your customers, improves ice quality, and helps the machine run well. The right process is simple, but small details matter. This guide explains the cleaning cycle, sanitizing steps, safety rules, common mistakes, and a practical maintenance schedule based on food-service best practices and manufacturer guidance.
Why You Need to Clean a Commercial Ice Maker
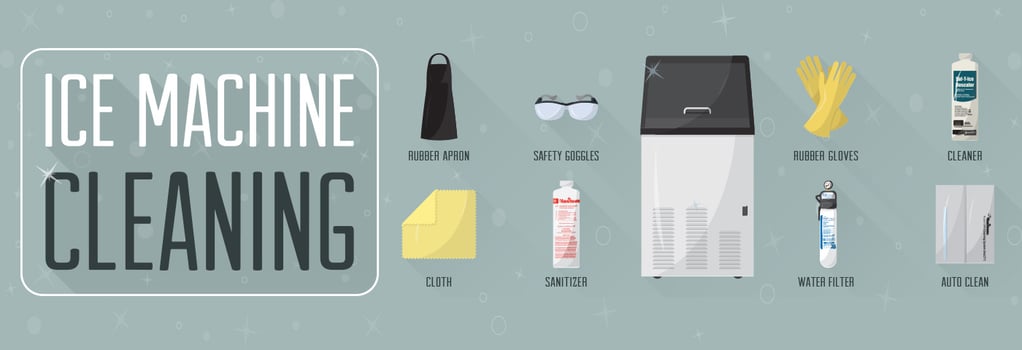
A commercial ice maker handles food, water, air, and moisture every day. These conditions can allow mineral scale, slime, mold, yeast, and bacteria to build up inside the water system, ice bin, spray parts, and drain.
A dirty machine may produce cloudy ice, bad odors, slow production, or small and misshapen cubes. In severe cases, buildup can block water flow or reduce cooling performance.
Regular cleaning also helps protect customers. Ice is considered food, so the machine should be treated like any other food-contact appliance. Food safety guidance recommends cleaning and sanitizing surfaces at suitable intervals and following the machine maker’s instructions.
Clean the machine sooner if you notice:
• A strange smell or taste in the ice
• Slime, mold, or dark spots
• White scale on the water system
• Lower ice production
• Water leaks or slow drainage
• A dirty condenser or blocked air filter
• Ice that melts faster than usual
A clean ice maker is easier to inspect. It is also easier to repair because scale and grime are less likely to hide worn parts or blocked tubes.
How Often Should You Clean a Commercial Ice Maker?
Most commercial ice makers need a full cleaning and sanitizing cycle at least every six months. Busy restaurants, bars, hotels, hospitals, and convenience stores may need to clean them every one to three months.
Your water quality and room conditions make a major difference. Hard water creates scale faster. Dusty rooms clog air filters and condensers. Warm, damp spaces can also encourage mold and slime.
Use this basic schedule as a starting point:
• Daily: Wipe the exterior, scoop, handles, and ice bin surfaces.
• Weekly: Inspect the bin, drain, water curtain, spray nozzles, and air filter.
• Monthly: Check for scale, odors, leaks, and poor ice production.
• Every one to six months: Complete a full cleaning and sanitizing cycle.
• As needed: Clean the condenser and replace the water filter according to the manual.
Always check the owner’s manual before choosing a cleaning chemical or setting a cleaning cycle. Some machines have special parts, automatic wash programs, or approved chemicals that differ from other models.
Supplies for Cleaning a Commercial Ice Maker
Gather everything before you begin. Stopping halfway through can leave chemical residue in the machine or expose clean parts to dirty surfaces.
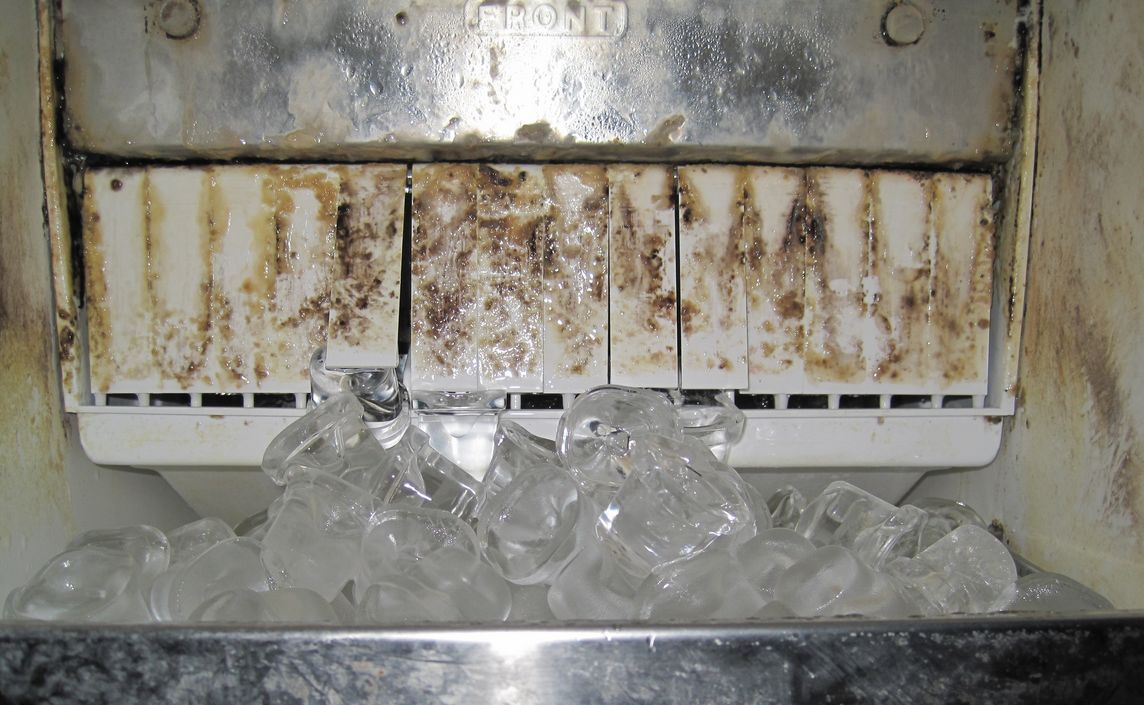
You may need:
• Food-safe ice machine cleaner approved for your model
• Food-safe sanitizer approved for food-contact equipment
• Clean gloves and protective eyewear
• Clean buckets
• Soft nylon brushes
• A soft cloth or nonabrasive sponge
• A spray bottle for approved sanitizer
• Clean water for rinsing
• A clean scoop
• A flashlight for inspection
• Sanitizer test strips when required by the product label
• A replacement water filter if it is due
Do not use ordinary household descaler unless the manufacturer approves it. Strong acids can damage nickel-plated surfaces, rubber seals, plastic parts, and metal tubing.
Never mix cleaner with sanitizer, bleach, ammonia, or another chemical. Mixing products can release dangerous fumes. Read each product label and follow the required contact time, dilution, ventilation, and rinsing instructions.
How to Clean a Commercial Ice Maker Step by Step
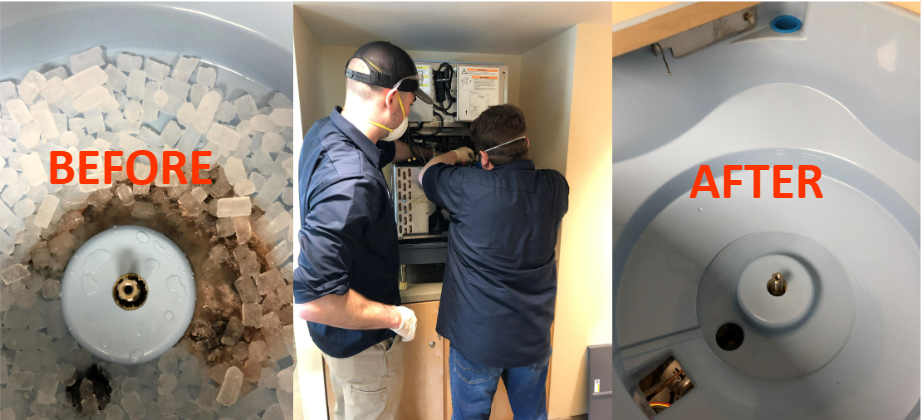
The exact buttons and parts vary by brand, but the general process is similar. When learning how to clean a commercial ice maker, the owner’s manual should always be your first reference.
1. Wash your hands and prepare the area
Wash your hands before touching the machine or its food-contact parts. Move nearby food, cups, and clean utensils away from the work area.
Tell staff that the machine is out of service. Place a sign on it so nobody adds ice or starts a cycle during cleaning.
2. Turn off and unplug the machine
Turn off the ice maker and disconnect it from power if the manual allows and requires it. Shut off the water supply.
Some commercial units have separate storage bins and refrigeration systems. Follow the manual carefully when disconnecting power, especially on large machines.
3. Remove and discard all ice
Scoop out every piece of ice from the storage bin, chute, and dispenser. Do not save or serve ice that was inside the machine during cleaning.
Place the old ice in a sink or approved waste container. Never pour large amounts of ice into a drain that may clog.
4. Remove detachable parts
Take out parts listed as removable in the manual. These may include:
• Ice curtains
• Water distribution tubes
• Spray nozzles
• Water troughs
• Float assemblies
• Filters or screens
• Ice guides
• Scoops and scoop holders
Do not force a part. If it does not come out easily, check the service instructions. A cracked clip or broken water tube can create a costly repair.
5. Wash the bin and interior
Use warm water and a clean cloth or soft brush to remove loose dirt. Wash the bin walls, floor, door, gasket, chute, and scoop holder.
Pay close attention to corners, hinges, drain openings, and seams. These spots act like tiny hiding places for residue.
Avoid steel wool, abrasive pads, and sharp tools. Scratches can trap dirt and make future cleaning harder.
6. Run the approved cleaning cycle
Add the ice machine cleaner in the amount stated by the product label and machine manual. Start the machine’s cleaning or wash mode if it has one.
If the unit does not have an automatic cleaning cycle, circulate the approved solution through the water system as directed by the manufacturer. Allow the cleaner to work for the full recommended time.
The cleaner breaks down mineral scale. It does not replace sanitizing. This is an important distinction when you clean a commercial ice maker.
7. Brush scale from removable parts
Place removable parts in the approved cleaning solution if the manual permits it. Brush away scale from water tubes, spray nozzles, troughs, and float parts.
Use a small nylon brush for narrow openings. Do not use metal wire, knives, or screwdrivers inside water passages.
Rinse each part with clean water until no cleaner remains. Chemical residue can affect taste and may create a food safety risk.
8. Drain and rinse the machine
Drain the cleaning solution completely. Refill or flush the system with clean water according to the machine instructions.
Many manufacturers require more than one rinse. Follow the exact rinse process. If the water still smells strongly of cleaner, keep rinsing and do not make ice for service.
9. Sanitize food-contact surfaces
Apply the approved sanitizer to the bin, scoop, door, gasket, water trough, distribution parts, and other food-contact surfaces.
Use the product’s correct dilution and contact time. Some sanitizers require air drying, while others require a clean-water rinse. Never guess.
Food-service operations may need test strips to verify sanitizer strength. A solution that is too weak may not sanitize well, while one that is too strong can leave residue or damage equipment.
10. Reassemble the machine
Return every clean part to its correct position. Check that water tubes are seated, spray nozzles point in the right direction, and float parts move freely.
Replace damaged gaskets, cracked tubes, loose clips, or blocked nozzles. A machine can look clean and still work poorly if one small water part is installed incorrectly.
11. Turn on the water and power
Restore the water supply and power. Watch the first fill cycle for leaks.
Run the machine according to the manual. Discard the first batch or batches of ice if the manufacturer recommends doing so. This helps remove any remaining taste or residue.
12. Inspect the first ice
Check the first finished batch. Look for clear appearance, normal size, and a clean smell and taste.
If the ice has a chemical odor, unusual color, or strange taste, stop serving it. Drain the machine and rinse again. When in doubt, follow the manufacturer’s service instructions or call a qualified technician.
This complete process explains how to clean a commercial ice maker without skipping the important difference between cleaning, rinsing, and sanitizing.
How to Clean the Ice Storage Bin
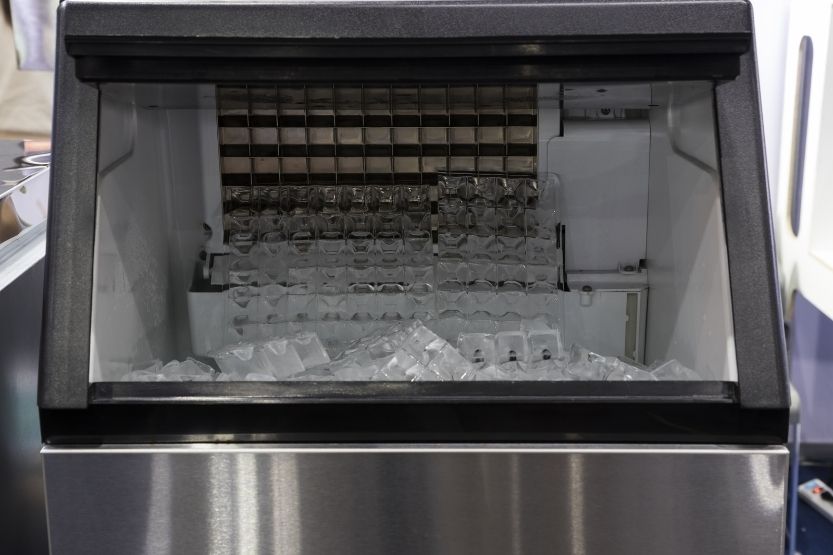
The storage bin is often overlooked because it is separate from the ice-making parts. However, hands, scoops, air, and melting ice can all introduce dirt into the bin.
First, remove all ice. Wash the inside walls, floor, door, drain, gasket, and scoop holder with an approved cleaner. Rinse well before applying sanitizer.
Keep the scoop outside the ice when possible. Store it in a clean holder, with the handle facing up. Never leave the scoop buried in ice because hands may touch the food-contact portion.
Check the bin drain as well. A slow drain can leave standing water, which creates a good place for slime and odor to grow. Clean the drain opening and confirm that water flows freely.
A useful service lesson is to clean the bin gasket every time you complete a full machine cleaning. It may look harmless, but moisture and crumbs often collect inside the fold.

How to Clean the Condenser and Air Filter
The condenser helps remove heat from the refrigeration system. If dust blocks the condenser or air filter, the machine may run hot, make less ice, or use more energy.
Before cleaning this area, turn off power. Remove the filter if the design allows it, then wash it with mild soap and water. Let it dry fully before replacing it.
Use a soft brush or vacuum to remove dust from the condenser fins. Do not bend the fins or spray water into electrical parts.
Some machines use water-cooled condensers rather than air-cooled condensers. These systems need different service steps and may require a trained technician.
Cleaning the condenser is not the same as cleaning the water system. Both jobs matter, but they solve different problems. The water system controls ice cleanliness, while the condenser supports cooling and production.
Common Mistakes to Avoid
Knowing what not to do is just as important as knowing how to clean a commercial ice maker. Many equipment problems begin with shortcuts that seem harmless.
Avoid these mistakes:
• Cleaning while the machine is still producing ice
• Forgetting to remove old ice from the bin
• Using a household cleaner not approved for ice machines
• Mixing cleaner, bleach, ammonia, or sanitizer
• Skipping the rinse cycle
• Using a knife or metal brush to remove scale
• Spraying water near electrical controls
• Ignoring the condenser and air filter
• Returning dirty parts after cleaning
• Serving the first batch without checking it
• Using a sanitizer at the wrong strength
• Cleaning only the bin and ignoring internal water parts
One common mistake is stopping after the machine looks clean. Scale may remain inside water tubes or behind spray nozzles. A proper cleaning cycle reaches areas that a cloth cannot.
Another mistake is using too much chemical. More cleaner does not mean better cleaning. It can damage parts and create residue. Always measure according to the label.

How to Tell If a Commercial Ice Maker Is Clean
A clean machine should have no visible slime, scale, mold, or food residue. Its ice should have a neutral smell and taste.
Check these areas:
• Ice bin walls and corners
• Door gasket and hinges
• Water trough and drain
• Spray nozzles
• Water distribution tube
• Ice curtain
• Scoop and scoop holder
• Condenser and air filter
• Water filter and inlet screen
The machine should fill, freeze, harvest, and drain normally. Ice production should match the expected output for the room temperature and water temperature.
Keep a cleaning log with the date, worker’s name, chemical used, and any problems found. Logs help managers spot patterns and support food safety inspections.
If the machine remains dirty after cleaning, do not scrape aggressively or keep adding chemicals. The unit may need a service technician, replacement part, or professional descaling.

A Practical Commercial Ice Maker Cleaning Schedule
A written schedule makes cleaning easier during a busy shift. Assign responsibility to a trained employee and have a manager review the log.
Daily tasks
• Wash hands before handling the scoop or ice
• Wipe the exterior and handles
• Keep the scoop clean and protected
• Remove spills near the bin
• Check for odors, leaks, and visible dirt
Weekly tasks
• Inspect the ice bin and gasket
• Check the scoop holder
• Look for scale around water outlets
• Inspect the drain for standing water
• Check the air filter if the model has one
Monthly tasks
• Review ice quality and production
• Inspect water tubes and spray nozzles
• Clean the air filter when needed
• Check the water filter replacement date
• Look for loose, cracked, or damaged parts
Scheduled deep cleaning
• Remove scale with approved cleaner
• Wash and sanitize the water system
• Clean and sanitize the ice bin
• Clean the drain and removable parts
• Clean the condenser if appropriate
• Discard the first ice batch when required
• Record the work in the maintenance log
High-volume sites may need a more frequent schedule. Your local health department, equipment manual, water quality, and business conditions should guide the final routine.
When to Call a Professional
Some cleaning tasks are safe for trained staff. Others require a qualified refrigeration or ice machine technician.
Call a professional when:
• The machine leaks after cleaning
• The compressor runs constantly
• The unit does not freeze water
• Ice production remains low
• Electrical parts get wet
• The water system stays blocked
• The condenser is damaged
• The machine shows an error code
• A chemical spill occurs
• You smell burning or electrical odor
Do not remove sealed refrigeration components or bypass safety controls. Commercial ice makers contain electrical systems, pressurized refrigerant, moving parts, and hot surfaces.
Professional service may also be needed when scale has entered hard-to-reach passages. Cleaning chemicals can remove some buildup, but they cannot repair damaged valves, pumps, sensors, or refrigeration parts.
Frequently Asked Questions About How to Clean a Commercial Ice Maker
How often should you clean a commercial ice maker?
A commercial ice maker usually needs a full cleaning and sanitizing cycle every one to six months. Clean it more often in busy locations, hard-water areas, or warm and dusty rooms.
Can you use bleach to clean a commercial ice maker?
Do not use bleach unless the machine manufacturer and product label specifically approve it for that purpose. Use an ice machine cleaner and food-contact sanitizer designed for the equipment, and never mix bleach with other chemicals.
Do you need to throw away the ice before cleaning?
Yes. Remove and discard all ice before you start cleaning and sanitizing. Ice inside the machine may contain cleaner, dirt, or microorganisms after the cleaning process begins.
What is the difference between cleaning and sanitizing an ice maker?
Cleaning removes scale, dirt, and residue. Sanitizing reduces microorganisms on clean food-contact surfaces, so both steps are needed when you clean a commercial ice maker.
Why does my ice maker still smell after cleaning?
A lingering smell may come from chemical residue, hidden slime, a dirty drain, an old water filter, or contaminated bin parts. Rinse as directed, inspect the drain and water system, and contact a technician if the odor remains.
Can you clean the condenser with water?
Usually, you should avoid spraying water near the condenser, controls, or electrical parts. Turn off the power and use a soft brush or vacuum unless the manufacturer gives different instructions.
Should you clean a commercial ice maker if the ice looks clear?
Yes. Clear ice does not prove that the water system and storage bin are sanitary. Regular cleaning remains necessary even when the ice looks normal.
Conclusion
Learning how to clean a commercial ice maker is a practical way to protect ice quality, reduce equipment problems, and support food safety. Remove the ice, shut down the unit, clean away scale, rinse well, sanitize food-contact parts, inspect the condenser, and discard the first batch when required.
Follow the manufacturer’s manual and chemical labels every time. Create a written cleaning schedule, train staff, and call a qualified technician when the problem involves electrical, refrigeration, or sealed components.
Start with your next scheduled cleaning, record what you find, and use the results to improve your maintenance routine.