
To clean mold from an ice maker, discard the ice, unplug the unit, scrub all parts, sanitize, rinse, and dry well.
Mold in an ice maker can spread through damp corners, water lines, bins, and hidden seals. I have seen small dark spots turn into a sour smell and cloudy ice when cleaning is delayed. This guide explains how to clean mold from an ice maker safely, prevent it from returning, and know when the machine needs professional service or replacement.
Why Mold Grows in an Ice Maker
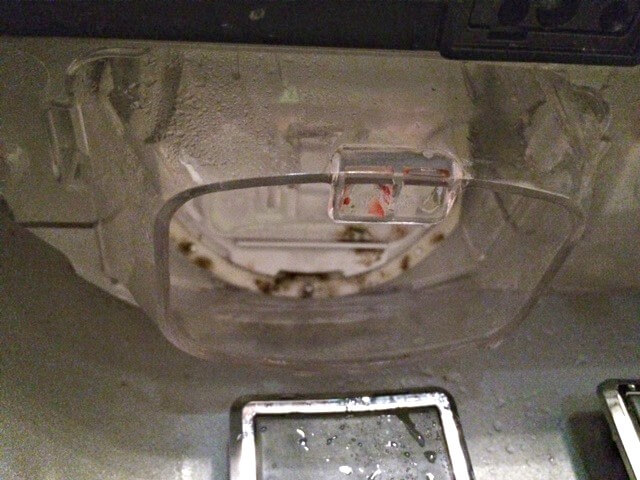
Mold grows where moisture sits for too long. Ice makers have many small spaces that stay damp, such as the ice bin, scoop, drain area, water reservoir, gasket, and chute. Warm room air can also enter when the door does not seal well.
Mold may look black, green, gray, or pink. However, color alone cannot identify the type of growth. Treat any unknown growth as mold and avoid touching it with bare hands.
Common causes include:
• Leaving old ice in the bin for weeks
• A dirty or wet ice scoop
• A clogged drain or slow water flow
• A cracked door gasket
• Poor air circulation around the appliance
• Hard-water buildup that traps dirt
• A water filter that needs replacement
• Cleaning products that leave residue
If the ice smells musty, tastes strange, or has visible spots, do not use it. Throw the ice away before you start cleaning.
What You Need Before Cleaning
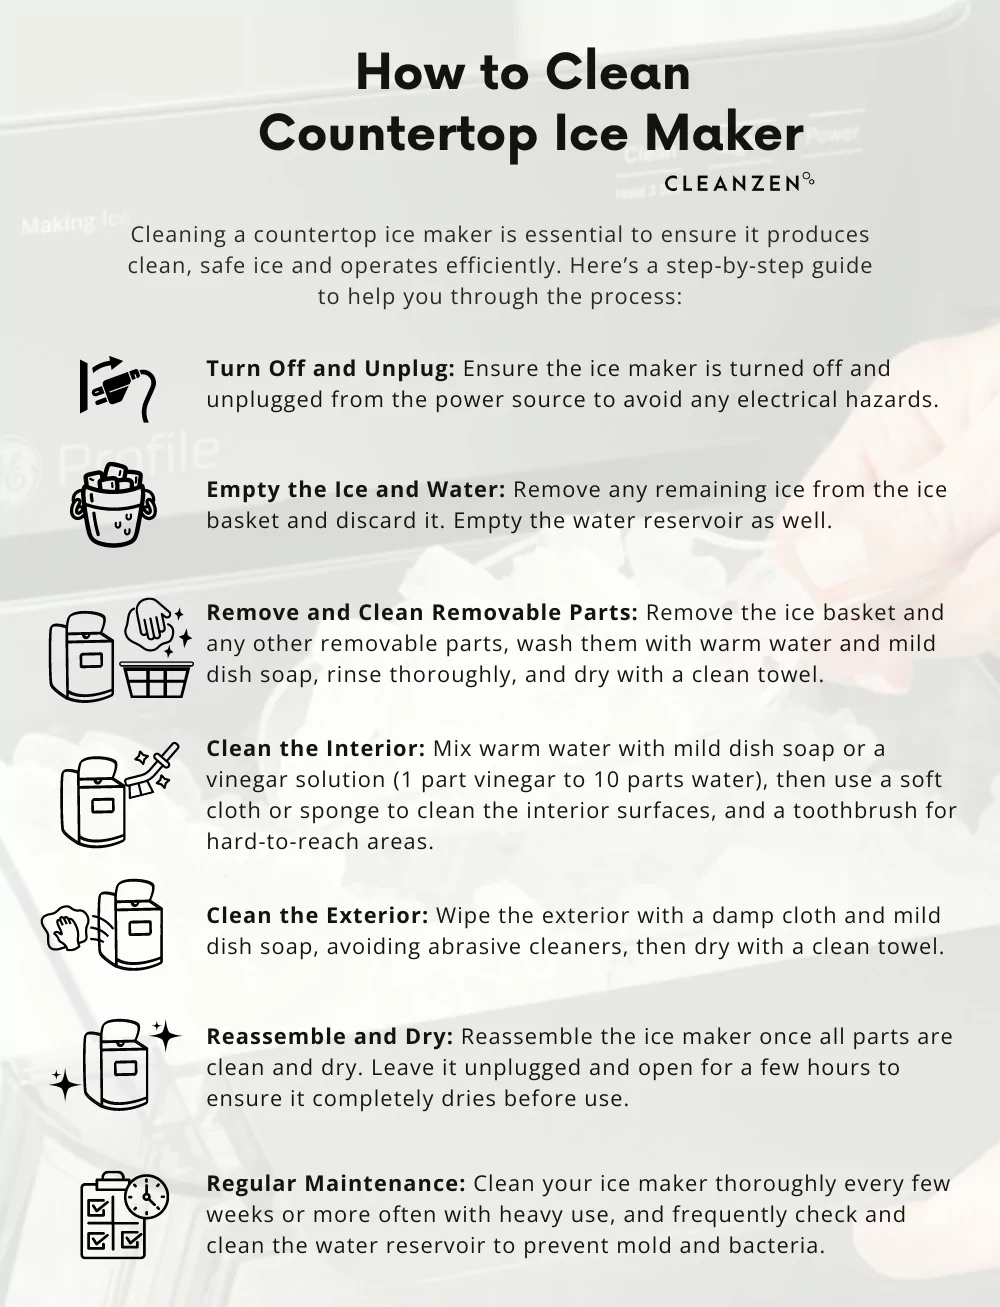
Gather your supplies before taking the ice maker apart. You will usually need:
• Disposable gloves
• Eye protection if mold is heavy
• Mild dish soap
• Warm water
• A clean sponge or soft brush
• An old toothbrush for small gaps
• Clean microfiber cloths
• Food-safe sanitizer approved for appliance surfaces
• A clean towel
• A small bucket or bowl
Avoid steel wool and harsh scouring pads. They can scratch plastic and stainless steel. Scratches may hold moisture and make future mold growth more likely.
Read the appliance manual first. Some ice makers have removable bins, filters, trays, and water lines that require special steps. The manual also tells you which cleaners are safe for food-contact surfaces.
Never mix bleach with vinegar, ammonia, or other cleaners. Dangerous gases can form. If you use a bleach solution, follow the product label and the appliance maker’s instructions. For many household ice makers, a mild soap wash followed by a properly labeled food-contact sanitizer is the safer choice.
How to Clean Mold From an Ice Maker
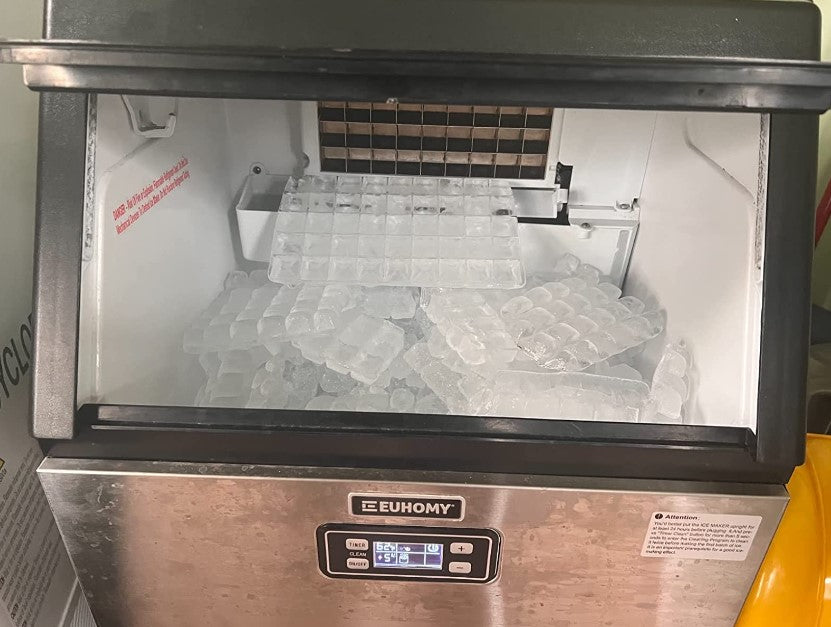
Follow these steps for a countertop, freezer, or built-in ice maker. The exact parts may differ, but the cleaning principle stays the same: remove, wash, sanitize, rinse, and dry.
1. Turn Off and Unplug the Ice Maker
Switch off the ice maker and unplug it from the wall. If it is built into a refrigerator, turn off the ice-making function and follow the manual before removing parts.
This step protects you from moving parts and electrical hazards. It also stops new water from entering while you clean.
2. Throw Away All Ice
Place every piece of ice in a trash bag. Do not try to save ice that looks clean because mold spores and odors may spread through the bin.
Wash your hands after handling the old ice. If the ice bin has a strong odor, keep it away from food until it has been washed and sanitized.
3. Remove Detachable Parts
Take out the ice bin, scoop, drip tray, water reservoir, filter, and other removable parts. Do not force anything. A cracked tray or loose seal can cause leaks later.
Set small parts on a clean towel. Take a quick photo before removal if you are unsure where each piece belongs.
4. Wash With Warm, Soapy Water
Fill a basin with warm water and a small amount of dish soap. Scrub every surface, including corners, hinges, grooves, and the underside of the bin.
Use an old toothbrush around seams and hard-to-reach areas. Mold is often like dust hiding under furniture: easy to miss until you look closely.
5. Clean the Interior
Wipe the inside of the ice maker with a clean cloth dipped in soapy water. Pay close attention to:
• The ice chute
• The water outlet
• The evaporator area, if accessible
• The bin rails
• The door gasket
• The drain opening
• The edges around the ice drop zone
Do not pour water into electrical openings, fans, control panels, or motor areas. Use a damp cloth instead of spraying the machine directly.
6. Sanitize Food-Contact Surfaces
After washing, apply a food-contact sanitizer that is suitable for ice machines or refrigerator surfaces. Follow the label for the correct strength and contact time.
A sanitizer works only when the surface is already clean. Soap and scrubbing must come first because dirt and mold residue can reduce sanitizer performance.
Do not use scented bathroom cleaner, glass cleaner, or general disinfectant on surfaces that touch ice. These products may leave unsafe residues.
7. Rinse as Directed
Rinse removable parts with clean water if the sanitizer label requires rinsing. Even when rinsing is not required, follow the appliance manual.
A leftover chemical taste is a sign that the surface was not rinsed or dried correctly. Never return the ice bin until there is no cleaner residue or strong chemical smell.
8. Dry Everything Completely
Dry each part with a clean towel. Leave the bin and removable pieces open to air-dry for several hours if possible.
Moisture is the fuel that keeps mold alive. A dry ice maker is much less inviting to mold than one that stays wet and closed.
9. Clean or Replace the Water Filter
If the appliance uses a water filter, check its age and condition. Replace it when the manual recommends, or sooner if it smells bad, looks dirty, or reduces water flow.
A filter does not remove mold that is already growing inside the machine. It supports clean water flow, but the ice maker still needs regular cleaning.
10. Run and Discard Several Ice Cycles
Reconnect the ice maker and run it according to the manufacturer’s instructions. Throw away the first two or three batches unless the manual gives different guidance.
Check the new ice for odor, taste, and appearance. If mold, slime, or a musty smell returns, stop using the machine and investigate the water line, drain, filter housing, and internal parts.

How to Clean Mold From an Ice Maker With Vinegar
Some people use diluted white vinegar to loosen mineral deposits and reduce odors. Vinegar can help with scale, but it is not a complete solution for heavy mold growth.
If the manual allows vinegar, use a small amount diluted with water. Wipe the surface, scrub gently, and rinse very well. Never mix vinegar with bleach or another cleaning product.
Vinegar may not reach hidden mold inside tubing, insulation, or sealed components. If mold keeps returning after cleaning, the problem may be inside the water system or drain.

How to Clean Mold From an Ice Maker With Bleach
Bleach can damage some plastics, rubber seals, and metal parts. It can also leave a dangerous residue if used at the wrong strength. Use it only when the appliance manual or product label supports its use.
For commercial ice machines, use a cleaner and sanitizer made for ice equipment. These products usually include clear directions for dilution, contact time, rinsing, and safe operation.
Never combine bleach with vinegar, ammonia, alcohol, or acidic cleaners. If you are unsure which product is safe, contact the manufacturer or choose a labeled food-contact sanitizer instead.

Cleaning Hidden Mold and Hard-to-Reach Areas
Visible mold is not always the full problem. A musty smell may come from a hidden drain, water line, gasket, or collection area.
Use a flashlight to inspect dark areas. Look for slime, standing water, cracked plastic, loose seals, and mineral deposits. Do not push a sharp object into tubing or drain openings because it can cause damage.
Contact an appliance technician if:
• Mold returns soon after a careful cleaning
• The water line looks dirty inside
• The drain stays clogged
• The machine leaks
• The ice tastes chemical or musty after repeated rinsing
• Mold appears behind sealed panels
• The appliance has damaged insulation or wiring
Some internal parts cannot be cleaned safely at home. Replacing a contaminated water line or sealed component may be safer than repeatedly treating the surface.

Mistakes to Avoid When Cleaning Mold
The wrong cleaning method can spread mold or damage the appliance. Avoid these common mistakes:
• Keeping the old ice while cleaning other parts
• Spraying liquid into the control panel
• Using a knife to scrape mold
• Mixing cleaning chemicals
• Returning wet parts to the machine
• Ignoring the water filter
• Using a dirty cloth or sponge
• Cleaning only the ice bin
• Skipping the rinse step
• Making ice before the machine is fully dry
One mistake I often see is cleaning the bin but ignoring the gasket and ice chute. These areas collect moisture and food dust, so they can bring the smell back within days.
Another mistake is using too much cleaner. More product does not mean better cleaning. Correct dilution, full contact time, and thorough rinsing matter more.

How to Prevent Mold in an Ice Maker
Once you know how to clean mold from an ice maker, prevention becomes much easier. Use these habits to keep the machine fresh:
• Clean the ice bin every one to two months, or as the manual advises
• Wipe spills as soon as they happen
• Keep the ice scoop clean and dry
• Do not store the scoop buried in ice
• Replace the water filter on schedule
• Remove old ice during long periods of nonuse
• Leave the bin and door slightly open while the unit dries, if safe
• Check the gasket for cracks or gaps
• Keep the area around the appliance dry
• Follow the manufacturer’s cleaning cycle
The best routine depends on use. A busy family may need to clean the ice maker more often than a person who uses it only on weekends. Homes with high humidity or hard water may also need more frequent care.
When You Should Replace the Ice Maker
Cleaning is not always enough. Replacement may make sense when mold returns after professional cleaning or when the machine has damaged internal parts.
Consider replacement if:
• The unit has deep cracks or damaged seals
• The water line cannot be cleaned or replaced
• The drain remains blocked
• The compressor or fan has other serious faults
• The appliance has a lasting chemical or mold odor
• Repairs cost close to the price of a new unit
Do not assume every dark mark is mold. Some marks are mineral stains, rust, or food residue. Still, if you cannot identify the material or remove it safely, stop using the ice maker and seek expert advice.
Health and Food Safety Considerations
Moldy ice should never be eaten or served. People with asthma, allergies, weakened immune systems, or other health concerns may be more sensitive to mold exposure.
Wear gloves during cleanup and improve ventilation. If mold covers a large area, avoid brushing it while dry because this can spread particles through the air.
Ice makers are food-contact appliances. This means cleaning products must be suitable for surfaces that touch food or beverages. Follow the label, rinse when directed, and discard the first batches of ice after cleaning.
Frequently Asked Questions About How to Clean Mold From an Ice Maker
Can I use bleach to clean mold from an ice maker?
Only use bleach if the appliance instructions and bleach label allow it. The wrong concentration can damage parts or leave unsafe residue, and bleach must never be mixed with vinegar or ammonia.
How often should I clean my ice maker?
Many homes benefit from cleaning every one to two months, but the manual should guide your schedule. Clean sooner if the ice smells bad, the bin feels slimy, or the machine sits unused for a long time.
Is ice from a moldy ice maker safe to use?
No. Discard all ice made while visible mold, slime, or a strong musty odor is present. Clean and sanitize the appliance before making ice again.
Why does mold keep coming back after cleaning?
Mold may be growing in a water line, drain, filter housing, gasket, or sealed internal part. Persistent growth can also result from poor drying, leaks, high humidity, or a damaged seal.
Can vinegar remove mold from an ice maker?
Diluted vinegar may help remove mineral scale and odors when the manual permits it. It may not remove hidden or heavy mold, so a food-safe appliance sanitizer or professional service may be needed.
Should I replace the water filter after finding mold?
Replacing the filter is wise if it is old, dirty, or has a bad odor. However, a new filter does not replace full cleaning of the ice bin, water path, drain, and other accessible surfaces.
Conclusion
Learning how to clean mold from an ice maker means more than wiping the ice bin. Discard the ice, unplug the appliance, wash every removable part, sanitize food-contact surfaces, rinse as directed, and dry everything fully. Check the filter, drain, gasket, and water line if the smell or mold returns.
A clean, dry ice maker is safer and easier to maintain. Set a regular cleaning reminder, follow the manufacturer’s instructions, and contact a qualified technician when mold hides inside sealed parts. Share your cleaning tips or explore more appliance-care guides to keep your kitchen fresh and safe.