
To hook up an ice maker, connect its water line, secure the valve, test for leaks, and level the unit.
Learning how to hook up an ice maker is easier when you treat the job like a small plumbing project, not just a quick appliance task. You need the right water connection, safe shutoff control, a clean tubing path, and a careful leak test. This guide explains each step in plain English, including common mistakes, tool choices, safety tips, and when to call a plumber.
What you need before you start
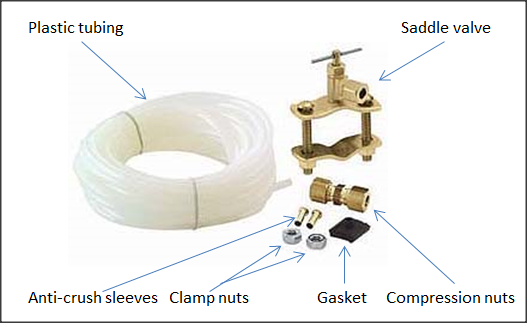
Before learning how to hook up an ice maker, check the ice maker manual and the refrigerator’s installation guide. Some models use a 1/4-inch water line, while others may include a special fitting or filter system.
Most installations need these items:
• A 1/4-inch approved water supply line, usually braided stainless steel, copper, or food-grade plastic
• A refrigerator water-line connection kit
• An accessible shutoff valve
• An adjustable wrench
• A drill and drill bit, if you need to make a cabinet opening
• A bucket or shallow pan
• A towel
• A level
• Thread seal tape, if the fitting instructions allow it
• A saddle valve or tee valve only if permitted by local plumbing rules and the appliance instructions
Braided stainless steel lines are often a good choice because they resist kinks and are easy to inspect. Copper lasts a long time, but it can bend or crack if handled roughly. Plastic tubing is flexible, but it must be routed carefully and kept away from sharp edges and hot surfaces.
Always use parts made for drinking water. Do not reuse an old line that feels stiff, cracked, stained, or damaged.
Check the water supply and refrigerator
The best place to start when you hook up an ice maker is with a careful inspection. Pull the refrigerator away from the wall, but do not stretch or bend any existing power cord or water line.
Look for one of these water supply points:
• A dedicated shutoff valve under the sink
• A valve behind the refrigerator
• A tee connection on the cold-water pipe
• A water outlet inside a nearby cabinet
The water supply should connect to cold water only. Hot water can damage the inlet valve, affect ice quality, and create a burn risk.
Check the refrigerator for a water inlet port. It is often located near the bottom rear panel. Some refrigerators have a built-in filter, while others require an external filter between the shutoff valve and the appliance.
Before you hook up an ice maker, measure the distance from the water valve to the refrigerator. Add enough extra length to move the refrigerator for cleaning, but avoid a large loose coil. Excess tubing can kink or catch behind the appliance.
If there is no existing water supply, the job becomes more involved. You may need to install a tee and shutoff valve on a cold-water pipe. If you are not comfortable cutting or changing plumbing, hire a licensed plumber.
Turn off power and water
Safety comes first. Unplug the refrigerator before working near its rear panel or electrical parts. Also close the home’s water shutoff valve or the local valve that feeds the refrigerator.
Open a nearby cold-water faucet for a few seconds. This releases pressure from the line and reduces spills. Place a towel and bucket under the connection point.
Never work on a wet electrical area. If water reaches the outlet, plug, or power cord, stop and dry the area fully before restoring power. If the outlet or cord becomes soaked, have it inspected by a qualified professional.
A refrigerator may seem simple, but it combines electricity, water, and moving parts. Treat the connection with the same care you would use for any small plumbing repair.

Install the shutoff valve
A shutoff valve lets you stop water quickly if the line leaks. It also makes future repairs much easier.
If a valve is already installed, inspect it for corrosion and test it before connecting the ice maker. Turn it off, then open the valve slowly. A valve that will not close fully should be replaced.
If you need to add a valve, the usual method is to install a compression tee on an accessible cold-water line. This work may require cutting the pipe, removing burrs, and making a watertight compression connection.
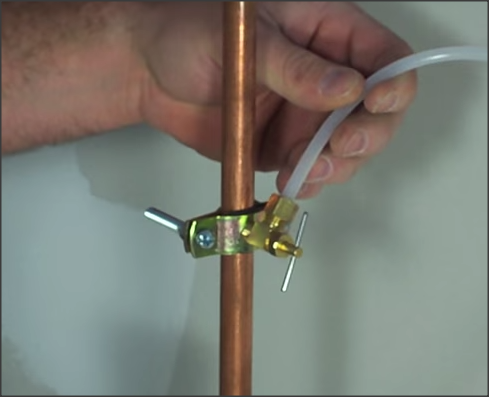
Some kits include a piercing saddle valve. These valves are easy to install, but they may clog, leak, or fail over time. Local plumbing codes may also restrict their use. A full-port tee valve is usually a stronger long-term option.
When installing any valve:
-
Follow the valve manufacturer’s instructions.
-
Confirm that the valve is made for potable water.
-
Keep the valve easy to reach.
-
Avoid placing it where a cabinet shelf could hit the handle.
-
Do not overtighten compression fittings.
-
Check the connection before moving the refrigerator back.
If you live in a rental home, ask the property owner before changing a water pipe. A small leak inside a wall or cabinet can cause expensive damage.

Connect the water line to the valve
Cut the water line cleanly with a tubing cutter or a sharp utility knife. The end should be straight and free from crushed areas. A crooked cut may prevent the compression fitting from sealing.
Slide the compression nut and ferrule onto the tubing if your fitting requires them. Push the tubing fully into the valve opening, then tighten the nut by hand. Finish with a wrench according to the fitting instructions.
Do not force the connection. Too much pressure can deform the ferrule or damage the valve. In many compression connections, thread seal tape is not needed because the seal forms at the ferrule, not on the threads.
After you hook up an ice maker to the supply valve, gently tug the tube. It should stay firm. Do not pull hard enough to stress the valve.
Route the line through the cabinet opening or wall space. Protect it from:
• Sharp cabinet edges
• Hinges and drawer slides
• The refrigerator wheels
• Hot water pipes
• The compressor and other hot rear components
• Tight bends
The water line should curve smoothly. A gentle loop is better than a sharp bend.
Connect the water line to the refrigerator
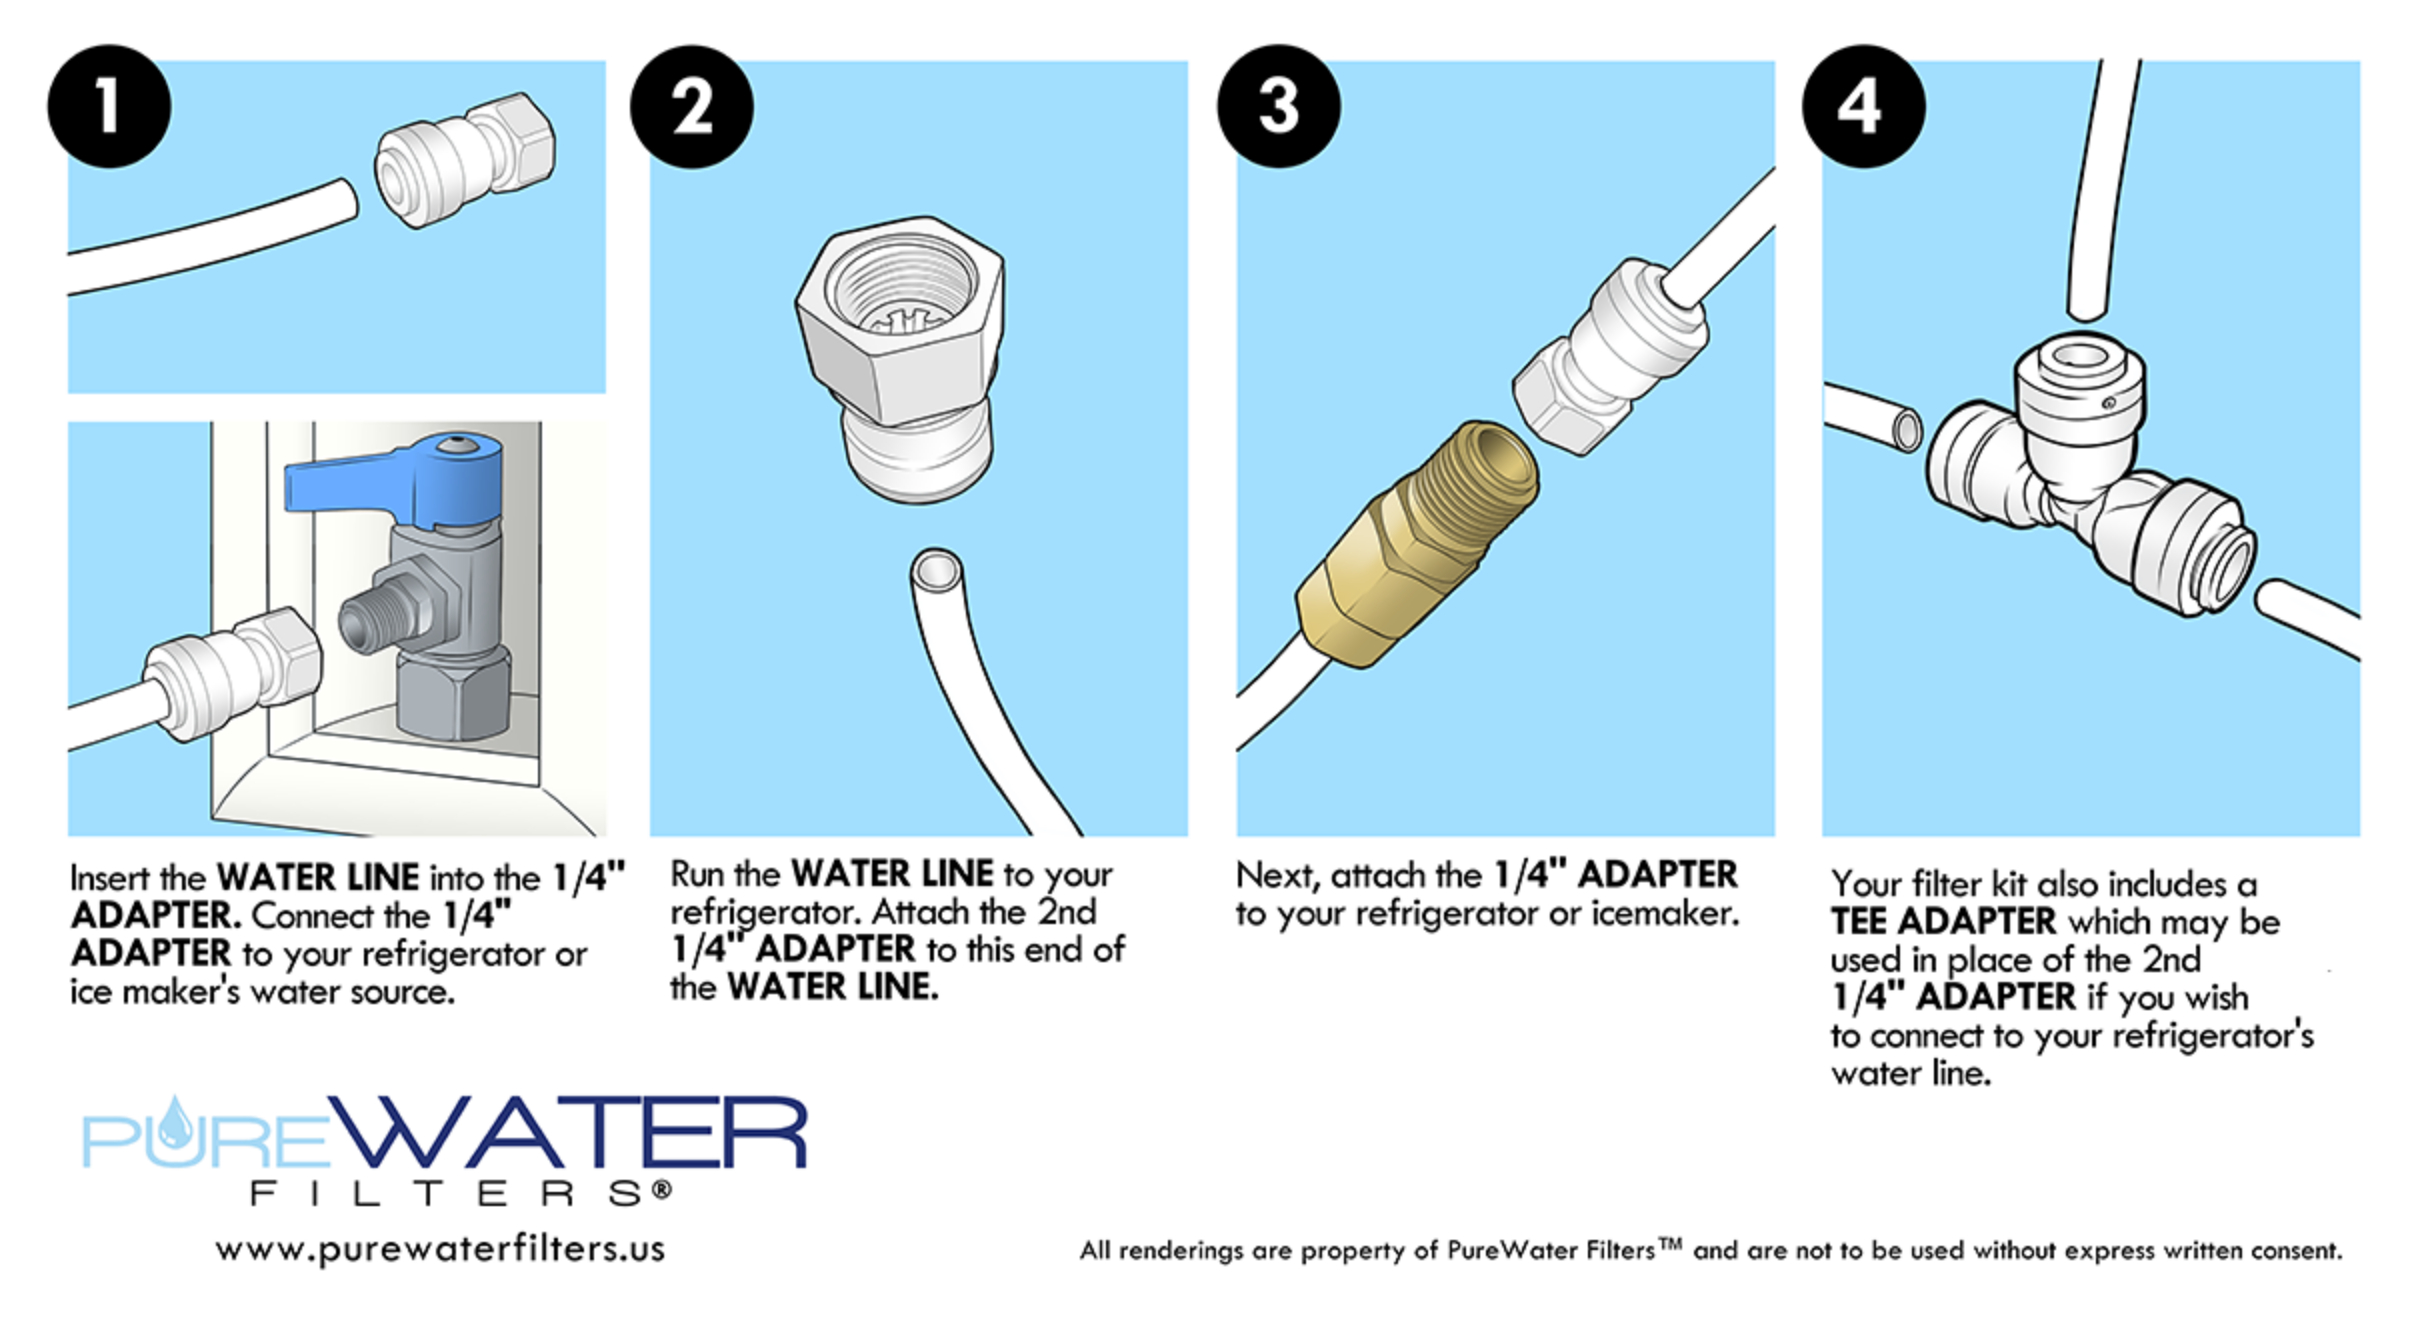
Most refrigerator ice makers have a water inlet fitting on the back. Confirm the location in the manual before removing any cap or plug.
Push the tubing into the inlet fitting as far as the instructions show. If the fitting uses a compression nut, tighten it by hand first and then use a wrench for the final adjustment. Hold the inlet fitting steady so you do not twist the refrigerator’s internal water valve.
Some modern models use a push-to-connect fitting. For this style, cut the tubing square, push it fully into the fitting, and pull back gently to confirm it has locked. If the fitting includes a locking clip, install it.
Do not connect tubing that is dirty inside. A small amount of debris can block the inlet screen or enter the ice maker valve. Keep the tubing ends covered until you are ready to connect them.
After you hook up an ice maker, leave the refrigerator far enough from the wall to inspect both ends. Do not push it into place until the water line passes a leak test.
Flush the line and test for leaks
Flushing removes dust, plastic particles, and trapped air. Keep the refrigerator unplugged while you test the plumbing.
Use this process:
-
Place a bucket under the refrigerator-side connection.
-
Open the water shutoff valve slowly.
-
Let about 2 to 3 gallons of water flow into the bucket, or follow the refrigerator manual’s flushing amount.
-
Close the valve if you see a leak.
-
Tighten the connection slightly if needed.
-
Open the valve again and inspect the fitting.
Run a dry paper towel around each joint. A paper towel can reveal a small bead of water that may not be visible by eye. Check the supply valve, both ends of the water line, the filter housing, and any tee connection.
Do not use the ice produced during the first few cycles. Throw away the first several batches, especially if the refrigerator has a new filter or the line has been stored for a while. Follow the appliance manual for the exact flushing and discard instructions.
A slow leak can take hours to appear. Check the connections again after 15 minutes, after one hour, and the next day.

Turn on the ice maker
Once the water connections are dry and secure, plug in the refrigerator. Let the unit reach its normal operating temperature.
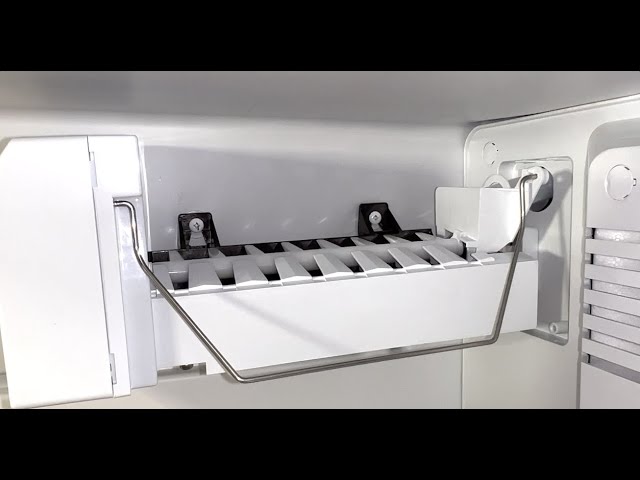
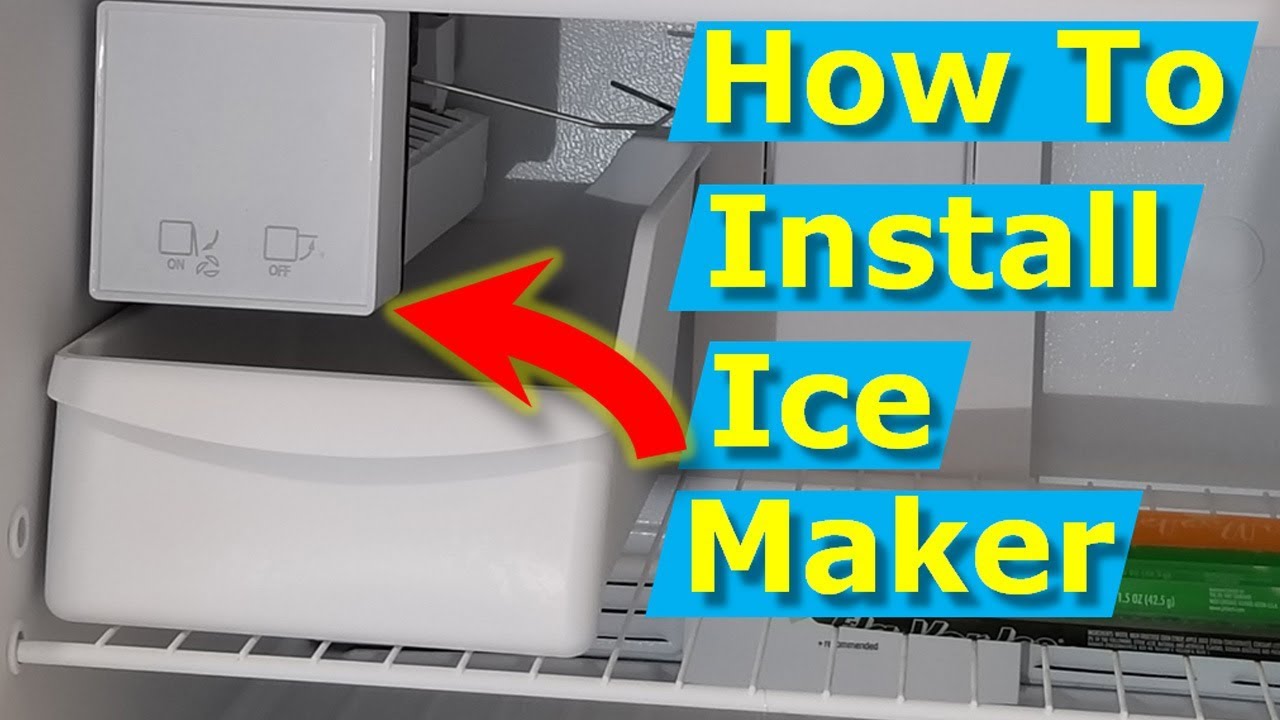
Many ice makers have a wire shutoff arm. Lowering the arm turns the ice maker on, while raising it turns the ice maker off. Newer models may use an electronic control on the refrigerator display.
Do not expect ice right away. A new ice maker may need several hours before the first harvest. The freezer must be cold enough, and the water valve must receive power during the fill cycle.
Watch the first fill carefully. You may hear a short humming sound as the water inlet valve opens. You may also hear water entering the ice mold. These sounds are usually normal, but loud buzzing, repeated clicking, or water running continuously can signal a problem.
When you hook up an ice maker, do not fill the mold by hand unless the manufacturer specifically recommends it. Manual filling can cause overflow and may interfere with the control system.

Check ice quality and operation
A properly installed ice maker should fill with clean water and produce firm, reasonably clear cubes. The exact appearance depends on the water supply, filter, freezer temperature, and ice maker design.
Check for these signs of normal operation:
• The mold fills once during each cycle
• The ice cubes release without sticking badly
• The shutoff arm stops production when the bin is full
• The water valve closes fully after filling
• No water collects under or behind the refrigerator
• The ice has no plastic, chemical, or metallic taste after flushing
If the first cubes taste odd, discard them and run another cycle. A persistent taste may mean the water line, filter, or valve needs attention.
Small white spots or cloudy centers often come from minerals or trapped air. They are not always a sign of unsafe water, but a certified filter may improve taste and appearance. For water safety concerns, test the household water supply rather than relying only on the ice maker.
Common mistakes to avoid
Many ice maker problems begin with a rushed installation. The most common mistake is pushing the refrigerator back before checking the line. This can pinch the tubing and create a slow leak.
Avoid these errors:
• Using a hot-water line
• Connecting to an unapproved plumbing fitting
• Reusing brittle tubing
• Bending the line sharply
• Leaving the shutoff valve hidden
• Overtightening compression nuts
• Forgetting to flush the line
• Failing to inspect the filter housing
• Plugging in the refrigerator while water is near the outlet
• Turning on the ice maker before the freezer is cold
• Using a line that is too short
• Letting the refrigerator wheel rest on the tubing
A useful lesson from many home appliance installations is that small leaks deserve immediate attention. A connection that drips only once every few minutes can still damage flooring, cabinets, or drywall over time.
Take a photo of the finished connection before pushing the refrigerator back. This gives you a quick reference for future filter changes or repairs.
Troubleshoot an ice maker that does not work
If the ice maker does not produce ice, start with the simple checks. Make sure the refrigerator is plugged in, the freezer is cold, and the ice maker switch or arm is on.
Then inspect the water supply:
-
Confirm that the shutoff valve is fully open.
-
Check for a kinked line behind the refrigerator.
-
Inspect the filter and filter housing.
-
Look for water at the refrigerator inlet.
-
Listen for the water valve during a harvest cycle.
-
Check whether the ice maker mold is frozen.
If the mold is empty and you hear a click or hum but no water enters, the inlet screen may be blocked, the valve may be faulty, or water pressure may be too low. If the mold is full of ice but the ice does not release, the ice maker motor, thermostat, or control board may need service.
If water enters continuously, turn off the water valve and unplug the refrigerator. A stuck inlet valve can cause an overflow.
Do not bypass safety switches or use metal tools near powered parts. A technician can test voltage and water pressure safely.
Water pressure, filters, and code considerations
Many refrigerator ice makers work best within the water-pressure range listed in the owner’s manual. A common range is about 20 to 120 pounds per square inch, but the correct value varies by model.
Low pressure can cause small cubes, slow filling, or no ice. Very high pressure can stress the inlet valve and connections. A pressure-reducing valve may be needed in some homes.
Replace water filters on the schedule recommended by the manufacturer. A clogged filter can reduce flow and make the ice maker appear broken. After replacing a filter, flush the amount of water listed in the instructions.
Plumbing requirements vary by city and state. The International Plumbing Code and Uniform Plumbing Code contain rules that may apply to water supply connections, backflow protection, and approved materials. Local rules take priority, so check with your building department when adding a new valve or changing a fixed water pipe.
For drinking-water safety, choose tubing and fittings intended for potable water. Products certified to appropriate drinking-water standards can provide extra assurance, especially for permanent installations.
When to call a professional
You can usually hook up an ice maker yourself when a proper shutoff valve and water line are already in place. The job becomes less suitable for DIY work when it requires cutting a pipe, opening a wall, or changing a main water connection.
Call a licensed plumber if:
• You cannot identify the cold-water supply
• The existing valve is corroded or stuck
• A pipe connection leaks after reasonable tightening
• You need to install a new valve inside a wall
• Water pressure is unusually high or low
• Your home has old, fragile plumbing
• Local rules require a permitted installation
Call an appliance technician if the plumbing is sound but the ice maker does not fill, harvest, or stop correctly. These problems may involve the control board, thermostat, motor, inlet valve, or wiring.
Paying for help can be cheaper than repairing a flooded floor. When in doubt, stop the water and ask for an inspection.
Frequently asked questions about how to hook up an ice maker
Can I hook up an ice maker without a water line?
No, an automatic ice maker needs a water supply line unless it has a built-in reservoir that you fill by hand. You can install a dedicated cold-water line or use an existing approved refrigerator connection.
What size water line does an ice maker use?
Many refrigerator ice makers use a 1/4-inch outside-diameter water line. Always confirm the size and fitting type in the refrigerator manual because some models use special connectors.
Should an ice maker connect to hot or cold water?
An ice maker should connect to cold drinking water. Hot water can damage components, affect ice quality, and create a safety risk.
How long does it take for a new ice maker to make ice?
The first batch may take several hours after the freezer reaches its operating temperature. Some models may need up to 24 hours to produce ice consistently.
Can I use a saddle valve to hook up an ice maker?
A saddle valve may be included in some installation kits, but it can clog or leak and may not be allowed by local plumbing rules. A proper tee with a shutoff valve is often a better long-term choice.
Why is my ice maker connected but not making ice?
Check the shutoff valve, water filter, tubing, freezer temperature, and ice maker switch. If water pressure and plumbing are correct, the inlet valve or ice maker control may need professional testing.
Should I leave the ice maker on all the time?
You can leave it on if the ice bin has room and the appliance is working normally. Turn it off when the bin is full, the refrigerator will be unused, or you notice a leak or unusual noise.
Conclusion
Learning how to hook up an ice maker comes down to four habits: use an approved cold-water line, install a reliable shutoff valve, route the tubing without kinks, and test every connection before moving the refrigerator. Flush the line, discard the first batches, and watch closely for leaks during the first day.
If the plumbing is already prepared, this can be a manageable home project. If you need to cut pipes or work near hidden plumbing, choose a licensed professional. Follow your refrigerator manual, inspect the setup often, and enjoy your first batch of fresh ice with confidence.