
Use a rod knife sharpener by guiding the blade along the rod at a steady angle with light, even pressure.
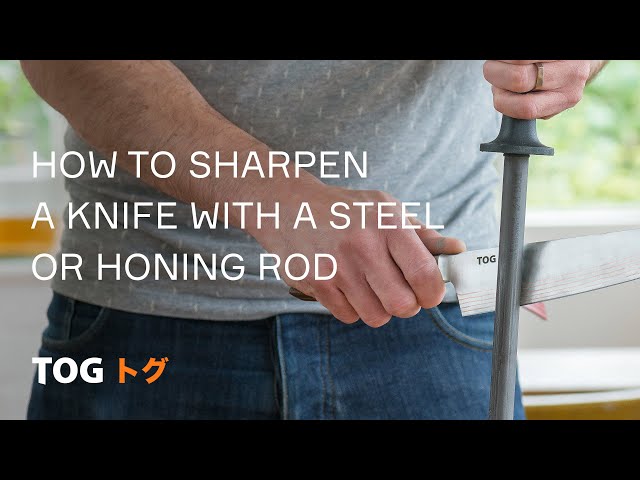
A rod knife sharpener can help restore a knife’s working edge in just a few careful strokes. The key is knowing whether you are honing, sharpening, or polishing the edge, then using the right angle and safe hand position.
I have used honing rods in home kitchens and during knife care tests, and the same lesson comes up each time: control matters more than speed. This guide explains how to use a rod knife sharpener, avoid common mistakes, choose the right rod, and keep your knives safer and sharper for longer.
What Is a Rod Knife Sharpener?
A rod knife sharpener is a long, narrow tool used to maintain or sharpen a knife’s edge. It may have a steel, ceramic, or diamond-coated surface. Some models also include a built-in guard or handle for safer use.
Many people call every rod a “knife sharpener,” but the tools do different jobs:
• A steel honing rod realigns a slightly bent edge. It usually removes little metal.
• A ceramic rod can realign an edge and remove a small amount of metal. It gives a fine finish.
• A diamond rod removes more metal and can sharpen a dull knife faster.
• A grooved or textured rod may be more aggressive than a smooth rod.
A rod does not replace a whetstone when a knife is very dull, chipped, or damaged. Think of it as a quick tune-up tool. It is like straightening the pages of a book rather than replacing the book itself.

Honing Versus Sharpening
Understanding the difference between honing and sharpening makes the process much easier. A knife edge is made of very thin metal. Regular use can push that edge slightly to one side, even when the metal is still present.
Honing moves that edge back into alignment. Sharpening removes a small amount of metal to create a new edge. A steel rod mainly hones, while ceramic and diamond rods can also sharpen.
Use a honing rod when:
• The knife still cuts but feels less smooth.
• The blade slides over a tomato skin instead of starting the cut.
• The edge looks straight but feels dull during normal work.
Use a sharpening rod, ceramic rod, or diamond rod when:
• Honing no longer improves the knife.
• The blade feels dull across its full length.
• The knife needs more bite on food.
• You want light sharpening between full whetstone sessions.
In my experience, many people press too hard because they expect the rod to remove metal quickly. That can damage the edge and create uneven wear. Start with gentle pressure and test the knife before doing more.

How to Use a Rod Knife Sharpener Safely
Safety should come before speed. A moving knife can slip if the rod is held loosely or if the blade meets the surface at an unstable angle.
Before learning how to use a rod knife sharpener, prepare a clear work area. Keep cutting boards, towels, and other tools away from your hands. Make sure the rod handle is dry and firm.
Choose one of these two safe methods:
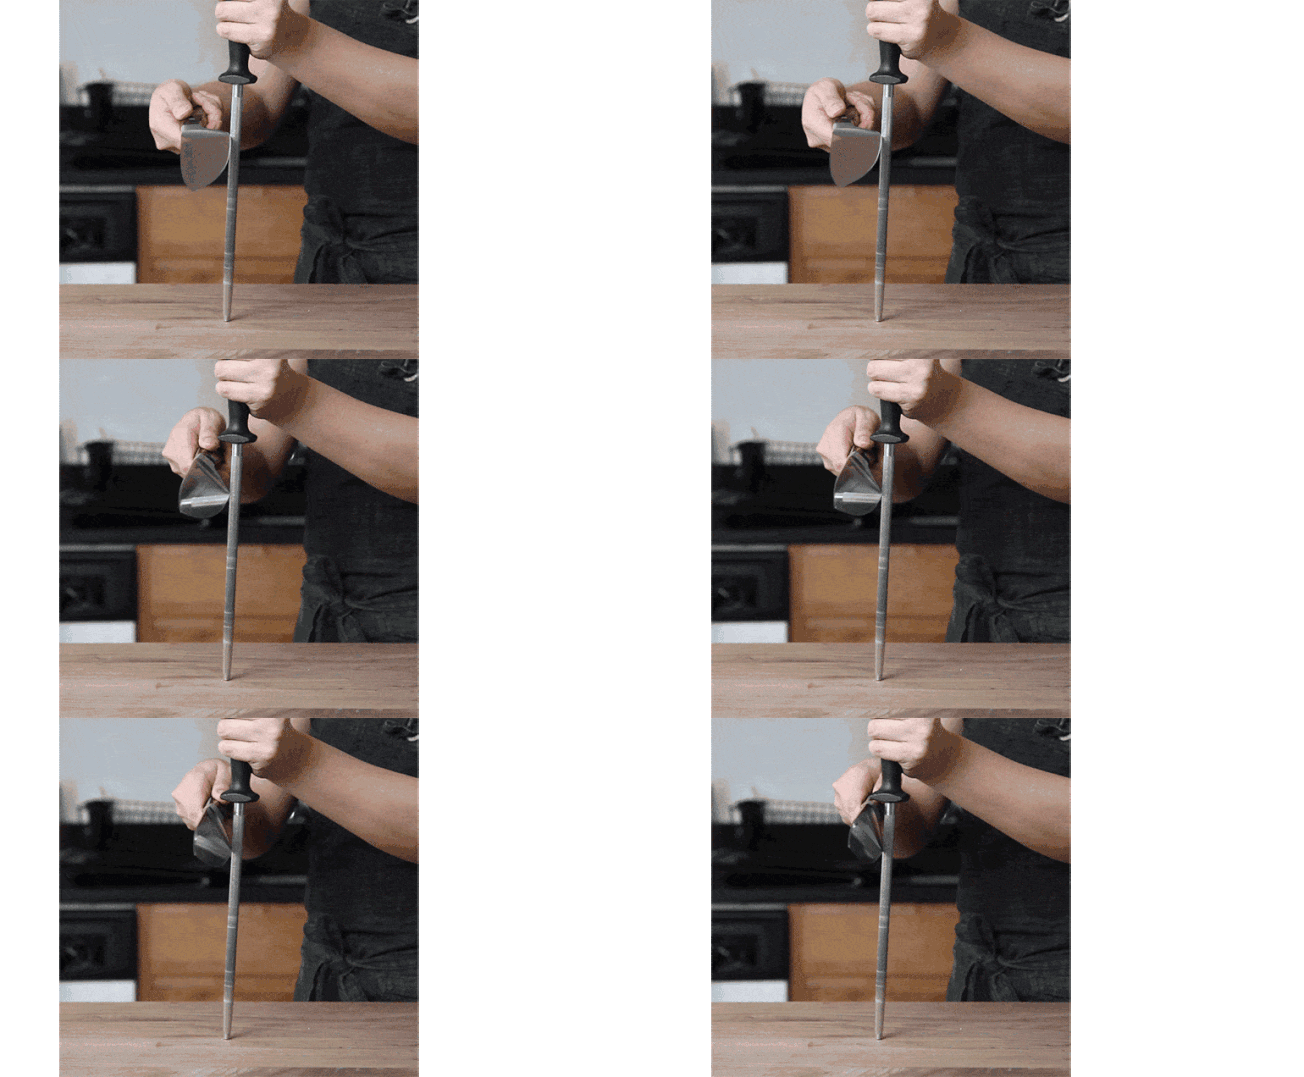
• Tip-down method: Hold the rod upright with the tip on a stable cutting board. Keep the rod vertical and move the knife down and across it.
• Tip-up method: Hold the rod in front of you with the tip pointing upward. Keep your free hand behind the guard and move the blade with full control.
The tip-down method often feels safer for beginners because the rod has support. If the tip slides, stop and reset it. Never place a hand or finger in front of the knife’s path.
Use a sharp knife carefully. A dull knife often requires more force and may slip more easily. Wear cut-resistant gloves if you are learning or have limited control, but do not treat gloves as a substitute for safe technique.
How to Use a Rod Knife Sharpener Step by Step
These steps explain how to use a rod knife sharpener with a common chef’s knife. Read your rod’s instructions first because angle and surface design can vary.
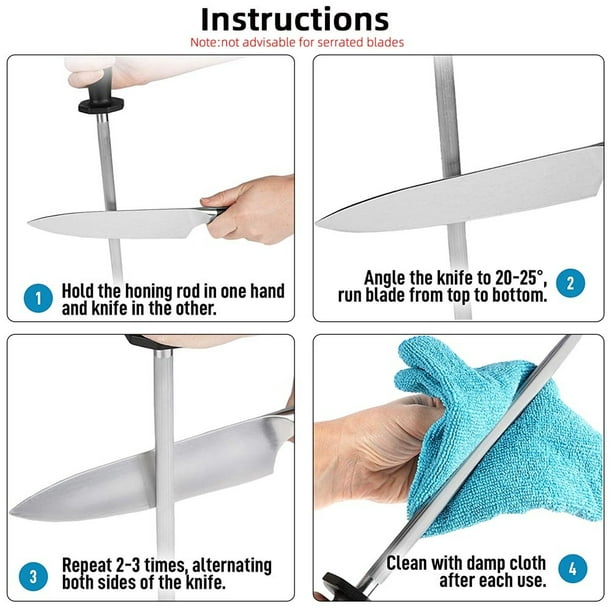
1. Clean and dry the knife
Wash the blade with warm water and mild dish soap. Dry it fully before sharpening or honing. Oil, food residue, and moisture can make the knife harder to control.
2. Choose the correct angle
Most Western kitchen knives work well at about 15 to 20 degrees per side. A thin Japanese-style knife may use a smaller angle, often around 10 to 15 degrees per side.
If you do not know the knife’s angle, start near 15 degrees. A smaller angle can make the edge sharper but more fragile. A larger angle can make the edge stronger but less keen.
A simple way to picture the angle is to hold the knife straight up at 90 degrees. Tilt it halfway toward the cutting board to reach about 45 degrees, then lower it again by half. This gives you a useful starting point near 20 degrees.
3. Place the heel of the blade on the rod
The heel is the part of the blade closest to the handle. Place it near the top of the rod, just below the handle or guard.
Keep the spine and edge aligned at your chosen angle. Do not twist your wrist as you move the knife.
4. Pull the blade down the rod
Draw the blade toward you and down the rod in one smooth motion. Move from the heel toward the tip so the full edge touches the rod.
Use light pressure. The knife should glide rather than scrape aggressively. Keep your fingers away from the edge and maintain the same angle throughout the stroke.
5. Repeat on the other side
Move to the other side of the knife and repeat the same motion. Use the same number of strokes on both sides unless the manufacturer gives different instructions.
For a slightly misaligned edge, try five gentle strokes per side. For a ceramic or diamond rod, start with two or three strokes per side because these surfaces can remove metal more quickly.
6. Reduce pressure near the end
The final strokes should be very light. Heavy finishing strokes can create a rough burr or bend the edge again.
Some people alternate sides with every stroke. Others complete several strokes on one side, then switch. Either method can work if you keep the angle steady and use equal care.
7. Clean and test the knife
Wipe the blade with a clean, damp cloth to remove fine metal particles. Then dry it before storing it.
Test the knife on a soft food, such as a tomato or ripe bell pepper. Use gentle pressure and let the edge do the work. Do not test sharpness with your finger.
:max_bytes(150000):strip_icc()/200389815-001_HighRes-56a20eaa3df78cf772717b45.jpg)
The Best Angle for a Rod Knife Sharpener
The best angle depends on the knife’s design, steel, and intended use. There is no single angle that fits every blade.
Use these ranges as practical starting points:
• 10 to 15 degrees per side: Thin slicing knives and many Japanese-style kitchen knives.
• 15 to 20 degrees per side: Most home kitchen knives.
• 20 to 25 degrees per side: Outdoor, utility, and heavy-use knives.
A knife used to cut soft vegetables may perform well at a thinner angle. A knife used for squash, poultry joints, or hard foods may need a stronger edge.
The most important part of how to use a rod knife sharpener is consistency. A perfect angle that changes every second will not work as well as a slightly imperfect angle held steadily.
Some rods include angle guides. These can help beginners, but they are not always exact. Practice with a slow motion first. Speed should come only after the angle feels natural.
How Much Pressure Should You Use?
Use less pressure than you think. The weight of the knife and a gentle hand are often enough for honing. Pressing hard can create deep scratches, remove too much steel, or make the edge uneven.
Match pressure to the rod:
• Steel honing rod: Light to moderate pressure.
• Ceramic rod: Light pressure.
• Diamond rod: Very light pressure.
A useful rule is to use no more force than you would use to write with a pencil. If the rod makes a harsh scraping sound, reduce pressure and check the angle.
When learning how to use a rod knife sharpener, beginners often make the same mistake: they try to fix dullness with force. A dull knife needs proper sharpening, not a harder pass on the rod.
Common Mistakes to Avoid
Avoiding small mistakes can protect both your knife and your hands. Most poor results come from an unstable angle, rushed strokes, or using the wrong type of rod.
Common problems include:
• Moving the knife too fast. Fast strokes make it harder to hold the angle.
• Using a back-and-forth sawing motion. This can create uneven wear and rough marks.
• Pressing too hard. Aggressive pressure can damage the edge.
• Sharpening only the center of the blade. Use the heel, belly, and tip in one controlled path.
• Ignoring the tip. Lift your elbow slightly as the tip reaches the end so the angle stays consistent.
• Using a rough diamond rod for daily honing. It may remove more metal than needed.
• Holding the rod loosely. A moving rod can cause the knife to slip.
• Sharpening a damaged knife with a honing rod. Chips and large bends need a stone or professional repair.
The first time I used a rod too quickly, I created a dull spot near the tip. Slowing down fixed the problem. That experience reinforced a simple lesson: a smooth stroke is more valuable than a dramatic one.

How Often Should You Use a Rod Knife Sharpener?
The right schedule depends on how often you cook and how hard you use the knife. A home cook may use a steel rod every few weeks or whenever the knife starts to drag.
A ceramic rod may be useful every few weeks for regular kitchen use. A diamond rod should be used less often because it removes more material.
Use your knife’s performance as the guide:
• If the knife cuts smoothly, do not sharpen it again.
• If the edge feels slightly rough, use a few light honing strokes.
• If the knife slips on food, stop and inspect the edge.
• If the blade has chips or a deep bend, use a whetstone or seek professional service.
Do not judge sharpness by how often you use the rod. A good knife may need only brief maintenance. Excessive sharpening shortens the useful life of the blade.

How to Choose the Right Rod Knife Sharpener
The best rod knife sharpener depends on your knife and your skill level. Look for a model with a comfortable handle, a strong guard, and a surface that matches your maintenance needs.
Consider these features:
• Rod material: Steel is gentle, ceramic is fine and versatile, and diamond is more aggressive.
• Rod length: A rod should be long enough to match or exceed the blade length.
• Surface texture: A smooth surface is useful for maintenance, while a coarse surface removes more metal.
• Handle design: Choose a handle that feels secure and does not twist.
• Safety guard: A guard protects the hand holding the rod.
• Cleaning needs: Ceramic and steel rods are often easy to wipe clean. Follow the care directions for diamond surfaces.
For most home cooks, a medium ceramic rod is a practical choice. It can refresh an edge without being as aggressive as many diamond rods.
Cleaning and Storing a Rod
A clean rod gives more predictable results. Fine metal dust and food oils can build up on the surface over time.
Clean a steel rod with a damp cloth and mild soap if the manufacturer allows it. Rinse away residue and dry the rod before storing it. Ceramic rods may need gentle cleaning with an abrasive pad approved by the maker.
Do not place the rod loose in a drawer with knives. The rod can be scratched, and the blade can become damaged. Store it in a knife block, wall rack, sheath, or another protected location.
Also clean the knife after using a rod. Fine particles left on the blade can transfer to food. This small step improves hygiene and protects the knife from residue.
When a Rod Is Not Enough
A rod knife sharpener is useful for maintenance, but it has limits. It cannot repair every edge problem.
Use a whetstone or professional sharpening service when:
• The knife has visible chips.
• The edge is rounded and no longer responds to honing.
• The blade has a deep bend.
• The knife has rust or serious damage.
• You need to change the bevel angle.
A whetstone gives you more control over metal removal and edge shape. However, it also requires more practice. If the knife is expensive or valuable, professional sharpening may be the safer choice.
Remember that a rod can improve a tired edge, but it cannot bring back missing metal. Knowing this limit helps prevent overworking the blade.
Frequently Asked Questions About How to Use a Rod Knife Sharpener
How many strokes should I use with a rod knife sharpener?
Start with three to five light strokes on each side of the blade. Stop and test the knife before adding more strokes, especially when using a ceramic or diamond rod.
Should I push the knife into the rod?
No. Use light pressure and let the blade glide along the rod. Heavy pressure can remove too much metal and may damage the edge.
Is a steel rod the same as a knife sharpener?
A steel rod mainly realigns an edge rather than removing much metal. It is often called a sharpener, but its primary job is honing.
Can I use a rod knife sharpener on serrated knives?
Most standard rods are not suitable for serrated knives because serrations need a tapered tool that fits each groove. Use a serrated knife sharpener designed for that blade style.
How do I know if I am using the right angle?
The blade should contact the rod at a steady angle from heel to tip. If you are unsure, start near 15 to 20 degrees per side and practice slowly.
Can a rod knife sharpener fix a chipped blade?
Usually, no. A chipped blade needs controlled material removal with a whetstone, specialized sharpener, or professional service.
Is it safe to hold the rod in the air?
It can be safe for experienced users, but beginners often have better control with the rod tip placed firmly on a cutting board. Keep your free hand behind the guard and never place it in the blade’s path.
Conclusion
Learning how to use a rod knife sharpener is mainly about control, angle, and gentle pressure. First, identify whether your rod is for honing or sharpening. Then keep the rod stable, guide the blade from heel to tip, work both sides evenly, and test the knife before doing more.
A rod works best as part of regular knife care, not as a cure for severe damage. Start slowly with an inexpensive kitchen knife, practice a steady motion, and build confidence over time. Keep exploring reliable knife-care techniques, and share your results or questions with other home cooks.