
A blocked fill tube, closed valve, clogged filter, or failed inlet valve often stops an ice maker from receiving water.
When an ice maker suddenly stops filling, the problem is usually small but hidden. Water may reach the refrigerator yet fail to enter the ice maker because of low pressure, a frozen tube, a faulty water inlet valve, or a control issue. This guide explains why your ice maker is not receiving water, how to test each likely cause safely, and when professional repair makes more sense.
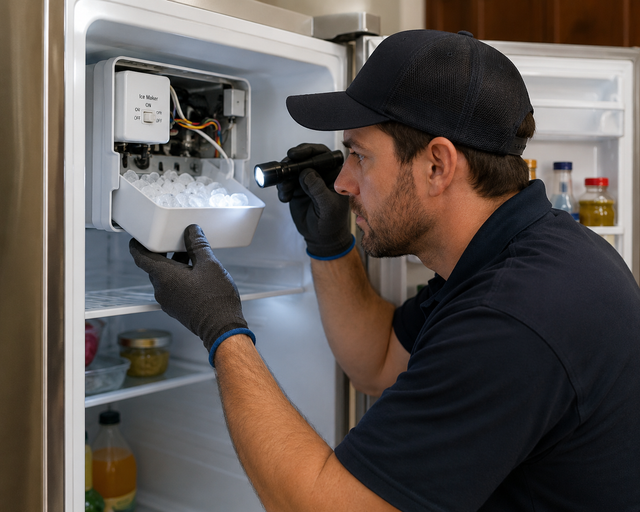
How an Ice Maker Receives Water
An automatic ice maker uses a simple chain of parts. The refrigerator sends power to a water inlet valve, the valve opens, and water travels through a small fill tube into the ice mold. A thermostat or electronic control then stops the flow after the mold reaches the correct level.
If one link fails, the ice maker may stay dry. It is much like a garden hose with several points of failure: the faucet may be open, but a kink or blocked nozzle can still stop the water.
Most models use these parts:
- Water supply line: Carries water from the household valve to the refrigerator.
- Water filter: Removes particles from the incoming water.
- Water inlet valve: Opens when the ice maker requests water.
- Fill tube: Directs water into the ice maker mold.
- Ice maker motor and control: Starts the harvest and fill cycle.
- Thermostat or sensor: Tells the control when the ice mold is cold enough.
- Shutoff arm or sensor: Stops ice production when the bin is full.
Understanding this path makes troubleshooting easier. Instead of replacing parts at random, you can check the water path from the wall to the ice mold.
Why Is My Ice Maker Not Receiving Water?
Several problems can explain why your ice maker is not receiving water. Start with the simplest checks before testing electrical parts.
The ice maker is turned off
Many ice makers have a wire shutoff arm, a power switch, or a digital setting. If the arm is raised, the ice maker reads the position as “full” and will not request water.
Check that:
- The shutoff arm is down.
- The ice maker switch is set to On.
- The refrigerator display does not show “Ice Off.”
- The ice bin is seated correctly.
- No ice cubes are jammed around the arm or rake.
A power outage or cleaning session can sometimes leave the ice maker switched off without anyone noticing.
The water supply valve is closed
Look behind the refrigerator or under the sink for the refrigerator’s water shutoff valve. The handle should be fully open. A partially closed valve can reduce pressure and prevent the ice maker from filling.
Move the refrigerator carefully. Avoid pulling hard on the water line, since a cracked line can cause a serious leak.
The water filter is clogged or installed incorrectly
A dirty filter can reduce water flow. Some refrigerators also stop ice production when the filter is expired or not locked into place.
Remove and reinstall the filter according to the owner’s manual. If the filter is old, replace it with the correct model. Do not run the refrigerator without a filter unless the manufacturer allows a bypass plug or bypass mode.
The fill tube is frozen
A frozen fill tube is one of the most common reasons an ice maker does not receive water. The tube is usually located above or behind the ice maker. Water left inside can freeze and form a plug.
You may see:
- A small ice buildup at the tube opening.
- Water in the ice maker mold but not in the tube.
- A humming sound without new ice.
- Good water flow from the dispenser but no ice production.
Never use a knife, screwdriver, heat gun, or open flame to clear the tube. These tools can damage the tube, wiring, liner, or insulation. Use a hair dryer on a low setting from a safe distance, or allow the freezer to defrost with the power disconnected.
The refrigerator temperature is too warm
An ice maker needs a cold freezer to run its harvest cycle. Most household freezers should be near 0°F, although the exact requirement varies by model.
A freezer that is too warm may still keep food cold but fail to make ice. Check for:
- A door that does not seal.
- Heavy frost around the evaporator.
- Blocked air vents.
- A dirty condenser area.
- Frequent door opening.
- Overloading that blocks airflow.
- A failing evaporator fan.
If the freezer is above the recommended temperature, fix the cooling problem first. The ice maker may not be the true cause.
The water inlet valve has failed
The water inlet valve is an electrically controlled valve. When the ice maker calls for water, the valve opens for a short time. If the valve coil fails, the valve screen clogs, or the valve becomes mechanically stuck, no water enters the ice maker.
A failed valve may produce no sound at all. In some cases, it makes a buzzing sound but does not release water. If the refrigerator dispenser also has weak flow, the valve or filter becomes more likely as the cause.
Water pressure is too low
Ice makers need enough water pressure to open the inlet valve and fill the mold. Low pressure can result from a partly closed shutoff valve, a clogged filter, a kinked supply line, or a plumbing problem.
Some models specify a minimum pressure in the owner’s manual. Do not assume that strong dispenser flow proves the pressure is perfect, because the ice maker may still need a specific pressure range and timing.
The ice maker control or thermostat is faulty
If the water supply is good but the ice maker never sends power to the inlet valve, the ice maker assembly may have a failed thermostat, motor, sensor, or electronic control.
This fault often requires testing with a multimeter or a model-specific diagnostic mode. Electronic ice makers vary widely, so avoid jumping terminals unless the manufacturer’s service instructions clearly support that test.

Quick Checks Before You Remove Any Parts
Before opening the freezer or testing wires, complete these basic checks. They take only a few minutes and often solve the issue.
- Confirm that the ice maker is turned on.
- Lower the shutoff arm if your model uses one.
- Check that the ice bin is fully seated.
- Inspect the refrigerator water line for kinks.
- Confirm that the wall valve is open.
- Test the dispenser, if your refrigerator has one.
- Check for an expired or poorly fitted water filter.
- Look for ice blocking the fill tube.
- Check the freezer temperature.
- Unplug the refrigerator before inspecting electrical parts.
If the dispenser works well but the ice maker remains dry, focus on the ice maker, fill tube, wiring, and ice maker water valve. If both the dispenser and ice maker have poor flow, start with the filter, supply line, household valve, and main inlet valve.
How to Diagnose an Ice Maker With No Water
A careful diagnosis prevents unnecessary part replacement. Use this sequence to find where the water stops.
Step 1: Check the water dispenser
Run the dispenser for several seconds. Strong, steady flow suggests that the refrigerator is receiving water. Weak flow points toward a filter, line, valve, or household pressure problem.
Some refrigerators use separate valve outlets for the dispenser and ice maker. Therefore, a working dispenser does not completely rule out a defective inlet valve.
Step 2: Inspect the fill tube
Look above the ice maker for the tube that sends water into the mold. If ice blocks the opening, thaw it gently.
After clearing the tube, wait several hours. Ice makers do not always fill right away because they must first reach the correct temperature and complete a harvest cycle.
Step 3: Look for signs of a harvest cycle
The ice maker should eject frozen cubes before it fills again. If cubes remain stuck in the mold, the motor or thermostat may not be completing the cycle.
Do not force the ejector rake. Breaking the rake or gear can turn a simple problem into a full ice maker replacement.
Step 4: Listen for the inlet valve
During the fill cycle, you may hear a brief hum or click. No sound may indicate that the ice maker is not sending power to the valve. A hum with no water may indicate a blocked valve, frozen tube, or weak valve.
Sound alone cannot prove that a part is good. It only helps narrow the search.
Step 5: Check electrical connections
Unplug the refrigerator before checking connectors. Look for loose plugs, corrosion, damaged wires, or signs of a water leak near the ice maker.
If you use a multimeter, follow the service manual for your exact model. Resistance readings differ between valve designs, and an incorrect test can damage electronic controls.

Common Fixes for an Ice Maker Not Receiving Water
The right fix depends on where the water path stops.
Replace the water filter
Use the filter specified for your refrigerator. After installation, flush the recommended amount of water through the dispenser to remove trapped air and loose carbon particles.
A filter that is not fully locked can restrict flow even when it appears installed. Check for an alignment mark or locking twist.
Thaw the fill tube
Disconnect power if you are working near moving parts or electrical connections. Thaw the tube slowly with warm air or a complete manual defrost.
Afterward, find out why it froze. A refrigerator that is too cold, a leaking valve, poor insulation, or a misaligned tube can cause the ice to return.
Open or replace the shutoff valve
A saddle valve may become restricted by mineral buildup. If the household valve is open but flow remains poor, a plumber may need to replace the valve with a more reliable connection.
Do not ignore a slow leak at the valve. Even a small drip can damage flooring and cabinets over time.
Replace the water inlet valve
A water inlet valve should be replaced with the correct model for the refrigerator. Shut off the water and unplug the appliance before beginning. Keep towels nearby because some water will remain in the line.
If you are not comfortable testing electrical components or handling water connections, a qualified appliance technician is the safer choice.
Repair or replace the ice maker assembly
If the ice maker does not harvest, does not call for water, or has a failed sensor, replacing the complete assembly may be more practical than repairing individual internal parts.
Take a photo of the wiring before removal. Confirm the model number, since ice maker assemblies that look similar may use different connectors or control systems.
Mistakes to Avoid During Troubleshooting
A few shortcuts can create more damage than the original fault.
- Do not poke the fill tube with a sharp tool.
- Do not use an open flame to melt ice.
- Do not bypass safety switches without clear service instructions.
- Do not replace the inlet valve before checking the filter and water line.
- Do not keep resetting the refrigerator if the freezer is not cold.
- Do not pull the refrigerator far enough to stretch the supply line.
- Do not reconnect power while exposed wires are wet.
- Do not use a universal part unless its specifications match the original.
A useful lesson from appliance service cases is that the first visible symptom is not always the failed part. For example, a dry ice mold may look like a bad ice maker, but a frozen fill tube or clogged filter may be the real cause.
When to Call an Appliance Professional
You can usually handle a filter change, basic inspection, and gentle thawing. Professional help is wise when the problem involves electrical testing, sealed refrigeration parts, or a persistent water leak.
Call a technician if:
- The refrigerator trips a circuit breaker.
- You see burned wires or melted connectors.
- The freezer is warm and heavily frosted.
- The water valve leaks after installation.
- The ice maker keeps freezing its fill tube.
- The refrigerator has a damaged water line.
- A control board may be defective.
- You cannot safely access the part.
A professional can test voltage, valve resistance, water pressure, temperature, and control signals. This is often cheaper than replacing several good parts through trial and error.

How Long Should You Wait After a Repair?
An ice maker may not produce ice immediately after you restore water flow. The freezer must be cold, the ice maker must complete its cycle, and the mold must freeze before cubes can be harvested.
Depending on the model and conditions, the first batch may take several hours. Production can take longer after a power outage, filter change, manual defrost, or refrigerator installation.
Watch for these signs of normal operation:
- Water enters the mold during the fill cycle.
- The mold freezes solid.
- The ejector removes the cubes.
- The ice maker refills after harvest.
- New cubes appear in the bin later.
If the mold remains dry after a complete cycle, continue checking the valve, fill tube, wiring, and control system.
Preventing Future Ice Maker Water Problems
Regular care can reduce many water flow problems. Keep the freezer near the manufacturer’s recommended temperature and avoid packing food against vents or the ice maker.
Replace the water filter on the schedule listed in the manual. Filter life depends on water quality and use, so a home with hard water may need more frequent replacement.
Other helpful habits include:
- Check the water line after moving the refrigerator.
- Keep the freezer door seal clean.
- Remove ice clumps from the bin.
- Do not force the shutoff arm.
- Clean spills around the refrigerator.
- Watch for slow dispenser flow.
- Inspect the fill tube when ice production drops.
Good maintenance does not prevent every failure. It does, however, help you notice a small flow problem before it becomes a leak or a larger appliance repair.

Frequently Asked Questions
Why is my ice maker not receiving water but the dispenser works?
The ice maker may have a frozen fill tube, a defective ice maker valve outlet, a wiring problem, or a failed ice maker control. A working dispenser proves that some water reaches the refrigerator, but it does not prove that the ice maker’s separate water circuit is working.
How do I know if my ice maker fill tube is frozen?
Look for ice blocking the small tube above or behind the ice maker. You may also hear the valve hum without seeing water enter the mold.
Can a bad water filter stop the ice maker?
Yes. A clogged or incorrectly installed filter can reduce water flow enough to stop ice production. Replace or reseat the filter, then flush the system as directed by the manufacturer.
How long does it take for an ice maker to start making ice?
Many ice makers need several hours after repair or startup. The freezer must reach the correct temperature, and the ice maker must complete a harvest cycle before it fills.
Should I replace the ice maker or the water inlet valve?
Test the water path first. If water reaches the valve but does not pass through during a powered fill cycle, the valve may be faulty; if the valve never receives a signal, the ice maker control or wiring may be the problem.
Is it safe to thaw an ice maker fill tube with a hair dryer?
It can be safe when done carefully with the refrigerator unplugged and the dryer kept on a low setting away from plastic, wiring, and standing water. Never use high heat, a heat gun, a knife, or an open flame.
Conclusion
When your ice maker is not receiving water, begin with the simple causes: the shutoff arm, water valve, filter, supply line, freezer temperature, and frozen fill tube. If those checks do not restore water, the inlet valve, wiring, thermostat, or ice maker control may need testing.
Work slowly, unplug the refrigerator before electrical checks, and avoid forcing frozen parts. A careful diagnosis can save money and prevent damage. If you find a leak, exposed wiring, or a cooling problem, contact a qualified appliance professional and share your refrigerator model for more targeted help.