
A clogged water line, failed inlet valve, frozen tube, or faulty control can stop your ice maker from filling.
When you ask, “why is water not filling my ice maker,” the answer is often a small issue that blocks water flow. The problem may be simple to fix, such as a closed supply valve, or it may involve the water inlet valve, ice maker switch, filter, wiring, or control board. This guide will help you check each cause safely and decide when professional repair is the better choice.
Why is water not filling my ice maker?
An ice maker needs several parts to work in the right order. The ice maker must sense that the ice bin needs more ice. Then, its motor and control module send power to the water inlet valve. The valve opens for a few seconds, and water travels through a small tube into the ice mold.
If any link in this chain fails, the ice maker may stay dry. That is why the ice maker can look normal while producing no ice.
The most common causes include:
• The ice maker is turned off
• The refrigerator is not level
• The water supply is closed
• The water filter is clogged or installed incorrectly
• The fill tube is frozen
• The water inlet valve has failed
• Water pressure is too low
• The ice maker module or thermostat is faulty
• A wire connection is loose
• The ice bin is full or the shutoff arm is stuck
The best repair starts with simple checks. Do not remove major parts until you confirm that the refrigerator has water and power.

Check the easy causes first
Before testing electrical parts, inspect the controls and water supply. Many service calls end with a switch being turned on or a water valve being opened. These checks take only a few minutes and do not require tools.
Make sure the ice maker is on
Some models use a wire shutoff arm. The arm must be down for the ice maker to make ice. If the arm is raised, the ice maker reads that the bin is full.
Other models use a power switch or a small plastic slider. Check the owner’s manual if you are unsure of the design.
Check the ice bin
Remove the ice bin and look inside the ice maker. Ice can freeze into a large block and stop the rake or ejector fingers from moving. Let the bin thaw in the sink, then dry it before replacing it.
Never use a knife or sharp metal tool to break ice. You could damage the bin, the evaporator, or your hand.
Confirm that the refrigerator is level
A refrigerator that leans too far can cause the ice maker’s water level or shutoff system to work poorly. Place a small level on a shelf or the top of the unit. Adjust the leveling feet if needed.
A level refrigerator also helps the doors seal well and keeps cooling more even.
Check the water dispenser
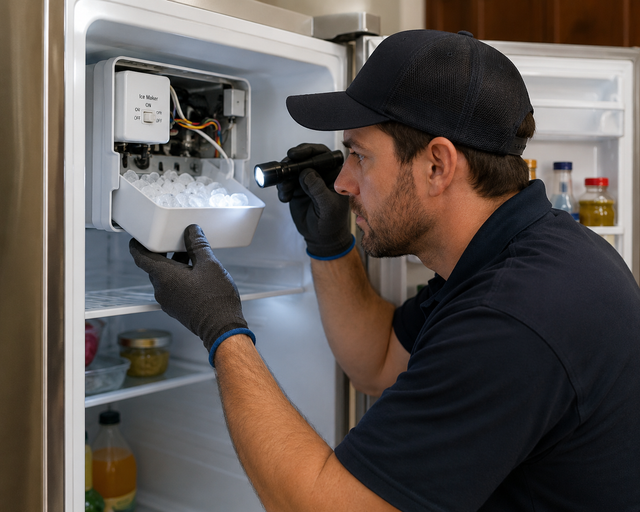
If your refrigerator has a water dispenser, press it for several seconds. If water flows with normal pressure, the home supply is likely working. If no water comes out, the issue may affect both the dispenser and the ice maker.
If the dispenser works but the ice maker does not fill, the problem is more likely inside the ice maker’s fill system.
Inspect the water supply and filter
A water supply problem is a common reason why water is not filling my ice maker. The ice maker may not need much water, but it still needs steady pressure through a clear path.
Check the shutoff valve
Look behind the refrigerator or under the sink. The shutoff valve should be fully open. A saddle valve may become restricted by mineral buildup, especially in older homes.
Turn the valve slowly. If it feels stuck, do not force it. A damaged valve can leak and cause water damage.
Inspect the water line
Look for these problems:
• Kinks behind the refrigerator
• Cracks or wet spots
• A crushed plastic tube
• Loose fittings
• Ice inside the line
Pull the refrigerator forward carefully. Avoid stretching the line. A sharp bend can reduce water flow even when the line does not look fully blocked.
Replace or reseat the water filter
A dirty refrigerator water filter can reduce flow. Most filters should be replaced based on the manufacturer’s schedule, often every six months, though water quality and use can change that period.
A filter may also cause trouble when:
• It is installed backward
• The protective cap was not removed
• It is not locked into place
• The wrong filter model was used
After installing a new filter, flush the water system according to the refrigerator manual. Air in the line can cause sputtering at first.
Consider water pressure
Many ice makers work best with household water pressure within the range stated in the owner’s manual. Low pressure can come from a partly closed valve, a clogged filter, a plumbing issue, or a reverse osmosis system.
Some reverse osmosis systems supply water too slowly for an ice maker. Check the refrigerator maker’s requirements before changing the plumbing.
Look for a frozen ice maker fill tube
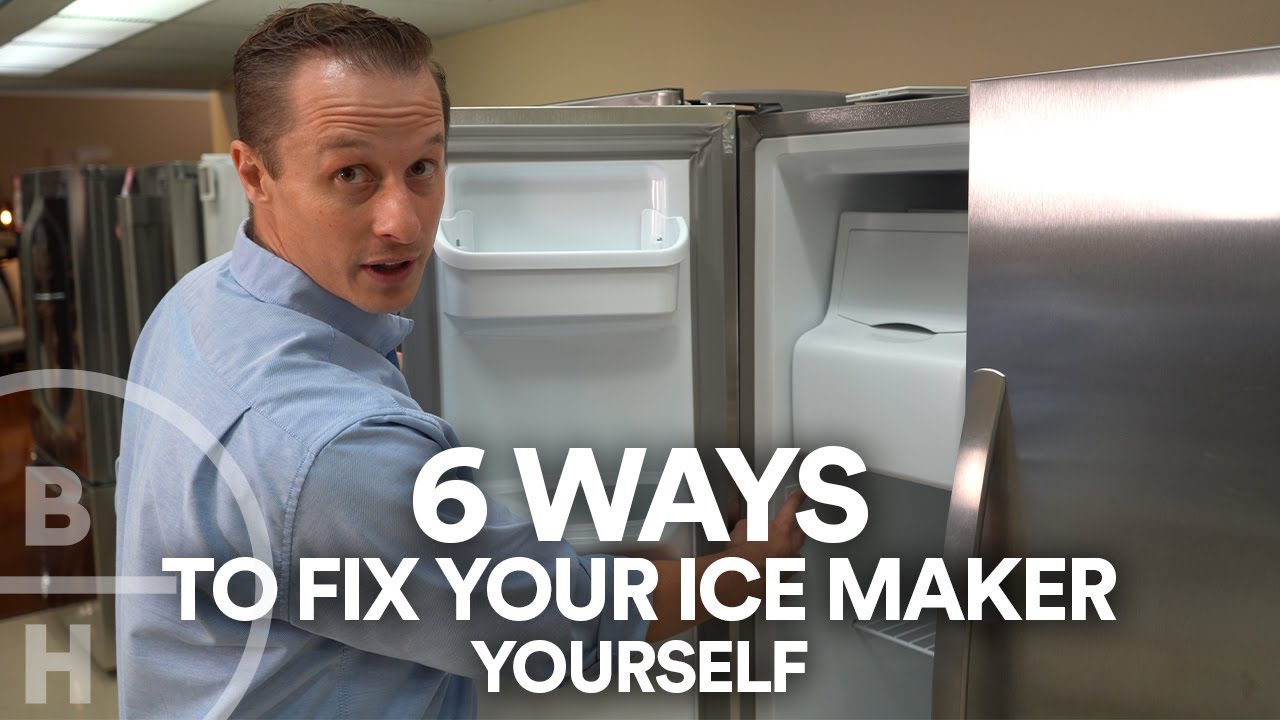
A frozen fill tube is one of the most common reasons why water is not filling my ice maker. The fill tube is the small passage that sends water into the ice mold. When it freezes, the inlet valve may open, but water cannot enter.
You can usually find the tube near the back of the ice maker. Use a flashlight and look for a solid plug of ice inside the opening.
Safe ways to thaw the tube
Unplug the refrigerator before working near moving parts or exposed wiring. Then use one of these gentle methods:
• Leave the freezer door open for a short time
• Use a hair dryer on a low, warm setting from a safe distance
• Apply a warm, damp cloth to the tube
Do not use a heat gun. Do not pour boiling water into the freezer. Too much heat can damage plastic parts, wiring, seals, or nearby food.
Once the tube is clear, dry any melted water. Plug the refrigerator back in and allow time for the ice maker to start a new cycle.
Why does the fill tube freeze?
A frozen tube may be a one-time event, but repeated freezing often points to another fault. Possible causes include:
• A leaking water inlet valve
• Low freezer temperature
• A blocked air passage
• A defective ice maker thermostat
• Poor insulation around the fill tube
• A control problem that keeps the valve open too long
If the tube freezes again, replacing only the ice may not solve the real problem.

Test the water inlet valve
The water inlet valve controls water entering the refrigerator. It often has separate outlets for the dispenser and ice maker. This design explains why the dispenser may work while the ice maker remains empty.
When the ice maker calls for water, the control sends voltage to the valve. The valve opens briefly, then closes. If its screen is blocked or its coil has failed, the ice maker will not fill.
Signs of a bad inlet valve
Watch for these clues:
• The ice maker makes a clicking sound but no water enters
• The water dispenser works, but the ice maker does not
• The fill tube remains clear
• The valve hums but produces little or no water
• Water pressure reaches the refrigerator, but not the ice maker
• The valve leaks after the ice maker cycle ends
Testing voltage and resistance may require a multimeter. The correct readings depend on the refrigerator model, so use the service manual for exact specifications.
Electrical testing near water can be dangerous. If you are not comfortable using a meter, unplugging the appliance, or identifying live terminals, contact a qualified appliance technician.
A useful service test
Many ice makers have test points or a test button. The service manual may show how to start a manual harvest and fill cycle. Never bridge random terminals. The wrong connection can damage the control board or create a shock hazard.
A technician can test whether the ice maker sends power to the valve. If power is present but water does not flow, the valve or water path is the likely problem. If power is missing, the ice maker module, wiring, thermostat, or control board may be at fault.

Inspect the ice maker assembly
If water reaches the refrigerator but not the mold, the ice maker itself may not be starting the fill cycle. The assembly contains a motor, gear system, thermostat, mold heater, and control contacts.
A failed part can stop the process before the water valve receives power.
Common ice maker assembly problems
• A broken ejector gear
• A failed motor
• A defective thermostat
• Burned electrical contacts
• A damaged control module
• Ice stuck around the ejector fingers
• Loose wiring at the ice maker
Some ice makers are sold as complete assemblies. Others allow the control module or valve to be replaced separately. The most cost-effective repair depends on the model, age, and condition of the refrigerator.
Check the freezer temperature
The freezer must be cold enough for the ice maker to harvest and refill. Many manufacturers recommend a freezer temperature near 0°F for food safety and proper operation, though the exact setting may vary.
A freezer that is too warm may not complete the ice-making cycle. A freezer that is extremely cold can contribute to a frozen fill tube or poor airflow.
Place an appliance thermometer inside the freezer instead of relying only on the control display. The display may show the set temperature, not the actual air temperature.
Check wiring and electronic controls
Modern refrigerators use sensors and electronic boards to control the ice maker. A loose plug or damaged wire can interrupt the fill signal.
Unplug the refrigerator before inspecting connectors. Look for:
• Loose plugs
• Pinched wires
• Corrosion
• Burn marks
• Rodent damage
• Ice near electrical connections
Do not bypass a safety switch or leave exposed wires connected. A temporary shortcut may start the ice maker but create a shock or fire risk.
Control boards can be expensive, so test the water supply, filter, fill tube, valve, and ice maker first. Replacing a board without confirming the diagnosis is a common and costly mistake.

A practical troubleshooting process
If you are still asking why water is not filling my ice maker, follow this order. It moves from simple checks to advanced testing.
-
Confirm that the ice maker is switched on.
-
Lower the shutoff arm or check the electronic ice setting.
-
Remove frozen clumps from the ice bin.
-
Test the refrigerator water dispenser.
-
Confirm that the water shutoff valve is open.
-
Inspect the supply line for kinks and leaks.
-
Remove and correctly reinstall or replace the water filter.
-
Check the ice maker fill tube for ice.
-
Confirm that the freezer is close to 0°F.
-
Use the service procedure to test the ice maker cycle.
-
Test the water inlet valve if you have the proper tools.
-
Call a technician if the issue involves live voltage, a control board, or repeated freezing.
This order saves time because it checks the most likely and least expensive causes first.
In real troubleshooting examples, the lesson is clear: replacing the ice maker too soon can waste money. A blocked filter or frozen tube can create the same symptom as a failed assembly.

Mistakes to avoid during repair
Ice maker repairs look simple, but small mistakes can create larger problems. Keep these safety points in mind:
• Do not use a sharp tool to remove ice.
• Do not use a heat gun inside the freezer.
• Do not test live wiring unless you know how to do so safely.
• Do not force a stuck shutoff valve.
• Do not install a filter that does not match the refrigerator.
• Do not leave the refrigerator pulled out where the water line is strained.
• Do not replace the control board before checking basic water flow.
• Do not ignore a water leak near the floor or wall.
Turn off the water supply if you find a leak. Water under a refrigerator can damage flooring and may encourage mold growth.
If the refrigerator is under warranty, check the warranty terms before opening sealed parts or hiring an outside repair service.

When to call a professional
You can safely handle many basic checks, such as replacing the filter, clearing a frozen fill tube, or opening the water valve. Professional help is wise when the diagnosis requires electrical testing or sealed system work.
Call an appliance technician when:
• The water valve leaks
• The refrigerator trips a breaker
• You smell burning plastic
• The ice maker repeatedly freezes
• The freezer cannot hold the correct temperature
• The control board may be faulty
• A water line is damaged inside the cabinet
• The refrigerator is still under warranty
A skilled technician should explain the test results before recommending parts. Ask whether the repair includes the diagnosis, labor, and warranty on the replacement part.
The repair may not be worthwhile on a very old refrigerator, especially if it also has cooling, seal, or compressor problems. Compare the repair cost with the appliance’s age and overall condition.
How to prevent future ice maker problems
Regular care can reduce many ice maker failures. It cannot prevent every electrical or mechanical fault, but it keeps water moving and helps you notice trouble early.
Try these simple habits:
• Replace the water filter on schedule.
• Keep the freezer near the recommended temperature.
• Avoid blocking air vents with food.
• Clean ice clumps from the bin.
• Check the water line when cleaning behind the refrigerator.
• Keep the refrigerator level.
• Use the correct filter and replacement parts.
• Watch for slow dispenser flow.
Slow water flow is often an early warning. Fixing the filter or supply line at that stage may prevent a frozen fill tube later.
Frequently Asked Questions
Why is water not filling my ice maker but the dispenser works?
The ice maker may have a frozen fill tube, a failed ice maker valve outlet, or a faulty ice maker module. Since the dispenser and ice maker can use separate valve outlets, a working dispenser does not prove that the ice maker system is healthy.
How do I know if my ice maker fill tube is frozen?
Look behind or above the ice maker for the small water tube. If you see ice blocking the opening, thaw it gently with warm air or a warm cloth, never with a sharp tool or heat gun.
Can a bad water filter stop the ice maker?
Yes. A clogged or poorly installed filter can reduce water pressure enough to stop the ice maker from filling. Reseat the filter or replace it with the correct model, then flush the system.
How long does it take for an ice maker to fill after repair?
Many ice makers begin a cycle within several hours, but some need 24 hours to make a normal amount of ice. The exact time depends on freezer temperature, model design, water pressure, and how long the appliance was unplugged.
Should I reset my ice maker?
A reset can help after a power outage or minor control glitch, but it will not repair a clogged filter, frozen tube, failed valve, or broken motor. Follow the model’s manual instead of pressing random buttons or forcing the ejector arm.
Is low water pressure the reason why water is not filling my ice maker?
It can be. A partly closed valve, clogged filter, kinked line, or reverse osmosis system may lower pressure. Test the dispenser and inspect the supply path before replacing parts.
Conclusion
The most likely reason why water is not filling my ice maker is a blocked water path, frozen fill tube, closed valve, clogged filter, or failed inlet valve. Start with the simple checks, then inspect the fill tube, freezer temperature, wiring, and ice maker controls.
Work slowly, unplug the refrigerator before electrical inspection, and stop if you find a leak or damaged wire. With a careful diagnosis, many ice maker problems are affordable to fix instead of requiring a new refrigerator. Share your model and symptoms in the comments, or explore your appliance manual for model-specific test steps.