
On most traditional ice makers, the arm down means on, while the arm up means off.
The ice maker arm is a simple but important control. It tells the ice maker when to make ice and when to stop. Still, designs vary by brand, and a stuck arm can look like a failed ice maker. This guide explains the ice maker arm up or down position, how the shutoff system works, and what to check when your ice maker stops producing ice.
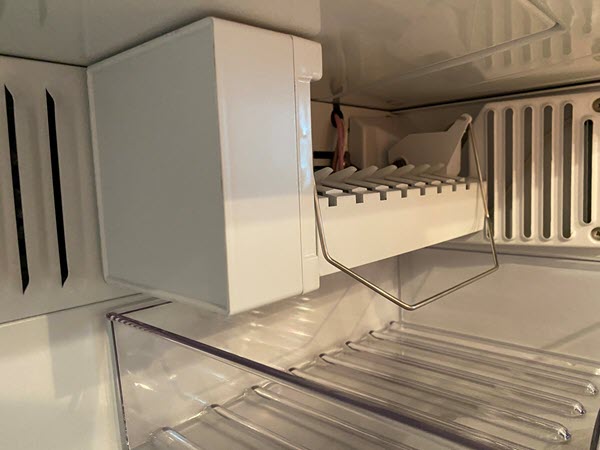
Ice Maker Arm Up or Down: What Does Each Position Mean?
On most refrigerator ice makers with a metal or plastic feeler arm, the position is easy to understand:
• Arm down: The ice maker is usually turned on and can make ice.
• Arm up: The ice maker is usually turned off or in the shutoff position.
The arm works like a small switch. As ice fills the storage bin, cubes push the arm upward. When the arm rises far enough, it tells the ice maker to stop making more ice. When you lower the arm, the ice maker can begin another cycle.
The ice maker arm up or down position may feel loose or spring-loaded. That is normal. The arm needs to move freely so it can sense the ice level.
Some newer refrigerators use an electronic sensor instead of a physical arm. These models may have a power button, touch control, or infrared sensor. If your ice maker has no visible arm, check the owner’s manual before moving any parts.

How the Ice Maker Shutoff Arm Works
The arm is also called a feeler arm, shutoff arm, bail arm, or sensor arm. Its main job is to detect when the ice bin is full.
When the ice maker starts a cycle, an internal motor turns a small ejector. The ejector pushes frozen cubes out of the mold and into the bin. The ice maker then fills the mold with water for the next batch.
The ice maker arm up or down position controls whether this process can continue:
-
The arm stays down when the ice maker is ready to operate.
-
The ice maker freezes water in its mold.
-
The motor ejects the ice cubes.
-
Ice builds up in the storage bin.
-
The cubes lift the arm.
-
The ice maker stops until the arm drops again.
The arm does not measure ice by weight. It measures the height of the ice near the top of the bin. This is why an uneven pile of ice can sometimes stop production early.
A common mistake is to force the arm down when ice is packed around it. That can bend the arm or damage the shutoff switch. Clear the ice first, then move the arm gently.
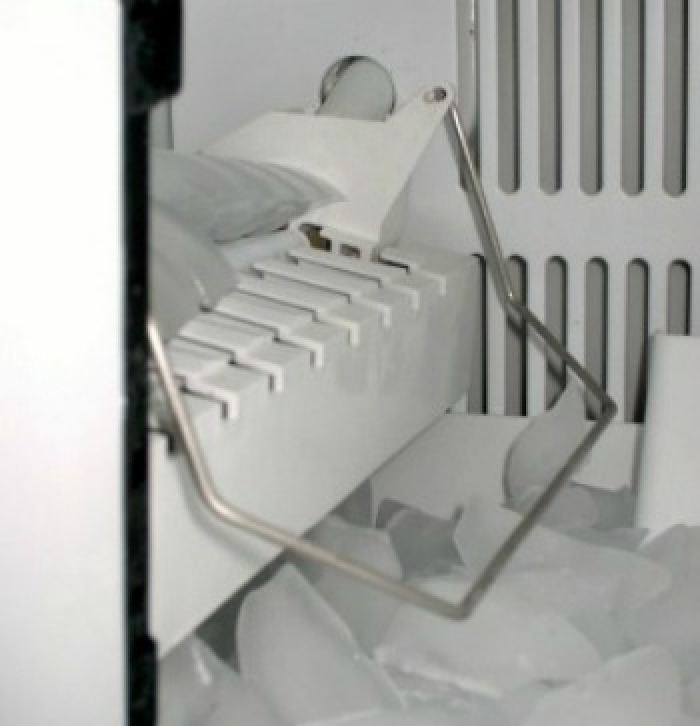
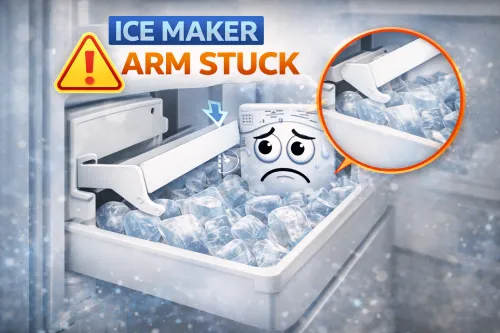
Why the Ice Maker Arm May Stay Up
If the ice maker arm will not stay down, the ice maker may be sensing a full bin or may have a mechanical problem.
Check these common causes:
• Ice is piled beneath or around the arm.
• A large clump of ice is holding the arm up.
• The arm is stuck against the freezer wall.
• The arm spring is damaged.
• The shutoff switch is worn.
• The ice maker is not level.
• The ice bin is not seated correctly.
• A shelf, food package, or container is blocking the arm.
Remove the ice bin and inspect the arm. It should move smoothly from the raised position to the lowered position. Do not use force. If it feels locked in place, unplug the refrigerator before inspecting the mechanism more closely.
In many service calls, the real issue is not a broken ice maker. It is a stray ice cube trapped under the shutoff arm. A quick inspection can save you the cost of a replacement part.

Why the Ice Maker Arm May Stay Down
An arm that stays down can also cause trouble. The ice maker may continue trying to produce ice, even when the bin is full.
This problem may happen when:
• The arm is bent.
• The arm has come loose from its mounting point.
• The shutoff switch has failed.
• Ice is frozen around the arm hinge.
• The ice bin does not push the arm correctly.
• The control module has an electrical fault.
A stuck-down arm may lead to an overfilled bin. Ice can spill into the freezer, freeze into a solid mass, or block the dispenser chute. In severe cases, the ice maker may keep calling for water when it cannot eject ice properly.
Turn the ice maker off if the arm does not rise when the bin is full. For a traditional design, lift the arm to the off position. For electronic models, use the power control or follow the manufacturer’s instructions.

How to Tell If the Ice Maker Is On
The ice maker arm up or down position is the first thing to check, but it is not the only sign.
A traditional ice maker is likely on when:
• The arm is fully down.
• The ice maker has a water supply.
• The freezer temperature is cold enough.
• The ice maker mold is not blocked.
• The unit has power.
A typical freezer should stay near 0°F for reliable ice production. If the freezer is much warmer, the ice maker may not freeze water correctly. A freezer that is too cold can also create problems if the fill tube or water line freezes.
You may hear a short motor sound during a harvest cycle. You may also see water enter the ice mold after the old cubes eject. Do not expect ice immediately after lowering the arm. Many ice makers need several hours to produce a full batch.
How to Turn the Ice Maker On or Off
Follow these steps for a standard ice maker with a feeler arm:
-
Open the freezer and locate the ice maker.
-
Look for the metal or plastic shutoff arm.
-
Move the arm down gently to turn the ice maker on.
-
Lift the arm until it clicks or rests in the raised position to turn it off.
-
Make sure the ice bin is fully inserted.
-
Wait several hours for the first batch of ice.
Do not repeatedly move the arm up and down within a few seconds. The ice maker may need time to reset its control cycle.
Some models use a wire arm, while others use a plastic paddle. Their movement may feel different. The ice maker arm up or down rule still applies to many models, but the exact shutoff position can vary.
If your refrigerator has a labeled switch, button, or digital control, use that control instead of forcing the arm. Always check the model’s manual when the position is unclear.
Ice Maker Arm Up or Down on Different Refrigerator Types
The basic rule works for many Whirlpool, GE, Frigidaire, Maytag, KitchenAid, Samsung, and LG models with a physical arm. However, refrigerator designs are not identical.
Traditional ice makers often use a mechanical arm. The arm rises as the bin fills and stops the ice maker through a small switch.
Some newer models use:
• An electronic shutoff button.
• An infrared beam.
• A freezer-door sensor.
• A motorized ice bin.
• A digital ice-making setting.
• A removable ice maker module.
On an infrared system, the ice maker may stop when a beam is blocked by ice. Dust, frost, or a poorly positioned bin can interfere with the sensor. On a digital system, the display may show that ice production is off even when no arm is visible.
The safest approach is to identify the control style first. Do not assume that every ice maker arm up or down position works the same way.

What to Check When the Ice Maker Makes No Ice
If lowering the arm does not restore ice production, use this simple checklist.
1. Check the freezer temperature
Use a small appliance thermometer if possible. The freezer should generally be around 0°F. A warm freezer may point to a dirty condenser, blocked air vents, a weak door seal, or a cooling problem.
2. Check the water supply
Make sure the refrigerator water valve is open. Check for a kinked line beneath or behind the refrigerator. If the water dispenser also has low pressure, the filter or water supply may be the cause.
3. Inspect the fill tube
The fill tube is the small tube that sends water into the ice mold. If it is frozen, water cannot enter. Never chip at it with a knife. Gentle warming from a safe distance may help, but a technician should handle repeated freezing.
4. Check the ice mold
Look for frozen cubes, empty sections, or a solid sheet of ice. These clues help show whether the unit receives water and completes a harvest cycle.
5. Confirm the bin position
Some ice makers will not run if the bin is missing or incorrectly placed. Reinstall it firmly and make sure nothing blocks the arm.
6. Test the arm gently
The ice maker arm up or down position should change without force. If it feels loose, bent, or stuck, the arm or switch may need repair.

Common Mistakes to Avoid
A few habits can create more trouble than they solve.
• Do not hold the arm down with tape or a heavy object.
• Do not force a frozen arm.
• Do not chip ice with a sharp tool.
• Do not pour boiling water into the ice maker.
• Do not remove electrical parts while the refrigerator is plugged in.
• Do not keep resetting the ice maker without checking the water supply.
• Do not assume a full bin means the ice maker is broken.
Holding the arm down can defeat the normal shutoff feature. This may cause the ice maker to overfill the bin or jam the ejector. A damaged arm can also become expensive to replace because some models require a complete ice maker assembly.
A safer method is to turn the ice maker off, remove the bin, clear loose ice, and inspect the arm with the refrigerator disconnected from power.
When to Repair or Replace the Ice Maker
A basic obstruction is often easy to fix. A failed control module, motor, thermostat, or water inlet valve may require a part replacement.
Consider professional service when:
• The arm will not move after the ice is cleared.
• The ice maker leaks water.
• The motor makes repeated clicking sounds.
• The fill tube freezes again and again.
• The ice maker runs but never ejects cubes.
• Electrical parts show burn marks.
• The refrigerator trips a breaker.
• The unit has a sealed cooling problem.
Before buying a replacement, record the refrigerator model number. Ice makers can look nearly identical while using different connectors, mounting points, and control systems.
A technician can test the water valve, thermostat, motor, and wiring. Replacing the whole ice maker may be reasonable for an older unit, but a single valve or switch may cost less on a newer refrigerator.
Practical Tips for Better Ice Production
Good maintenance helps the ice maker work more consistently.
• Keep the freezer near 0°F.
• Leave air vents clear.
• Replace the water filter on the recommended schedule.
• Keep the ice bin clean and dry.
• Break up large clumps of ice.
• Do not overfill the freezer around the ice maker.
• Check that the door seal closes tightly.
• Use the correct ice maker setting for your model.
If the ice tastes stale, empty the bin and wash it with mild dish soap. Rinse it well and dry it before reinstalling it. Old ice can absorb freezer odors, especially from uncovered food.
During vacations, lift the arm or switch the ice maker off. Close the water supply if the refrigerator will be unattended for a long period. This reduces the risk of leaks and unwanted ice buildup.
Frequently Asked Questions About Ice Maker Arm Up or Down
Should the ice maker arm be up or down to make ice?
The arm should usually be down to make ice. When the arm is up, the ice maker is normally in the off position.
How do I turn off an ice maker with a wire arm?
Raise the wire arm until it locks or rests in the upper position. Do not force it, and check the refrigerator manual if the arm does not move normally.
Why is my ice maker arm stuck up?
Ice may be trapped under the arm, or the arm hinge, spring, or shutoff switch may be damaged. Remove loose ice and test the arm gently with the refrigerator unplugged.
Why does my ice maker keep making ice when the arm is up?
The shutoff switch, control module, or arm linkage may have failed. Turn off the ice maker using its main control and arrange a repair if the problem continues.
Can I run the ice maker without the ice bin?
Some models can run without the bin, but others use the bin or a sensor as part of the shutoff system. Keeping the bin installed is the safest choice unless the manual says otherwise.
How long does an ice maker take to make ice after lowering the arm?
Many household ice makers need several hours to produce the first batch. The exact time depends on freezer temperature, water pressure, and the refrigerator design.
Do all ice makers use an up or down arm?
No. Some newer ice makers use buttons, electronic sensors, infrared controls, or digital settings. If there is no physical arm, use the labeled control for your model.
Conclusion
For most traditional refrigerators, the ice maker arm down position means on, while the ice maker arm up position means off. The arm should move freely, rise when the bin fills, and never be forced. If the ice maker stops working, check the arm, freezer temperature, water supply, fill tube, and bin before replacing parts.
Take a minute to inspect your ice maker arm today. A small piece of trapped ice may be all that stands between an empty bin and a fresh batch of cubes. If this guide helped, explore your refrigerator manual or share your ice maker question in the comments.