Cooking chicken livers in an air fryer is a culinary adventure that combines convenience with flavor. If you’re looking to elevate your cooking game and impress your taste buds, this guide is for you. Chicken livers are not only a rich source of nutrients but also incredibly versatile. Using an air fryer, you can achieve a crispy exterior and a tender interior without the mess of traditional frying. In this article, I’ll walk you through everything you need to know about cooking chicken livers in an air fryer, from preparation to serving tips. Let’s dive into this delightful journey!
Source: mightyspatula.com
Why Choose Chicken Livers?
Chicken livers are a nutrient-dense food, packed with vitamins and minerals. They’re an excellent source of vitamin A, iron, and folate. These nutrients are essential for maintaining healthy vision, boosting the immune system, and promoting red blood cell formation. Additionally, chicken livers are high in protein and low in calories, making them a great choice for those looking to maintain a balanced diet.
Nutritional Benefits
- Vitamin A: Supports eye health and immune function.
- Iron: Essential for oxygen transport in the blood.
- Folate: Important for DNA synthesis and repair.
- Protein: Aids in muscle growth and repair.
- Low Calories: Ideal for weight management.

Source: blackpeoplesrecipes.com
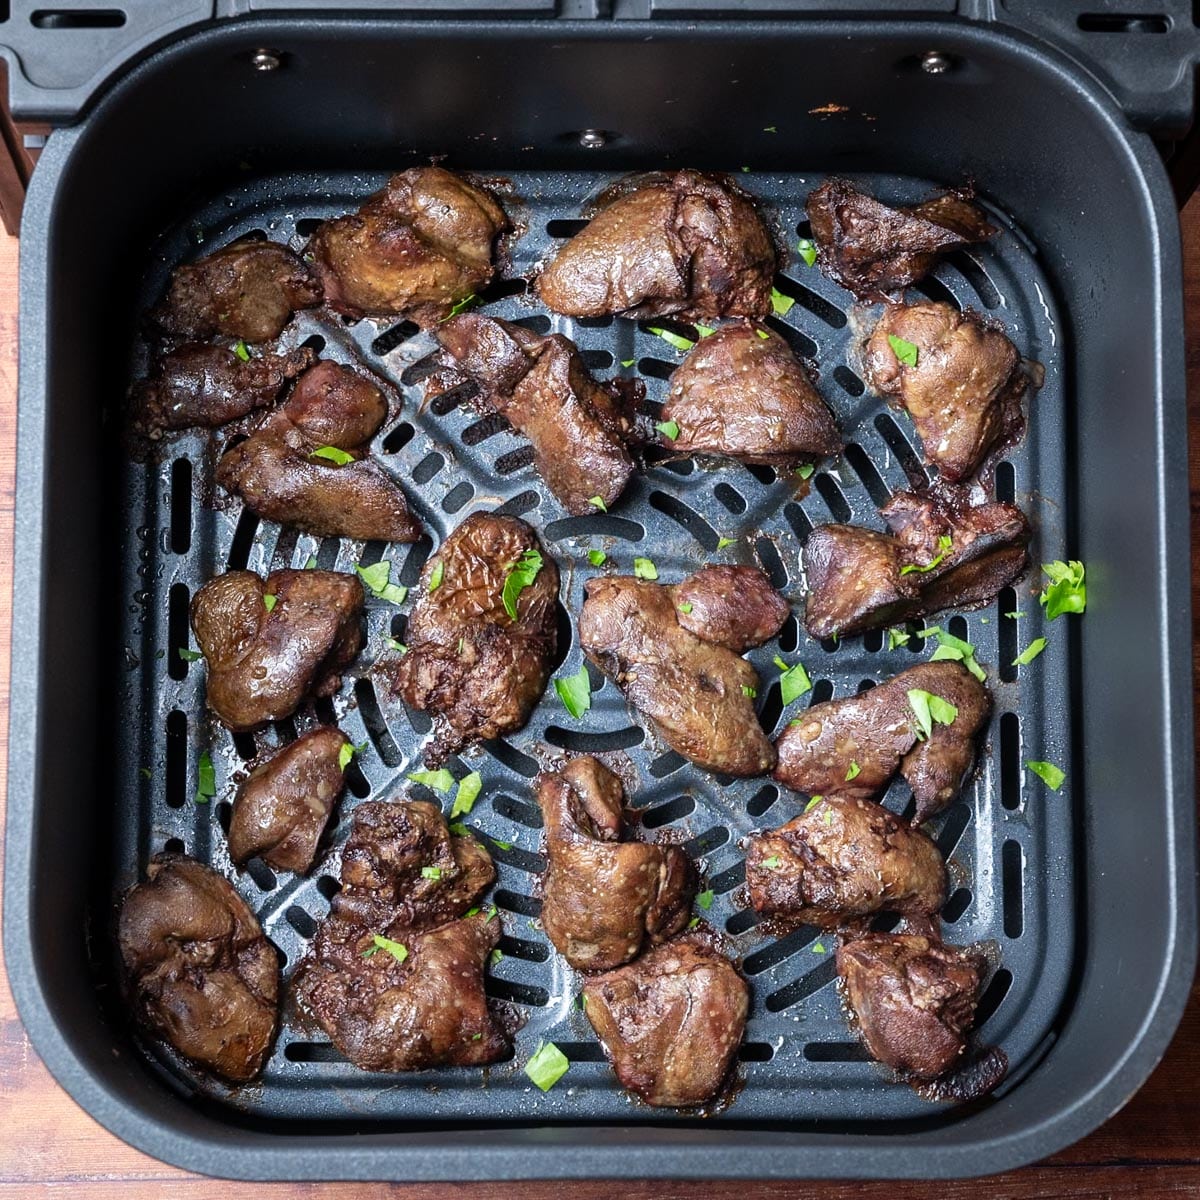
Preparing Chicken Livers for the Air Fryer
Before cooking, it’s crucial to prepare the chicken livers properly. This step ensures that they cook evenly and taste delicious.
Cleaning and Trimming
- Rinse: Start by rinsing the chicken livers under cold water. This removes any residual blood and impurities.
- Trim: Use a sharp knife to trim away any connective tissues or fat. This helps in achieving a more tender texture.
- Pat Dry: Use paper towels to pat the livers dry. Removing excess moisture is key to achieving a crispy exterior.
Marination
Marinating chicken livers enhances their flavor and tenderness. Here’s a simple marinade recipe:
- Ingredients:
- 2 tablespoons olive oil
- 1 tablespoon soy sauce
- 1 teaspoon garlic powder
- 1 teaspoon onion powder
- 1/2 teaspoon black pepper
- 1/2 teaspoon salt
- Instructions:
- Combine all ingredients in a bowl.
- Add the chicken livers and toss to coat.
- Cover and refrigerate for at least 30 minutes.

Source: mightyspatula.com
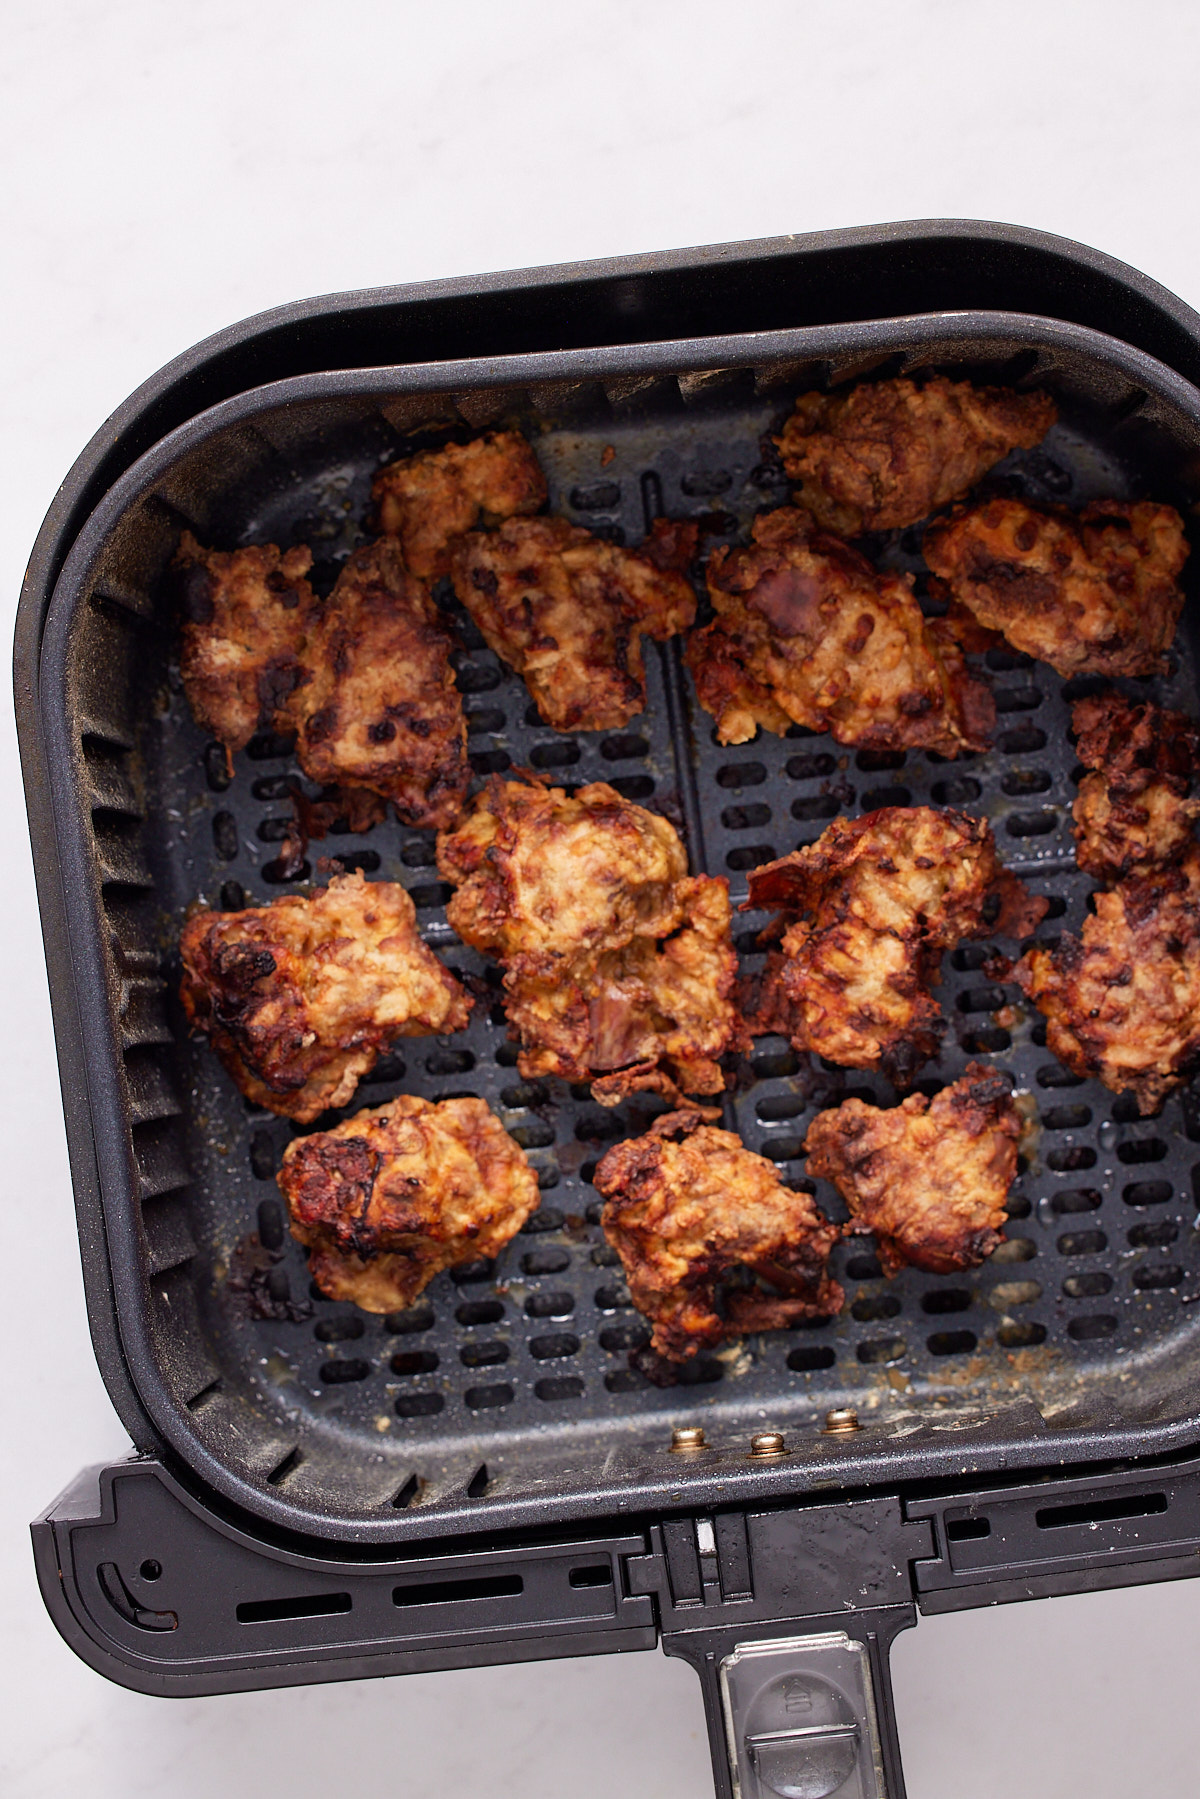
Cooking Chicken Livers in the Air Fryer
Now that your chicken livers are prepped and marinated, it’s time to cook them in the air fryer.
Step-by-Step Instructions
- Preheat: Preheat the air fryer to 400°F (200°C) for 5 minutes.
- Arrange: Place the marinated livers in a single layer in the air fryer basket. Avoid overcrowding to ensure even cooking.
- Cook: Cook for 10-12 minutes, flipping halfway through. The livers should be golden brown and have an internal temperature of 165°F (74°C).
- Rest: Let the livers rest for a few minutes before serving. This allows the juices to redistribute, enhancing flavor.
Tips for Perfect Chicken Livers
- Use a Meat Thermometer: Ensure the internal temperature reaches 165°F for safe consumption.
- Avoid Overcrowding: Cook in batches if necessary to ensure even cooking.
- Experiment with Seasonings: Feel free to add your favorite herbs and spices for a unique flavor profile.

Source: blackpeoplesrecipes.com
Serving Suggestions
Chicken livers can be served in various ways, depending on your preference.
Pairing Options
- Salads: Add cooked livers to a fresh green salad for a protein boost.
- Rice or Quinoa: Serve over cooked rice or quinoa for a complete meal.
- Vegetables: Pair with roasted or steamed vegetables for a balanced dish.
Sauce Ideas
- Garlic Butter Sauce: Melt butter with minced garlic and drizzle over the livers.
- Balsamic Glaze: A sweet and tangy glaze that complements the rich flavor of the livers.
- Spicy Sriracha Mayo: Mix mayonnaise with sriracha for a spicy kick.

Source: www.melaniecooks.com
Common Mistakes and How to Avoid Them
Cooking chicken livers can be tricky if you’re not familiar with the process. Here are some common mistakes and how to avoid them:
Mistake 1: Overcooking
Solution: Use a meat thermometer to check the internal temperature. Remove the livers from the air fryer as soon as they reach 165°F.
Mistake 2: Not Preheating the Air Fryer
Solution: Always preheat the air fryer for even cooking. This step is crucial for achieving a crispy exterior.
Mistake 3: Skipping the Marination
Solution: Marinate the livers for at least 30 minutes to enhance flavor and tenderness.
Source: blackpeoplesrecipes.com
Frequently Asked Questions of How to Cook Chicken Livers in Air Fryer
How long should I cook chicken livers in the air fryer?
Cook chicken livers in the air fryer for 10-12 minutes at 400°F, flipping halfway through.
Can I use frozen chicken livers?
Yes, but it’s best to thaw them before cooking. This ensures even cooking and better texture.
How do I store leftover chicken livers?
Store leftovers in an airtight container in the refrigerator for up to 3 days. Reheat in the air fryer for a few minutes before serving.
Are chicken livers healthy?
Yes, chicken livers are rich in vitamins and minerals, including vitamin A, iron, and folate, making them a nutritious choice.
What can I serve with chicken livers?
Chicken livers pair well with salads, rice, quinoa, and vegetables. You can also serve them with sauces like garlic butter or balsamic glaze.
Conclusion
Cooking chicken livers in an air fryer is a simple and delicious way to enjoy this nutritious ingredient. By following the steps outlined in this guide, you can achieve perfectly cooked livers with a crispy exterior and tender interior. Whether you’re a seasoned cook or a beginner, this method is sure to impress. Now that you’re equipped with the knowledge and tips, why not give it a try? Explore new flavors, experiment with seasonings, and enjoy the delightful taste of air-fried chicken livers. Don’t forget to share your experience in the comments below or subscribe for more cooking tips and recipes!