
Descaling an ice maker removes mineral buildup, improves ice quality, and helps the machine run safely and smoothly.
Hard water can leave white scale inside an ice maker, on the evaporator plate, and around water lines. Over time, this buildup may cause cloudy ice, slow production, odd tastes, or poor water flow. Learning how to descale an ice maker is simple when you use the right cleaner, follow the manufacturer’s instructions, and rinse the machine well.
Why You Need to Descale an Ice Maker
Ice makers use water again and again. When that water contains calcium and magnesium, minerals can stick to the machine’s wet surfaces. This residue is often called limescale or mineral scale.
A small amount may not cause trouble at first. As it grows, it can act like grit in a pipe. It may block water flow, strain the pump, and make ice harvest less reliable.
Regular descaling can help:
• Remove calcium and mineral deposits
• Improve the taste and smell of ice
• Keep ice cubes clear and fresh
• Support steady ice production
• Reduce stress on the water pump and valves
• Make future cleaning easier
Descaling does not replace sanitizing. A descaler removes mineral deposits, while a food-safe sanitizer helps control germs. Many ice maker manuals recommend both steps, but they should not always be mixed together.
How Often Should You Descale an Ice Maker?
Most home ice makers need descaling every three to six months. The exact schedule depends on water hardness, how often you make ice, and the type of machine you own.
You may need to descale an ice maker sooner if you notice:
• White flakes in the ice bin
• Cloudy or chalky ice
• A sour, metallic, or stale taste
• Slower ice production
• Small or misshapen cubes
• Water pooling inside the machine
• A loud pump or unusual operating sound
Homes with very hard water may need monthly care. If you use filtered or softened water, the interval may be longer. Still, check your owner’s manual because some brands require a specific cleaner or cleaning cycle.

What You Need Before You Start
Gather your supplies before you begin. This makes the job faster and prevents you from leaving the machine open for too long.
You will usually need:
• The ice maker’s approved descaling solution
• A soft cloth or microfiber towel
• A soft brush or clean toothbrush
• A bowl or container
• A clean sponge
• Food-safe gloves, if desired
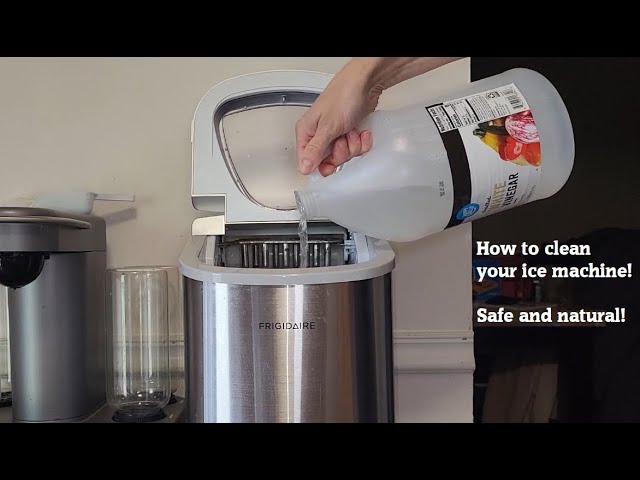
Use a commercial ice machine cleaner when the manufacturer calls for one. Many products use citric acid or sulfamic acid to dissolve scale. Do not use bleach, drain cleaner, vinegar, or a strong household descaler unless the manual says it is safe.
Vinegar is popular for household cleaning, but it may damage some seals or leave a smell. It can also be too weak for thick mineral buildup. The safest choice is a cleaner labeled for ice makers or food contact equipment.
How to Descale an Ice Maker Step by Step
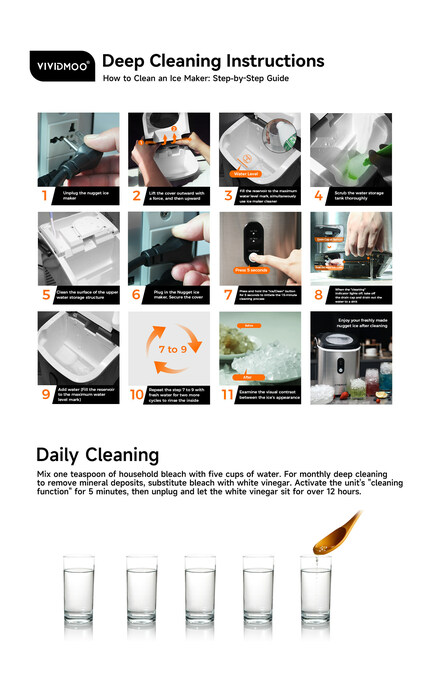
The basic process is similar for portable, undercounter, and built-in ice makers. However, the layout and cleaning cycle can differ. Always read the manual first, especially if your machine has an automatic cleaning mode.
1. Turn Off the Ice Maker
Switch off the ice maker and unplug it from the wall. For a built-in unit, turn off the water supply if the manual recommends it.
Remove all ice from the storage bin. Do not keep old ice for later use. It may have picked up cleaner, scale, or odors during the process.
Let hot parts cool before you touch them. Never pour cleaner into a running machine unless the instructions specifically tell you to do so.
2. Remove Loose Parts
Take out the ice bin, scoop, water curtain, filter, and other removable parts. The manual will show which parts can safely come out.
Wash these parts with warm water and mild dish soap. Rinse them well, then set them aside. Do not put parts in the dishwasher unless the manufacturer says they are dishwasher safe.
3. Drain the Water Reservoir
Find the drain plug, drain cap, or drain tube. Empty the old water into a sink or bowl.
If the reservoir has visible flakes, wipe them away with a soft cloth. Avoid knives, metal scrapers, and rough scouring pads. Scratches can create places where scale and dirt collect.
4. Mix the Descaling Solution
Prepare the cleaner exactly as the label says. The correct amount matters. A stronger mix is not always better and may harm internal parts.
Some cleaners are ready to use. Others must be diluted with water. Never mix a descaler with bleach, ammonia, or another cleaning product. Chemical mixtures can create dangerous fumes.
5. Add the Cleaner
Pour the solution into the water reservoir or follow the location listed in your manual. Keep the liquid away from control panels, vents, and electrical connections.
For a portable ice maker, the cleaner often goes directly into the water tank. For a built-in unit, the machine may use a cleaning cycle that pulls the solution through the water system.
6. Run the Cleaning Cycle
Start the cleaning cycle if your ice maker has one. If it does not, allow the solution to sit for the time listed on the product label.
The solution may loosen flakes from the evaporator plate, water lines, pump, and spray holes. Do not run the machine longer than directed. Extended contact can wear some rubber parts or metal surfaces.
Discard any ice made during this cycle. It is not safe to eat.
7. Drain and Wipe the Machine
Turn the machine off when the cycle ends. Drain the cleaning solution completely.
Use a soft cloth to wipe the water reservoir, ice-making surface, chute, and inside walls. A soft brush can help around small holes and corners. Do not force a brush into a pump or narrow water line.
8. Rinse the Ice Maker Several Times
Fill the reservoir with clean water and run the rinse cycle. Drain the water afterward.
Repeat the rinse step at least two or three times, or until there is no chemical smell or taste. Rinsing is one of the most important parts of how to descale an ice maker because leftover cleaner can contaminate new ice.
9. Clean and Replace the Parts
Wash the bin, scoop, and removable parts again with clean water. Dry them with a fresh towel or let them air-dry.
Replace the water filter if it is old, clogged, or listed for replacement after cleaning. Reinstall each part in the correct position.
10. Make and Discard the First Batch
Turn the ice maker back on and allow it to make one full batch. Throw that batch away.
Make a second batch and inspect it. The ice should have a normal smell, taste, shape, and color. If you still notice a chemical taste or visible flakes, drain the unit and rinse it again.
This full process explains how to descale an ice maker safely without rushing the most important steps.

How to Descale Different Types of Ice Makers
Not every ice maker cleans in the same way. The method depends on the machine’s design.
Portable Ice Makers
Portable units usually have a small reservoir and a removable ice basket. They are often easy to clean, but their pumps and water paths are compact.
Remove the basket, drain the water, add the approved cleaner, and use the built-in cleaning cycle. Wipe the ice chute and fan area with a dry or slightly damp cloth. Keep water away from the electrical controls.
Undercounter Ice Makers
Undercounter models are connected to a water line and drain. They may have a larger bin, a water filter, and a dedicated cleaning program.
Follow the manual closely. Some models require a measured amount of cleaner and a specific cleaning time. You may also need to clean the drain line because mineral deposits can slow drainage.
Refrigerator Ice Makers
A refrigerator ice maker may not have a separate cleaning cycle. In many cases, you clean the ice bin, replace the water filter, wipe accessible surfaces, and follow the refrigerator maker’s instructions.
Do not pour cleaner into a refrigerator ice maker unless the manual clearly allows it. Some internal parts are difficult to rinse, which can leave cleaner trapped inside.
Commercial Ice Machines
Commercial machines need a more careful process. They often have separate cleaning and sanitizing cycles, plus water filters and complex water circuits.
Use only the chemical and concentration approved for that machine. Food service operations should follow local health rules and keep a written cleaning schedule.

How to Remove Heavy Mineral Buildup
Light scale usually dissolves during one cleaning cycle. Heavy buildup may need more care.
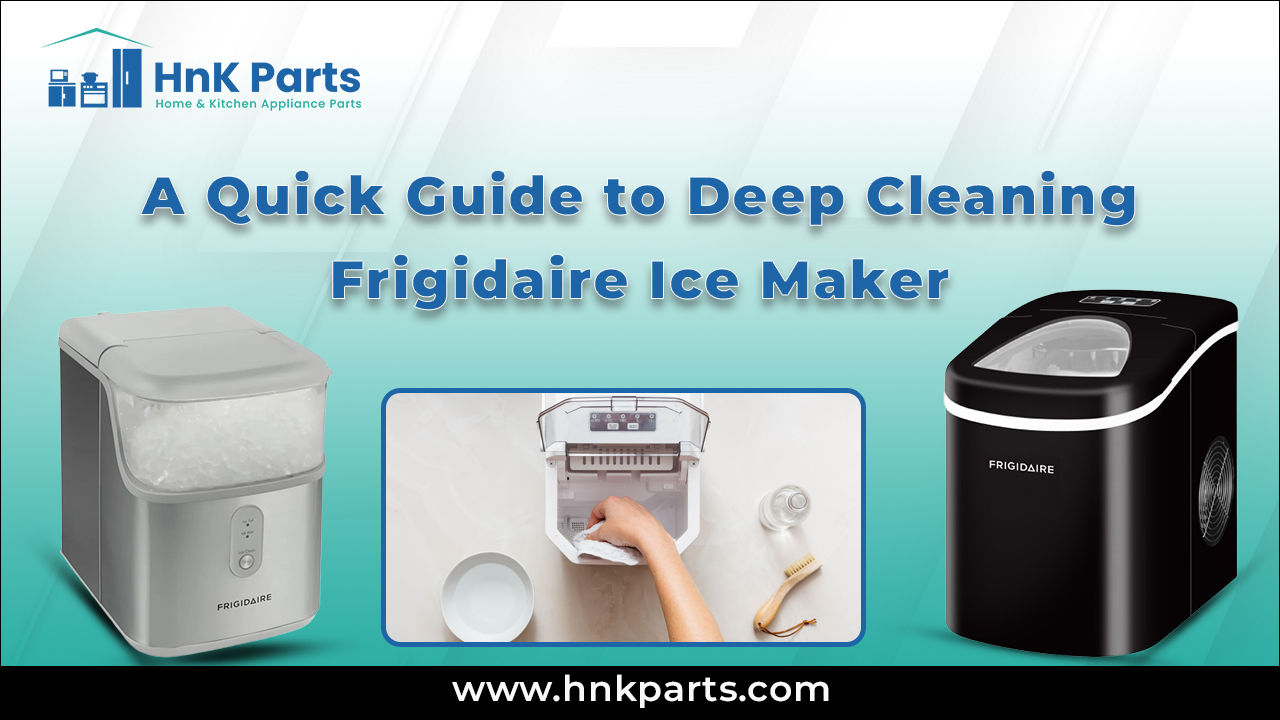
First, run the approved descaling cycle. Then inspect the evaporator surface, water trough, spray nozzles, and drain area. Use a soft brush to loosen any remaining deposits.
Do not chip thick scale with a screwdriver or knife. That can scratch the metal, bend a water spray arm, or damage a coating. If deposits remain after two proper cleaning cycles, contact the manufacturer or a qualified appliance technician.
A machine that quickly develops heavy scale may have a water quality problem. A suitable water filter can reduce mineral load, but it cannot remove every type of contaminant. Test your water or ask a local water professional if the problem continues.
Common Mistakes to Avoid
Small mistakes can damage an ice maker or make the cleaning less effective. Keep these points in mind:
• Do not use bleach to remove mineral scale. Bleach is not a descaler and may damage parts or leave unsafe residue.
• Do not mix cleaning chemicals. Use one product at a time and rinse fully.
• Do not skip the rinse cycles. Cleaner left in the water system can affect the next batches of ice.
• Do not scrape metal surfaces with sharp tools. Scratches can lead to more buildup.
• Do not clean a plugged-in machine when water may reach electrical parts.
• Do not return old ice to the clean bin.
• Do not assume vinegar is safe for every model.
• Do not ignore the water filter.
One mistake I often see in home cleaning routines is stopping after the first rinse. The machine may look clean, but a faint cleaner smell can remain in the water path. A few extra rinse cycles are a small price for better tasting ice.

Descaling Versus Sanitizing an Ice Maker
Descaling and sanitizing solve different problems.
Descaling breaks down hard mineral deposits. Sanitizing reduces microorganisms on approved food-contact surfaces. One process cannot fully replace the other.
A good cleaning plan may look like this:
-
Remove old ice and loose debris.
-
Descale the machine with an approved product.
-
Drain the cleaner.
-
Rinse until the water is clear and odor-free.
-
Sanitize if the manual recommends it.
-
Rinse again if the sanitizer label requires rinsing.
-
Make and discard the first batch of ice.
Always follow the product label and machine manual. Some sanitizers are no-rinse products, while others require a clean-water rinse.
How to Prevent Mineral Scale
Prevention will not remove existing buildup, but it can slow the problem.
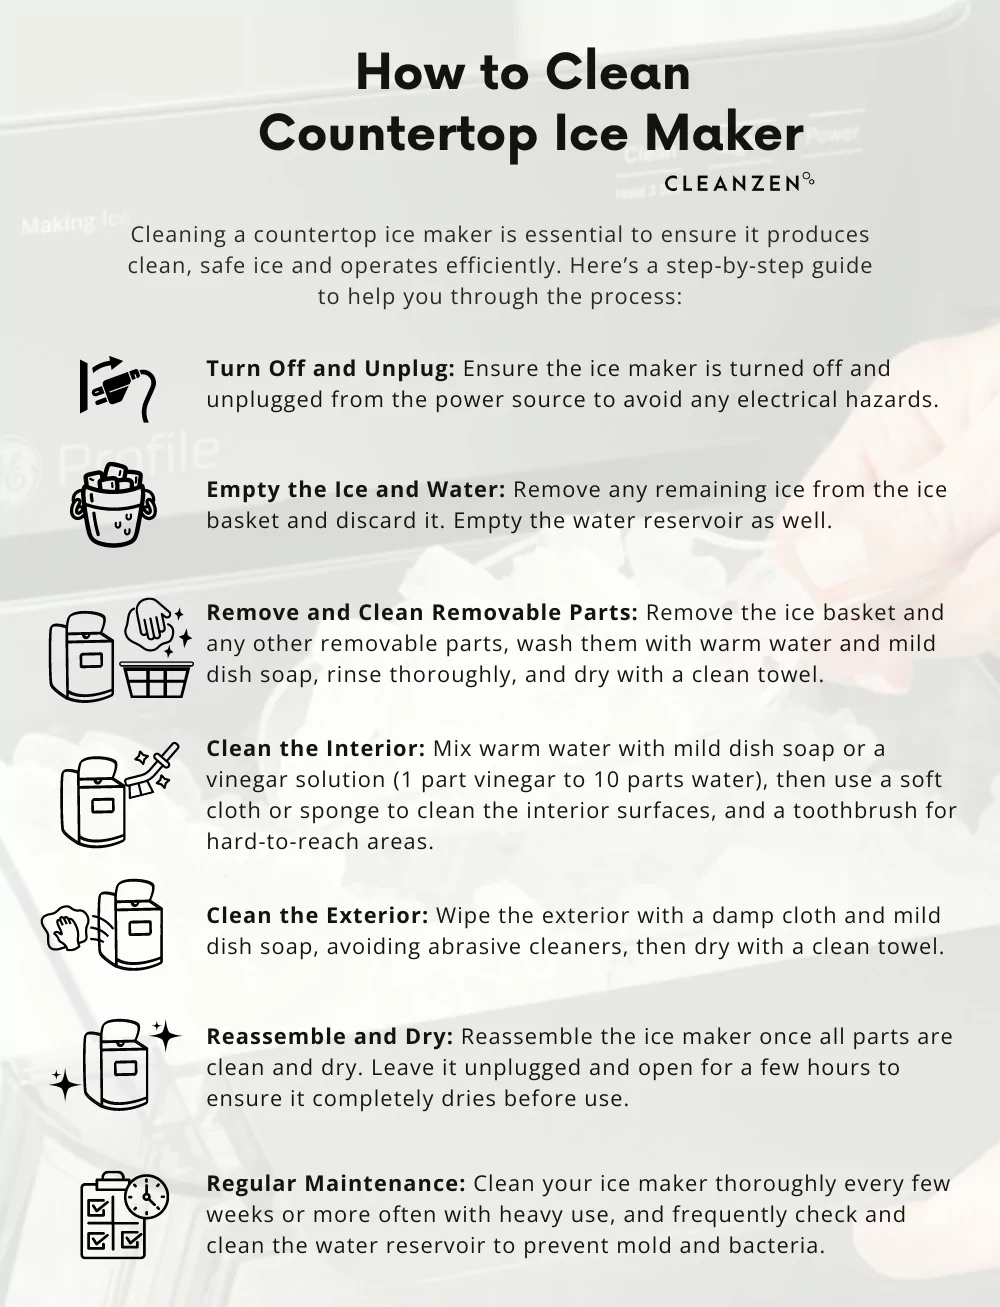
Use these habits:
• Replace the water filter on schedule.
• Use water recommended by the manufacturer.
• Empty and clean the ice bin regularly.
• Keep the lid or door closed when possible.
• Wipe spills before they dry.
• Never let old ice sit for weeks.
• Inspect the water inlet and drain area.
• Keep a simple cleaning calendar.
Filtered water may improve taste and reduce some scale, but it is not a guarantee. Water softeners also have limits. Some soften calcium and magnesium but do not address every mineral or impurity.
If your ice maker serves a large family or makes ice every day, inspect it once a month. A quick check can catch scale before it becomes a thick, stubborn layer.

Signs You May Need Professional Help
Most routine cleaning is safe for a homeowner. Call a qualified technician if:
• The pump does not run after cleaning
• The machine leaks from inside
• The water line stays blocked
• The evaporator plate is damaged
• The ice tastes like chemicals after repeated rinsing
• The unit shows a persistent error code
• The machine trips a breaker
• Scale returns within days
A technician can test water flow, inspect valves, check the pump, and look for hidden buildup. Cleaning cannot fix a failed part, damaged seal, refrigerant problem, or electrical fault.
Frequently Asked Questions About How to Descale an Ice Maker
What is the best cleaner for an ice maker?
The best cleaner is an ice machine descaler approved by the manufacturer. Many approved products contain food-equipment acids, such as citric or sulfamic acid, that dissolve mineral scale when used correctly.
Can I use vinegar to descale an ice maker?
Vinegar may remove light scale from some machines, but it is not safe for every model. Check the manual first, because vinegar can leave an odor or affect certain seals and internal parts.
How long does it take to descale an ice maker?
Most cleaning cycles take about 30 minutes to one hour, followed by several rinse cycles. Heavy buildup may require more time, but never exceed the cleaner’s recommended contact time.
How many times should I rinse an ice maker after descaling?
Rinse at least two or three times, or until the water has no chemical smell. Always follow the cleaner label because some products require a specific number of rinse cycles.
Can I use ice from the cleaning cycle?
No. Discard all ice made during the descaling and rinsing process. Make a fresh batch after cleaning, then check its smell, taste, and appearance before serving it.
How often should I descale a portable ice maker?
A portable ice maker often needs descaling every three to six months. Clean it more often if you have hard water, use it daily, or see flakes and cloudy ice.
Conclusion
Learning how to descale an ice maker is mostly about using the right cleaner, protecting the machine, and rinsing it thoroughly. Turn the unit off, remove old ice, follow the approved cleaning cycle, wipe away loose scale, and discard the first fresh batch.
Regular descaling can improve ice quality and help prevent blocked water paths. Set a reminder based on your water quality and usage, then check the owner’s manual before each deep clean. Share your cleaning tips or explore more appliance care guides to keep your kitchen equipment working its best.