
A knife sharpener with angle guide helps you create a steady, sharp, and safer edge with less guesswork.
A good knife sharpener with angle guide makes sharpening easier for beginners and more consistent for skilled cooks. After testing guided systems, pull-through sharpeners, and sharpening stones, I have learned that the angle matters as much as the abrasive. This guide explains how angle guides work, which angles suit different knives, what features to look for, and how to avoid common mistakes.

What Is a Knife Sharpener With Angle Guide?
A knife sharpener with angle guide is a sharpening tool that helps you hold the blade at a set angle. The guide may be a slot, clamp, rail, arm, or built-in plastic support. Its main job is to keep the blade steady as you sharpen.
The edge of a knife has two ground sides. Each side meets at a specific angle. For example, a knife sharpened at 15 degrees per side has a 30-degree total edge angle. Some products list the angle per side, while others list the total angle, so always read the product instructions carefully.
Without a guide, many people change the angle during each stroke. This creates a rounded or uneven edge. A knife sharpener with angle guide acts like training wheels. It keeps your hand in the right position while the abrasive removes metal and forms a new edge.
Guided sharpeners come in several forms:
• Pull-through models with fixed angle slots
• Rod systems with a guide collar or angle markings
• Clamp systems that hold the blade in place
• Electric sharpeners with preset sharpening stages
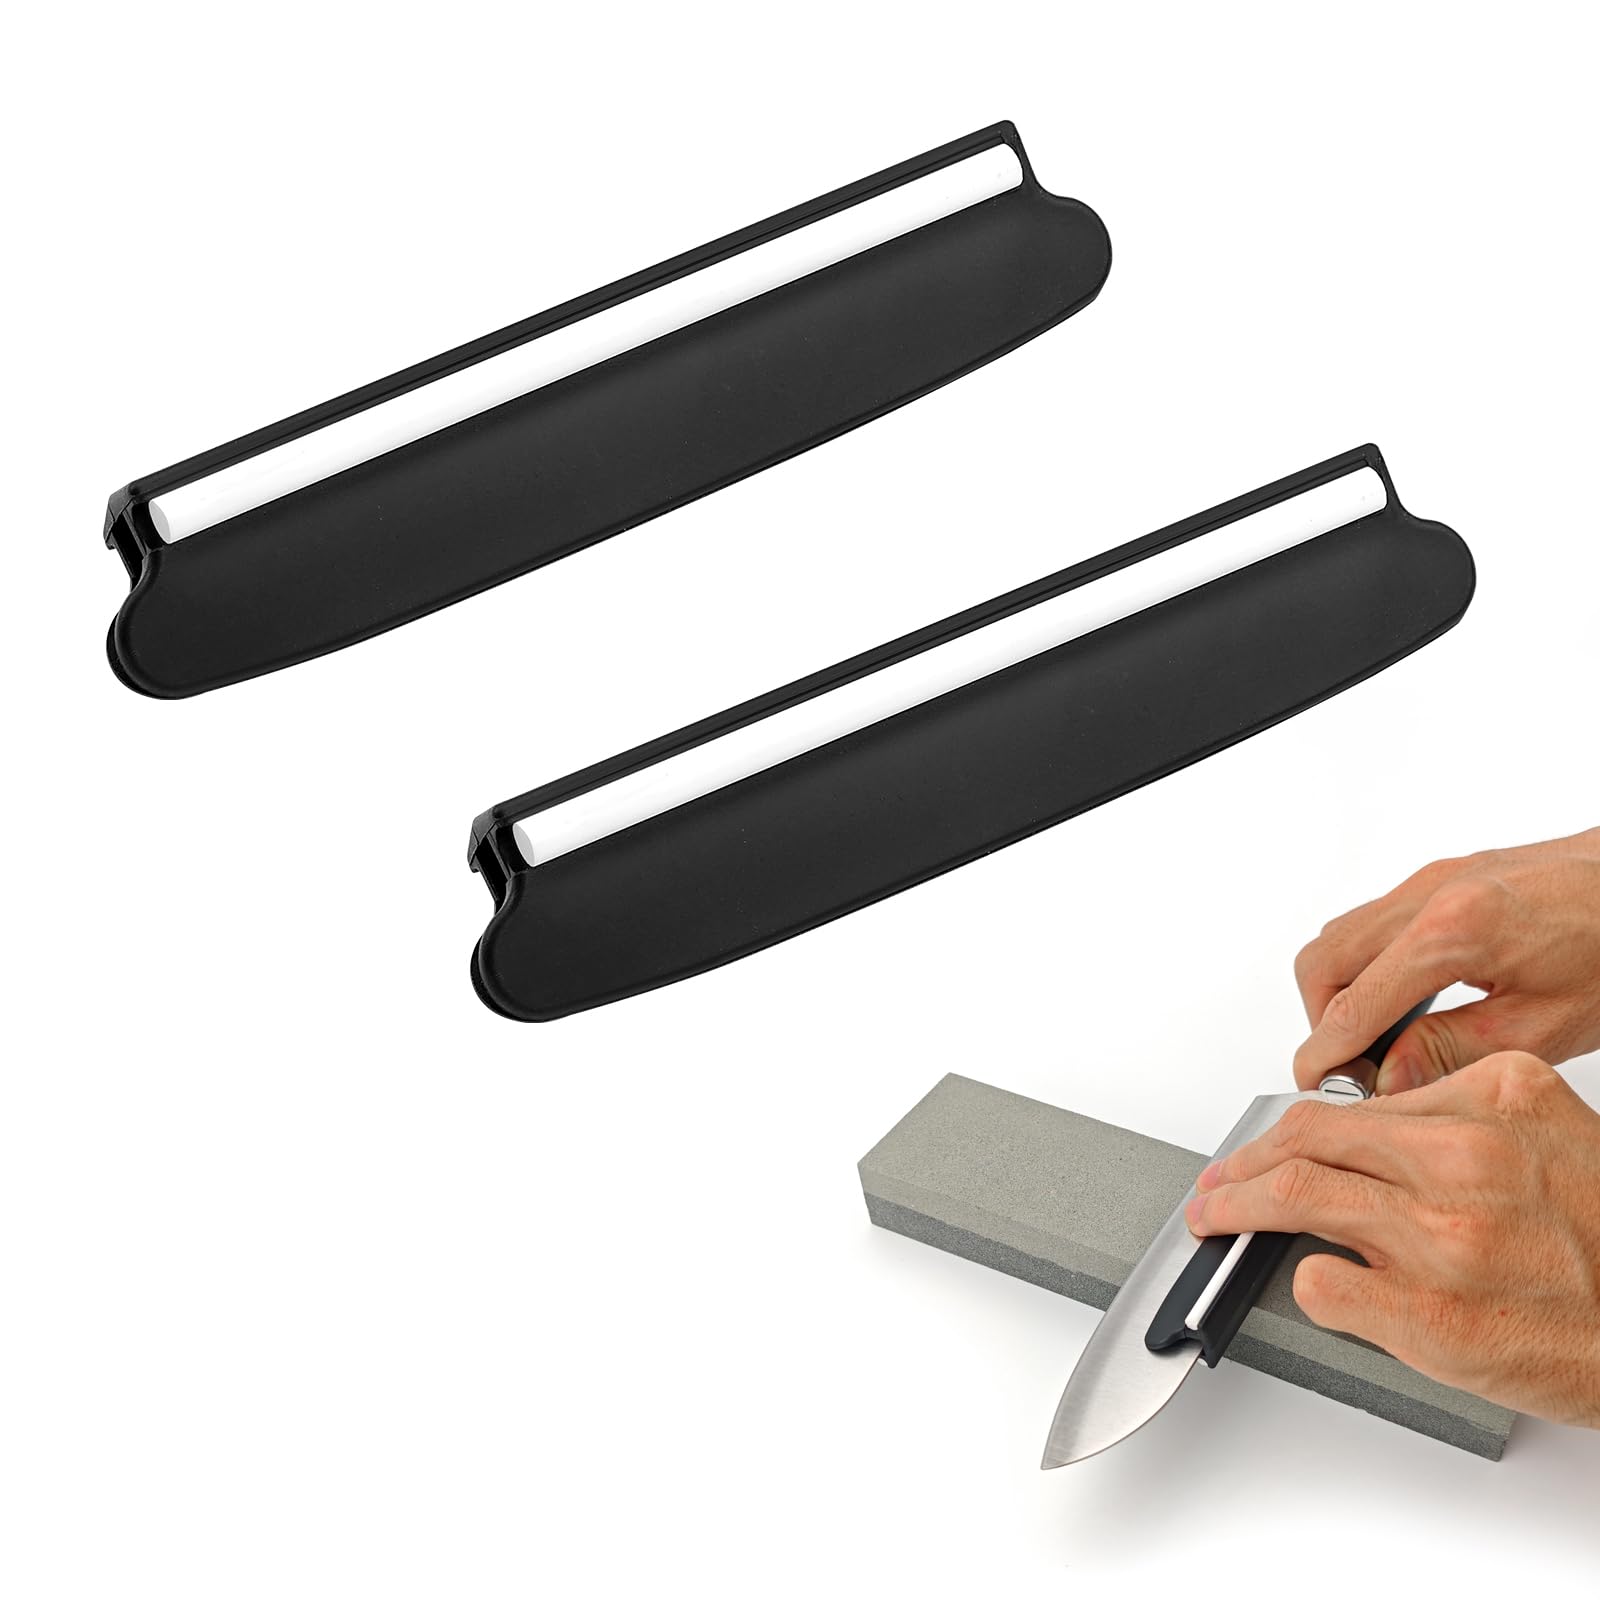
• Sharpening stones used with an external angle guide
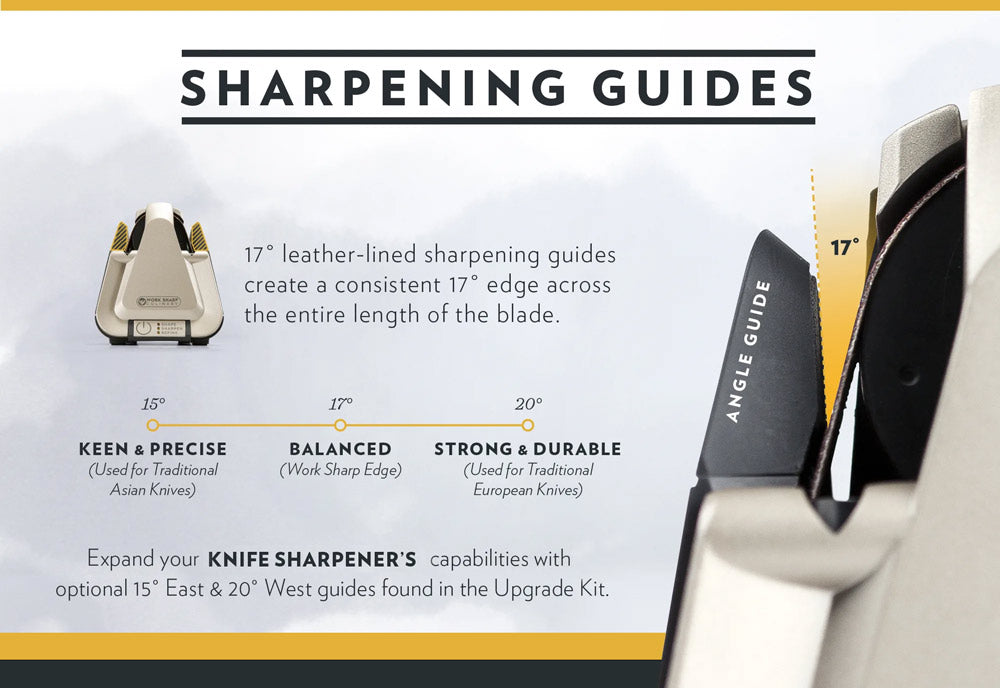
Why Sharpening Angle Matters
The sharpening angle affects sharpness, durability, and cutting feel. A smaller angle creates a thinner edge that can slice very well. A wider angle creates a stronger edge that can handle more force.
For most kitchen knives, 15 to 20 degrees per side is a useful range. Western-style chef knives often work well around 20 degrees per side. Many Japanese kitchen knives use about 12 to 16 degrees per side, but the maker’s instructions should come first.
Outdoor and work knives often need a stronger edge. A range of 20 to 25 degrees per side may suit hunting knives, pocket knives, and utility blades. Heavy chopping tools may need an even wider angle because they face more impact.
The best angle depends on the knife, steel, and task:
• Fine slicing knives: 12 to 16 degrees per side
• General kitchen knives: 15 to 20 degrees per side
• Pocket and utility knives: 20 to 25 degrees per side
• Heavy-duty blades: 25 degrees or more per side
These ranges are practical starting points, not strict rules. A thin, hard blade may chip at an angle that works well for a softer steel knife. When unsure, choose a slightly wider angle and sharpen gently.
Benefits of Using a Knife Sharpener With Angle Guide
A guided sharpener offers more control than freehand sharpening. It can be especially helpful if you are new to knife care or want repeatable results.
Better angle control
The main advantage is consistency. The guide helps keep each stroke close to the same angle. This allows the abrasive to contact the edge instead of scraping the shoulder of the blade.
Faster learning
Freehand sharpening takes practice. A knife sharpener with angle guide reduces the number of variables you must manage. You can focus on light pressure, smooth movement, and checking the edge.
More even edges
An uneven edge may feel sharp in one area and dull in another. A guided system helps sharpen the heel, middle, and tip more evenly. This can make slicing feel smoother and more predictable.
Safer sharpening
A stable blade position lowers the chance of slips. It does not remove all risk, though. You should still keep fingers away from the abrasive path and follow the manufacturer’s safety instructions.
Repeatable results
If you sharpen your chef knife at 18 degrees today, you can often return to a similar setting later. This prevents unnecessary metal removal and helps the knife keep its original shape.
In my own use, the largest improvement came from slowing down. Many people press too hard because they want quick results. Light, steady strokes with a guide usually produce a cleaner edge than forceful strokes.
Types of Knife Sharpeners With Angle Guides
Each sharpener type has strengths and limits. The right choice depends on your skill, knife collection, and preferred level of control.
Pull-through sharpeners
Pull-through sharpeners have one or more slots. You draw the knife through the slot several times. The slot sets the angle for you.
They are simple and fast. Many include a coarse stage for damaged edges and a fine stage for polishing. However, some models remove more metal than needed. They may also struggle with thick spines, unusual blade shapes, or single-bevel knives.
Choose a model with ceramic or diamond abrasives and a clearly stated angle. Avoid forcing a blade through a narrow slot.
Guided rod systems
A guided rod system usually includes sharpening stones or ceramic rods attached to a base. The guide sets the angle while you move the blade or stone.
These systems provide more control than a basic pull-through sharpener. You can often choose several angles and abrasive grits. They may require more setup, but they are useful for people who care about edge quality.
Clamp-style sharpeners
Clamp systems hold the knife at a fixed position. A sharpening rod or stone moves along the edge at a selected angle.
They are known for precise control. They work well for expensive knives and repeated maintenance. The downside is setup time. Some clamps may also leave marks on polished blades if used without care.
Electric sharpeners
Electric sharpeners use powered abrasive wheels or belts. They are quick and convenient. Many have preset angle guides and separate stages for grinding, sharpening, and honing.
A quality electric model can be useful in a busy kitchen. Still, power can remove metal quickly. Use minimal pressure and stop as soon as the knife forms a clean edge.
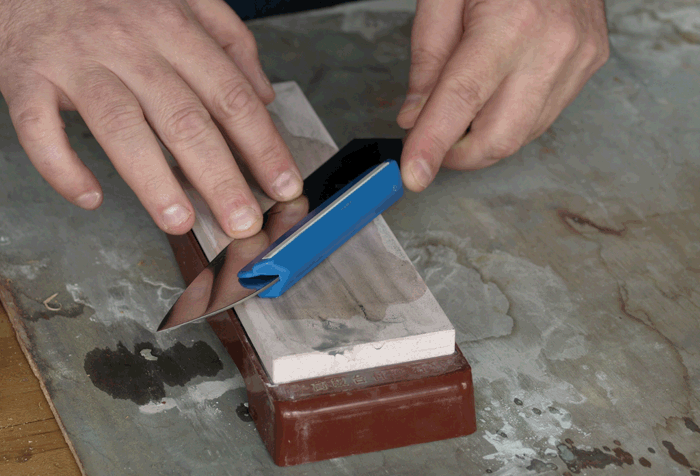
Sharpening stones with angle guides
A stone gives excellent control and can produce a refined edge. An angle guide can help beginners keep the blade steady while learning.
Stones require more practice than other systems. They also need proper soaking or flattening, depending on the type. For people who enjoy sharpening as a skill, this method offers the most flexibility.
How to Choose the Best Knife Sharpener With Angle Guide
A sharpener should match your knives, not just your budget. Before buying, consider the points below.
Check the angle range
Look for a sharpener that supports the angles your knives need. A model fixed at 20 degrees may not suit a thin Japanese blade. An adjustable knife sharpener with angle guide gives you more flexibility.
Also check whether the stated angle is per side. This small detail can prevent a major sharpening mistake.
Choose the right abrasive
Common abrasive materials include:
• Diamond: Cuts quickly and works well on hard steel
• Ceramic: Provides a fine finish and works well for light maintenance
• Aluminum oxide: Common in stones and general sharpening tools
• Tungsten carbide: Cuts aggressively but may remove too much metal
Diamond is useful for repairing dull or hard blades. Ceramic is better for gentle touch-ups. A sharpener with both coarse and fine stages can handle more tasks.
Consider blade compatibility
Read the specifications before using a sharpener on:
• Serrated knives
• Single-bevel knives
• Scissors
• Thick outdoor blades
• Flexible fillet knives
• Narrow or unusually shaped blades
A standard V-shaped knife sharpener may damage a serrated edge. Serrated knives usually need a tapered ceramic rod that fits inside each groove.
Look for a stable base
A non-slip base helps prevent movement. For a countertop sharpener, rubber feet and a wide base are useful. A moving sharpener can create an uneven edge and increase injury risk.
Review the guide design
The angle guide should hold the knife naturally. It should not force the blade into a position that feels awkward. Adjustable guides are useful, but they should lock firmly and show clear angle markings.
Think about maintenance
A sharpener collects metal dust and abrasive debris. Choose one that is easy to clean. Removable parts, smooth surfaces, and clear instructions make long-term use easier.
Avoid unrealistic claims
No sharpener can make every knife perfect in a few seconds. Be cautious with products that promise a razor edge without mentioning blade condition, steel type, or technique. Good sharpening requires the right angle, suitable abrasive, and controlled pressure.

How to Use a Knife Sharpener With Angle Guide
Always read the product manual first. The following steps apply to many guided systems, but the exact method may vary.
-
Clean and dry the knife. Food and oil can affect control.
-
Place the sharpener on a stable surface. Keep the edge pointed away from your body.
-
Select the correct angle. Start with the knife maker’s recommendation when available.
-
Use the coarse stage only if the blade is very dull or damaged. For normal maintenance, begin with a fine stage.
-
Set the heel of the blade into the guide or slot.
-
Move the knife smoothly from heel to tip. Follow the sharpener’s instructions about stroke direction.
-
Use light pressure. Let the abrasive do the work.
-
Repeat the same number of strokes on both sides unless the knife has a single bevel.
-
Check for a small burr along the edge. A burr is a thin wire of metal that shows the abrasive has reached the edge.
-
Finish with the fine or honing stage.
-
Wipe the blade clean and test it on paper or a soft food item.
Do not test sharpness by dragging your finger across the edge. That test can cause a cut and tells you little about how evenly the knife is sharpened.
A useful habit is to count strokes. If you use eight strokes on one side, use about eight on the other. This helps maintain balance and reduces unnecessary metal removal.
Common Mistakes to Avoid
Even a knife sharpener with angle guide cannot correct poor technique. These mistakes are common and easy to prevent.
Using too much pressure
Heavy pressure can create deep scratches and remove too much steel. It may also push the blade out of the guide. Start with gentle pressure and increase it only when the instructions require it.
Sharpening a sharp knife
If the knife still cuts well, do not use the coarse stage. A few light honing strokes may be enough. Frequent aggressive sharpening shortens the life of the blade.
Ignoring the tip
The tip has a different curve from the rest of the knife. Lift the handle slightly as the tip reaches the abrasive, if the sharpener’s design allows it. Do not force the tip into a straight slot.
Mixing angle systems
One product may list 15 degrees per side. Another may list a 30-degree included angle. Treating these numbers as the same can lead to a weak or overly thick edge.
Using the wrong sharpener for serrations
A flat abrasive slot cannot reach the inner curves of a serrated blade. Use a tapered rod or a sharpener designed for serrations.
Expecting a dull blade to recover instantly
A badly damaged edge may need several careful passes. If the blade has chips, bends, or deep rust, professional repair may be safer than repeated home sharpening.
Failing to clean the sharpener
Metal dust can build up and affect performance. Follow the cleaning instructions, and never rinse an electric sharpener unless the manual says it is waterproof.

How Often Should You Sharpen a Knife?
The right schedule depends on use. A home cook who prepares food several times each week may need light honing every one to two weeks and full sharpening every one to three months.
A busy restaurant may need more frequent maintenance. A knife used only occasionally may need sharpening just a few times each year.
Look for signs instead of following a strict calendar:
• The knife slips on tomato skin
• Slices become uneven
• You need more force to cut
• The blade crushes soft food
• The edge feels rough during careful inspection
A honing rod can realign a slightly misaligned edge, but it does not remove much metal. A knife sharpener with angle guide removes metal to create a new edge. Knowing the difference helps prevent over-sharpening.
Store knives in a block, sheath, or magnetic strip. Loose knives in a drawer can hit other tools and damage the edge.
Knife Sharpener With Angle Guide vs. Professional Sharpening
Home sharpening is convenient and affordable. It works well for routine maintenance when the blade has normal wear.
Professional sharpening may be better when:
• The knife has large chips
• The edge is badly bent
• The blade is very expensive
• The knife has a complex single bevel
• You need a full thinning or reshaping service
A professional may use belts, wheels, water stones, or specialized jigs. However, service quality varies. Ask how the sharpener controls heat and angle. Excess heat can affect the temper of some blades, while poor angles can change the knife’s feel.
For most household knives, a careful knife sharpener with angle guide is enough for regular care. Professional service is best viewed as repair or restoration, not a replacement for basic maintenance.
Safety Tips for Guided Knife Sharpeners
A sharp knife is safer to use than a dull one because it needs less force. Sharpening tools still require care.
• Keep the sharpener on a stable, dry surface.
• Keep your free hand behind the cutting edge.
• Wear cut-resistant gloves only if they do not reduce your grip or control.
• Do not sharpen toward your body.
• Keep children and pets away from the work area.
• Unplug electric models before cleaning.
• Replace cracked guides, loose parts, or worn abrasives.
• Wash and dry the knife after sharpening.
After sharpening, use a cutting board that will not damage the edge. Glass, stone, and ceramic boards can dull knives quickly. Wood and quality plastic boards are usually kinder to the edge.
Frequently Asked Questions About Knife Sharpener With Angle Guide
Is a knife sharpener with angle guide good for beginners?
Yes. The guide reduces the need to estimate the angle by hand and helps beginners build consistent habits. Choose a simple model with clear instructions and light abrasive action.
What is the best angle for a kitchen knife?
Most kitchen knives work well between 15 and 20 degrees per side. Check the knife maker’s recommendation because thin blades and single-bevel knives may need a different angle.
Can a guided sharpener sharpen serrated knives?
Only if it is designed for serrated edges. A standard sharpening slot may damage the teeth, so use a tapered ceramic rod or a dedicated serrated-knife tool.
Does a knife sharpener with angle guide remove too much metal?
It can if you use heavy pressure, a coarse setting, or too many passes. Use the finest stage that solves the problem and stop once the edge is sharp.
Is an electric or manual guided sharpener better?
A manual sharpener offers more control and usually removes less metal. An electric model is faster, but it requires careful pressure and proper stage selection.
How do I know when sharpening is complete?
The edge should cut cleanly without force, and the blade should feel consistent from heel to tip. Stop when the knife performs well rather than continuing to chase an even sharper feel.
Conclusion
A knife sharpener with angle guide makes edge care more controlled, repeatable, and approachable. The best results come from choosing the correct angle, using light pressure, matching the abrasive to the task, and sharpening only when needed.
For most home cooks, a stable guided sharpener with clear angle settings and coarse and fine stages is a practical choice. Start slowly, follow the knife maker’s guidance, and treat the blade with care. Explore trusted sharpening resources, practice on a less expensive knife, and share your sharpening experience with other kitchen enthusiasts.