
Use a knife sharpener tool by setting the correct angle, applying light pressure, and making steady passes.
A dull knife is harder to control and may slip during cutting. Learning how to use a knife sharpener tool helps restore a clean edge, improve kitchen safety, and extend the life of your knives. I have tested several manual and electric sharpeners over the years, and the best results always come from choosing the right slot, using gentle pressure, and avoiding rushed strokes.

What Is a Knife Sharpener Tool?
A knife sharpener tool removes a small amount of metal from a blade to create a new cutting edge. Over time, contact with cutting boards, food, and storage blocks can bend or wear this edge. Sharpening reshapes it so the two sides meet in a fine point again.
Many people confuse sharpening with honing. They are related, but they do different jobs:
• Sharpening removes metal and creates a new edge.
• Honing realigns a slightly bent edge without removing much metal.
• Stropping polishes the edge and removes tiny burrs left after sharpening.
A honing rod may make a knife feel sharper, but it cannot fix a badly dull blade. For that job, you need a knife sharpener tool with an abrasive surface, such as ceramic, diamond, or tungsten carbide.
Types of Knife Sharpener Tools
The best method depends on your tool and the knife. Read the sharpener’s instructions before use because slot design, angle, and pressure can vary.
Manual Pull-Through Sharpener
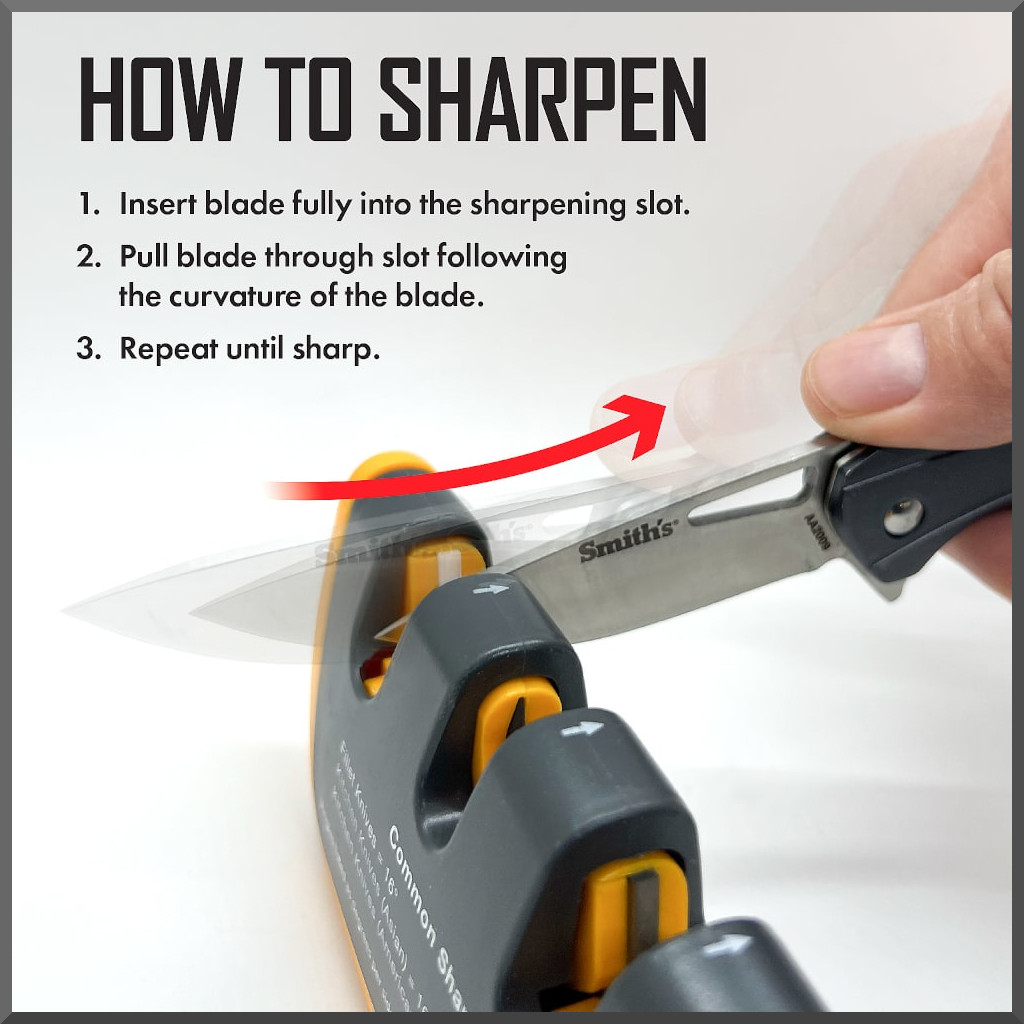
A manual pull-through sharpener has one or more fixed slots. You pull the knife through the slots in one direction. These tools are simple and useful for home cooks who want a quick method.
Many models include:
• A coarse slot for very dull knives
• A fine slot for refining the edge
• A ceramic slot for light polishing
The fixed angle makes this knife sharpener tool easy for beginners. However, aggressive carbide slots can remove more metal than necessary, so use them only when the blade truly needs major repair.
Electric Knife Sharpener
An electric sharpener uses spinning abrasive wheels. It can sharpen quickly and often guides the blade at a set angle. This makes it useful in busy kitchens.
Electric models need careful handling. Do not push the knife down into the slot or pull it back and forth. Let the machine guide the process. Too much pressure can overheat the edge, remove excess metal, or leave an uneven bevel.
Whetstone
A whetstone gives you the most control, but it also requires practice. You hold the blade at a steady angle and move it across the abrasive surface.
Common stones include:
• Coarse stones for damaged or very dull blades
• Medium stones for normal sharpening
• Fine stones for polishing and refining
A whetstone can produce an excellent edge, but it is less forgiving than a fixed-angle knife sharpener tool.
Honing Rod
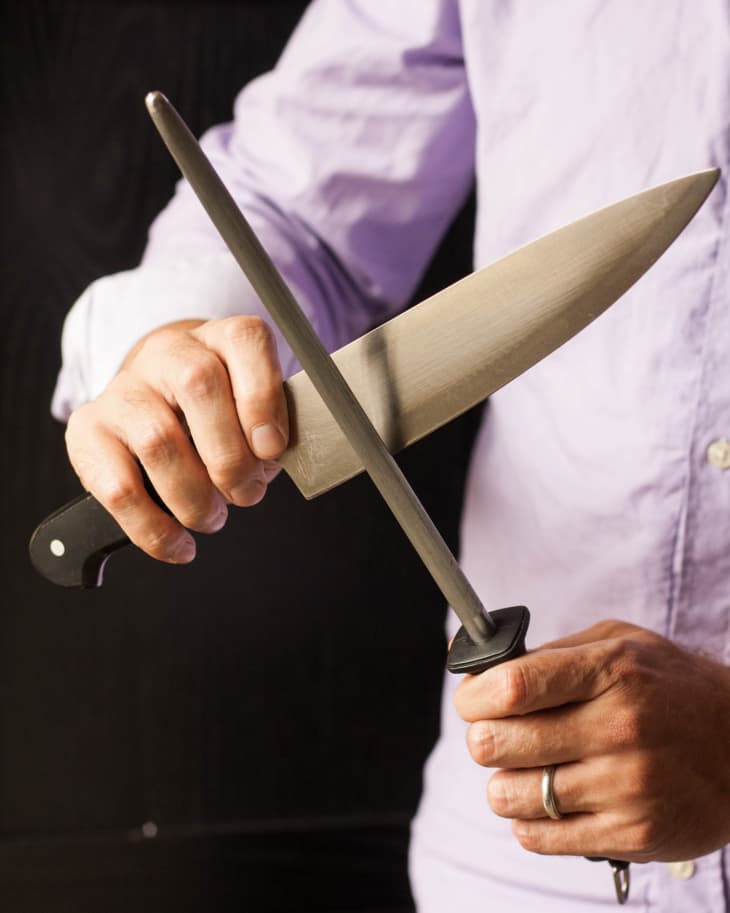
A honing rod is not a full sharpening tool. It is best for maintaining a knife that is still fairly sharp. Ceramic rods can remove a small amount of metal, while traditional steel rods mainly realign the edge.
:max_bytes(150000):strip_icc()/faw-primary-knife-sharpeners-aug-24-nsimpson-89-1-617608fed6bf49e5831273cd2e7e0c69.jpeg)
How to Use a Manual Knife Sharpener Tool
A manual pull-through sharpener is often the easiest place to start. Follow these steps for a safe and even result.
1. Clean and Inspect the Knife
Wash and dry the knife first. Look for chips, bends, rust, or deep damage. A basic kitchen knife sharpener tool can improve dullness, but it may not repair a badly chipped or cracked blade.
Check the handle, too. If it is loose, repair or replace the knife before sharpening. A damaged handle can make the process unsafe.
2. Place the Sharpener on a Stable Surface
Set the sharpener on a flat counter. Hold the handle firmly if the tool has one. Some models include suction cups or a non-slip base.
Never hold a small sharpener in your hand while pulling the blade through it. If the tool moves, the knife may slip toward your fingers.
3. Select the Correct Slot
Start with the coarse slot only if the knife is very dull or damaged. For routine maintenance, use the fine or ceramic slot first.
A typical order is:
-
Coarse slot for repair
-
Fine slot for sharpening
-
Ceramic slot for smoothing
Do not use every slot automatically. Removing metal without a reason shortens the useful life of the blade.
4. Hold the Knife Correctly
Hold the knife by its handle. Keep your fingers behind the heel of the blade. Place the heel into the slot first, unless the manufacturer gives different instructions.
Keep the blade upright. Do not twist it from side to side as you pull.
5. Pull the Blade Through Slowly
Pull the knife from heel to tip in one smooth motion. Use light pressure. The abrasive parts should do the work.
Most manual knife sharpener tools need a small number of passes, often three to six. Follow the instructions for your model. Do not saw the blade back and forth through the slot.
6. Refine the Edge
If needed, move to the fine slot. Use the same slow motion and light pressure. This step removes roughness and helps create a cleaner edge.
Wipe the blade with a damp cloth after sharpening. Tiny metal particles may remain on the surface. Wash and dry the knife before using it with food.
7. Test the Knife Safely
Do not test sharpness with your thumb. Try slicing a sheet of paper or a soft food such as a tomato.
A sharp knife should cut with little force. If it crushes the tomato or tears the paper, it may need another light pass through the fine slot.
How to Use an Electric Knife Sharpener Tool
An electric knife sharpener tool can save time, but technique still matters. Begin by reading the manual and checking whether the device is designed for your blade type.
Use this process:
-
Place the sharpener on a dry, stable counter.
-
Turn on the device before inserting the knife, if the manual says to do so.
-
Put the heel of the blade into the correct slot.
-
Pull the blade toward you at a steady speed.
-
Keep the knife straight and use minimal downward pressure.
-
Repeat the same number of passes on both sides.
-
Use the finishing slot if the sharpener includes one.
Never leave the blade in the spinning slot. Do not force a thick blade into a narrow opening. Stop if you hear unusual sounds, see sparks, or notice heat building on the edge.
Electric sharpeners are convenient, but they can remove metal quickly. For expensive Japanese knives, handmade blades, or thin specialty knives, confirm that the device supports the blade’s angle and steel type.
How to Use a Whetstone
A whetstone requires more skill, but it offers excellent control. Soak the stone only if the instructions require soaking. Some stones are splash-and-go models and need only a little water on the surface.
Place the stone on a non-slip base. Hold the knife at the recommended angle, often around 15 to 20 degrees per side for many kitchen knives. The correct angle depends on the knife, so follow the maker’s guidance when available.
Move the blade across the stone from heel to tip. Use even strokes and cover the entire edge. After several strokes, check for a small burr on the opposite side. This burr shows that you have reached the edge.
Turn the knife over and repeat the process. Finish with lighter strokes on a finer section of the stone. Rinse, dry, and store the stone according to its instructions.
My first mistake with a whetstone was lifting the handle at the end of each stroke. That created a rounded tip instead of a smooth edge. Keeping the angle steady felt awkward at first, but slow movements made a major difference.

How to Choose the Correct Sharpening Angle
The sharpening angle is the angle between the blade and the abrasive surface. A lower angle creates a thinner, sharper edge, but that edge may be more delicate. A higher angle creates a stronger edge, but it may not feel as fine.
General guidance includes:
• Around 15 degrees per side for many thin Japanese-style kitchen knives
• Around 20 degrees per side for many Western kitchen knives
• Around 20 to 25 degrees per side for heavier utility and outdoor knives
These numbers are general, not universal. The original factory angle, steel quality, blade thickness, and intended use all matter.
A fixed-angle knife sharpener tool can help beginners maintain consistency. With a whetstone, you can use a guide clip or practice with a marker. Color a small section of the bevel with a marker, then make a few strokes. If the marker disappears evenly, your angle is close.
How Much Pressure Should You Use?
Use less pressure than most people expect. Heavy pressure can create an uneven edge and remove too much metal.
A useful guide is:
• Use firm but gentle pressure with a coarse abrasive.
• Use light pressure with a fine abrasive.
• Use almost no pressure for final polishing strokes.
Imagine you are wiping water from a glass surface. That mental image helps prevent forceful movements. The abrasive should cut the steel, not your muscles.
If the knife makes a harsh scraping sound, you may be pressing too hard or using the wrong slot. Smooth, controlled contact is better than speed.
How to Sharpen Different Knife Blades
Not every knife should be sharpened in the same way.
Straight-Edge Knives
Chef’s knives, paring knives, utility knives, and many pocket knives work with standard sharpening slots. Keep the blade straight and sharpen both sides evenly.
Serrated Knives
Serrated knives have teeth and recessed areas. A standard pull-through knife sharpener tool may damage them. Use a tapered ceramic rod or a sharpener designed for serrated blades.
Sharpen only the beveled side of each tooth. Do not flatten the opposite side unless the manufacturer gives different instructions.
Single-Bevel Knives
Some traditional Japanese knives have one sharpened side and a nearly flat back. These require a specialized method. Sharpening both sides like a Western chef’s knife can change the blade’s design and cutting performance.
Ceramic Knives
Ceramic blades need a diamond abrasive designed for ceramic. Many ordinary sharpeners are not suitable. When a ceramic blade has a large chip, professional service is often the safest choice.

Common Mistakes to Avoid
Small technique errors can reduce performance or damage the blade. Avoid these common problems:
• Using a coarse slot on every knife: This removes metal quickly and may shorten blade life.
• Pressing too hard: Heavy pressure can create an uneven bevel.
• Moving the blade back and forth: Most pull-through tools are designed for one-way passes.
• Sharpening at different angles: An inconsistent angle creates a weak or uneven edge.
• Ignoring the tip: Pull the blade through fully so the tip reaches the abrasive.
• Using a damaged sharpener: Loose parts or worn abrasives can produce poor results.
• Testing the edge with your finger: A sharp knife can cause a serious cut even when it feels smooth.
• Sharpening wet or dirty blades: Food and moisture can affect control and cleanliness.
One lesson I learned after damaging a favorite utility knife is simple: more sharpening is not always better. The goal is to restore the edge, not reshape the entire blade during every session.
How Often Should You Use a Knife Sharpener Tool?
There is no single schedule for every kitchen. Frequency depends on how often you cook, what you cut, the knife’s steel, and the cutting surface.
As a general guide:
• Hone a frequently used knife every few uses or whenever it feels slightly off.
• Sharpen a home kitchen knife every one to three months when used often.
• Sharpen less-used knives when they begin to crush, slip, or tear food.
Use a cutting board made from wood or soft plastic. Glass, stone, and ceramic boards can dull a blade quickly. Store knives in a block, sheath, or magnetic strip rather than loose in a drawer.
How to Know When a Knife Is Sharp
A sharp knife should start a cut without much force. It should slice through food instead of crushing it.
Useful checks include:
• Slice paper carefully away from your body.
• Cut a ripe tomato with gentle pressure.
• Slice an onion without forcing the blade down.
• Look for a clean, even edge under good light.
A shiny line along the edge may indicate a flat or damaged section. A sharp edge usually reflects less light because it comes to a fine point.
Remember that sharpness and safety work together. A sharp knife is easier to control, but it still requires careful handling and proper storage.
Cleaning and Maintaining Your Sharpener
Maintenance helps your knife sharpener tool work correctly for longer.
Follow these habits:
• Brush away metal filings after use.
• Wipe the housing with a dry or slightly damp cloth.
• Do not immerse an electric sharpener in water.
• Replace worn abrasive parts when the manufacturer recommends it.
• Keep whetstones flat by leveling them when needed.
• Store manual tools in a dry place.
A clogged abrasive surface may feel less effective. However, do not use oil or household cleaners unless the instructions specifically allow them. The wrong substance can damage the abrasive or contaminate the tool.
When to Use a Professional Sharpener
Home sharpening works well for routine maintenance, but some blades need expert care. Consider professional service when the knife has:
• Large chips
• A bent or broken tip
• Deep rust or pitting
• A loose handle
• A very thin or valuable blade
• A complex single-bevel or specialty edge
Professional sharpening may also be useful if you are unsure about the correct angle. A skilled sharpener can remove less metal and restore the original shape more accurately than an aggressive home tool.
Frequently Asked Questions About How to Use a Knife Sharpener Tool
Should I sharpen a knife wet or dry?
Most manual and electric sharpeners are used dry, while some whetstones require water. Always follow the instructions for your specific tool because using water or oil incorrectly can damage it.
How many times should I pull a knife through a sharpener?
Many sharpeners need three to six slow passes, but the exact number varies. Stop when the knife cuts cleanly rather than continuing to remove metal.
Is a honing rod the same as a knife sharpener tool?
No. A honing rod mainly realigns a slightly bent edge, while a sharpening tool removes metal to create a new edge. Use honing for regular maintenance and sharpening when the knife remains dull.
Can I use a pull-through sharpener on a serrated knife?
Usually, no. Use a sharpener made for serrated blades unless the manufacturer clearly says the tool supports them.
What angle should I use to sharpen a kitchen knife?
Many kitchen knives use about 15 to 20 degrees per side. The correct angle depends on the knife, so check the manufacturer’s guidance when possible.
How can I tell if I am using too much pressure?
If the blade makes a harsh scraping sound, feels difficult to pull, or loses too much metal, you may be pressing too hard. Use light, steady pressure and let the abrasive do the work.
Can a knife sharpener damage my knife?
Yes, especially if you use the wrong slot, apply heavy pressure, or sharpen a specialty blade with an unsuitable tool. Choose a sharpener that matches the blade type and use the least aggressive setting needed.
Conclusion
Using a knife sharpener tool becomes much easier when you focus on three habits: choose the correct slot, hold a steady angle, and use light pressure. Clean the blade first, sharpen from heel to tip, refine the edge, and test it safely with food or paper.
Start with an inexpensive, straight-edge kitchen knife and practice slowly. With a little care, you can keep your knives safer, sharper, and more enjoyable to use. Explore more knife-care guides, share your sharpening experience, or leave a comment with the tool that works best in your kitchen.