
To put water in an ice maker, fill its marked reservoir with clean water and start the ice-making cycle.
Learning how to put water in an ice maker is simple once you know which type you have. Countertop ice makers usually need manual filling, while refrigerator ice makers may use a water line, a refillable tank, or both. This guide explains each method, shows common mistakes to avoid, and shares practical tips for making clean ice safely.
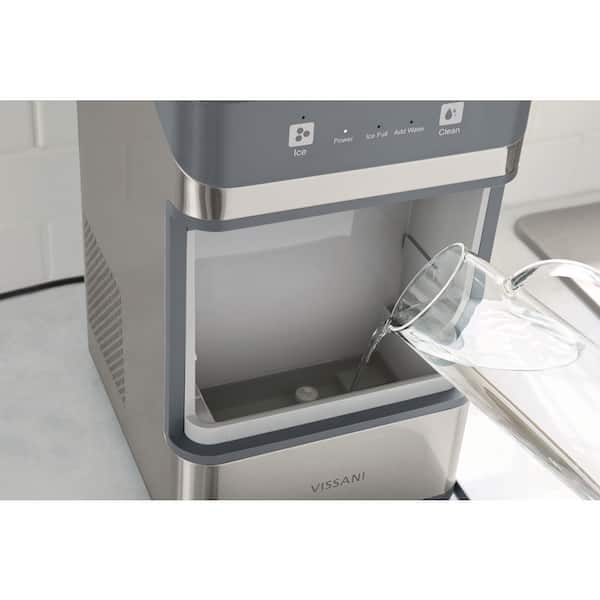
Identify Your Ice Maker Type
Before learning how to put water in an ice maker, check how the machine gets its water. The steps differ by model, and using the wrong method can cause leaks or poor ice production.
Most home ice makers fit into one of these groups:
• Countertop ice maker with a built-in water reservoir
• Refrigerator ice maker connected to a water supply line
• Refrigerator ice maker with a refillable internal tank
• Portable ice maker with a removable water basket or tank
A countertop machine is the easiest to fill. You pour water into a marked reservoir, turn the unit on, and select the ice size. A plumbed refrigerator ice maker fills itself through a small valve when the machine calls for water.
Look for labels such as “MAX,” “WATER,” or “FILL.” If you cannot find a tank, do not pour water into the ice storage basket. The basket holds finished ice, not water, and filling it may damage the machine.
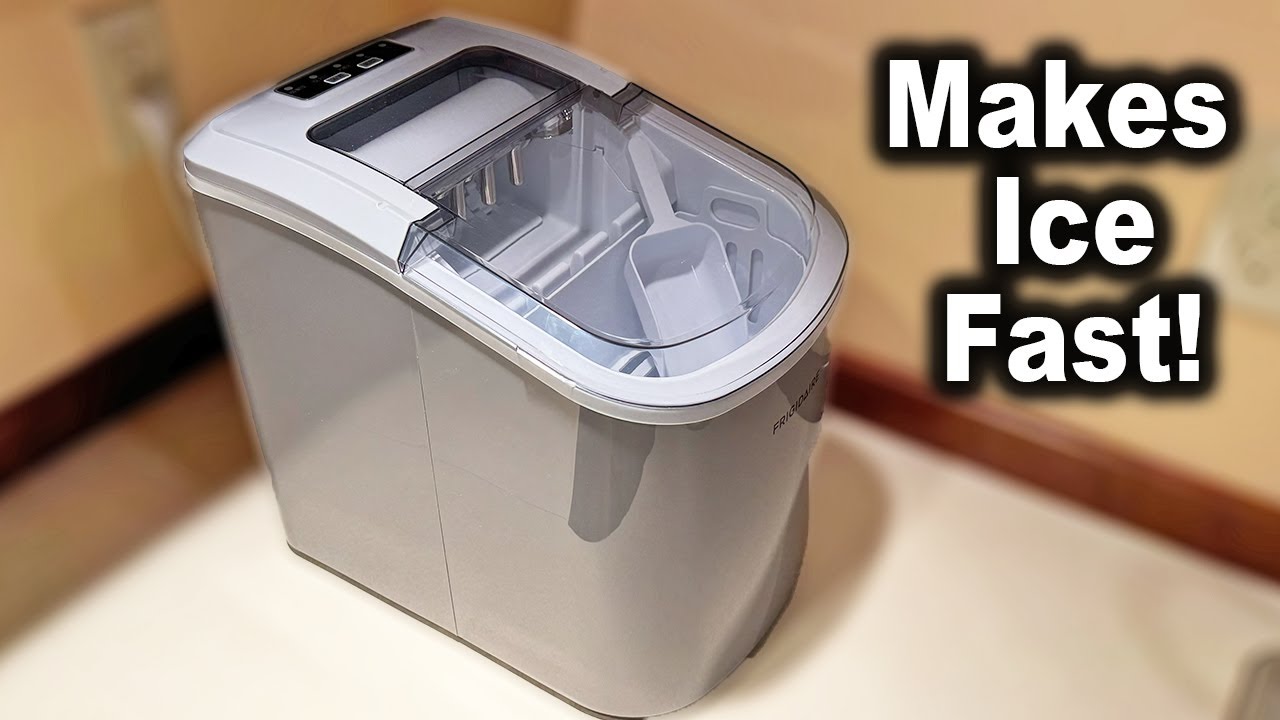
How to Put Water in a Countertop Ice Maker
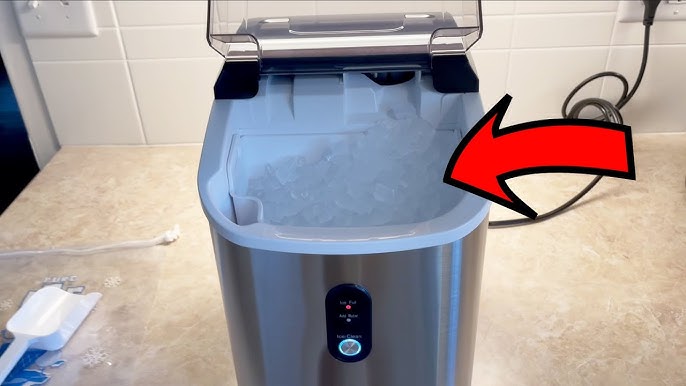
Countertop ice makers are common in kitchens, offices, RVs, and dorms. They usually have a water tank under the top lid or behind the ice basket.
Follow these steps:
-
Place the ice maker on a level, dry surface near a grounded outlet.
-
Remove the ice basket if it blocks the water tank.
-
Find the reservoir and its maximum fill line.
-
Pour in cold or room-temperature drinking water.
-
Stop before the water reaches the MAX line.
-
Put the ice basket back in place.
-
Close the lid and plug in the machine.
-
Press the power, start, or ice button.
The machine may take several minutes to begin making ice. Most portable models first pump water over a cold metal evaporator. Ice then forms around small metal prongs or a chilled tray.
When learning how to put water in an ice maker, avoid filling the tank above the marked line. Extra water can spill into the fan, controls, or electrical parts. It can also make the water pump work poorly.
In my experience testing small countertop units, the most common mistake is pouring water into the ice basket instead of the reservoir. The basket often looks like the right place because it is easy to reach. Check the label first, and you will avoid a messy cleanup.
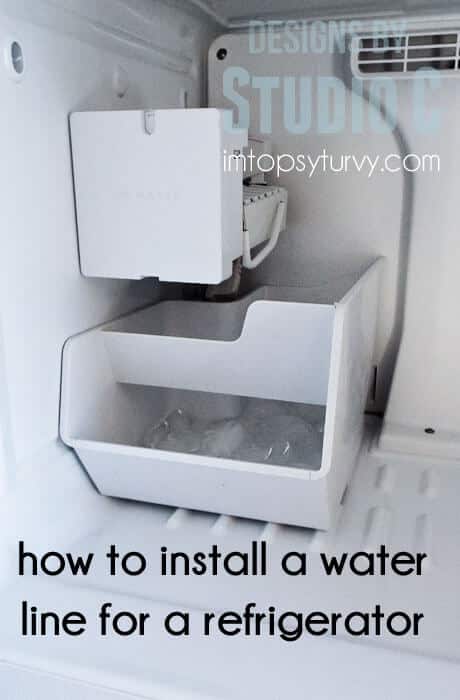
How to Fill a Refrigerator Ice Maker
Many refrigerator ice makers do not need manual filling. They use a water supply line connected to the back of the refrigerator. When the ice mold needs water, an inlet valve opens and sends in a measured amount.
To check a plumbed refrigerator ice maker:
• Confirm that the refrigerator is connected to a water line.
• Make sure the shutoff valve is open.
• Check that the ice maker arm or switch is turned on.
• Confirm that the refrigerator water filter is installed correctly.
• Look for kinks, leaks, or crushed tubing behind the unit.
After installation, the ice maker may need time to fill. Some models take several hours to produce the first batch. The first few batches may also contain air, dust, or tiny particles from the new water line, so many appliance makers recommend discarding them.
If your refrigerator has a fill tube, inspect it for ice. A frozen fill tube can stop water from entering the mold. Do not use a sharp tool to remove the ice. Turn off the ice maker and let the tube thaw, or follow the manufacturer’s service instructions.
A refrigerator with a refillable tank works differently. Open the refrigerator door, remove the tank if designed for removal, and fill it with drinking water. Reinstall it firmly so the valve seats correctly.
This is an important part of understanding how to put water in an ice maker. Some refrigerators need a water line, while others need a tank. Always follow the owner’s manual for your exact model.
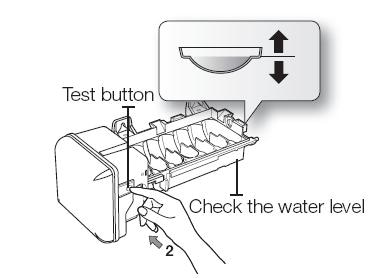
How Much Water Should You Add?
Use enough water to reach the reservoir’s fill mark, but never go past it. The right amount depends on the size of the machine and the ice cycle.
A small portable ice maker may hold about 1.5 to 3 quarts of water. Larger units may hold more. The water tank label is more reliable than a general estimate.
If there is no clear line, check the manual before filling the tank. Guessing can lead to overflow or weak ice production.
Here are useful signs:
• Too little water may trigger a “low water” light.
• Too much water may cause spills or leaks.
• Correct water levels help the pump run smoothly.
• A low tank can make hollow or very small ice.
• A full tank does not always make one full basket of ice.
Ice makers use water in cycles. The tank may still hold water after one batch finishes. Do not refill it every time you remove ice unless the low-water indicator appears.

What Type of Water Is Best?
Use clean, safe drinking water. Filtered tap water usually works well and may improve taste. Bottled water can also work, but it is not required unless your tap water is unsafe or has a strong taste.
Avoid these water types:
• Carbonated water
• Juice or flavored drinks
• Milk
• Hot water
• Salt water
• Water with added oils or powders
Hot water can stress some plastic tanks and may reduce the machine’s cooling performance. It can also create steam or condensation near electrical parts.
Distilled water is usually safe, but some machines may detect its low mineral content less easily. If your unit gives a low-water warning while the tank is full, try filtered tap water and check the manual.
Water quality affects more than flavor. Hard water can leave mineral scale on the water sensor, pump, and evaporator. Over time, this buildup can reduce ice production and cause odd noises.

How to Start the Ice-Making Cycle
Once you learn how to put water in an ice maker, starting the cycle is usually easy. Make sure the machine is plugged in, the basket is installed, and the lid is closed.
Press the button labeled “Power,” “On,” “Start,” or “Ice.” Some models require you to select small, medium, or large ice before the cycle begins.
The first batch may be smaller or wetter than later batches. This is normal for many countertop units because the machine and water need time to reach the correct temperature.
Do not expect the ice to be as hard as ice from a freezer. Portable ice makers often make clear or bullet-shaped ice that melts faster. Move finished ice to a freezer if you want to keep it for later.
Never run a machine without water unless the manual says it supports that function. A dry pump can make noise and may wear out sooner.

Cleaning and Refilling the Water Reservoir
Clean water does not keep an ice maker clean by itself. The tank, basket, scoop, and internal water path need regular care.
Before cleaning, unplug the machine and remove all ice. Drain the remaining water from the drain plug or tank. Wash removable parts with warm water and mild dish soap.
For mineral buildup, use the cleaning method listed in the manual. Some manufacturers allow a diluted food-safe descaling solution or white vinegar solution. Others require a specific cleaner.
Do not mix vinegar with bleach or any other cleaning product. Never use harsh chemicals inside a food-contact appliance unless the manufacturer clearly approves them.
A simple cleaning routine includes:
• Wipe the tank after each use when practical.
• Drain old water if the machine will sit unused.
• Wash the ice basket and scoop often.
• Descale the water path when mineral deposits appear.
• Rinse well after cleaning.
• Let the unit dry with the lid open.
As a practical rule, clean a frequently used countertop ice maker at least every few weeks. Clean it sooner if the ice smells strange, looks cloudy from buildup, or the tank feels slimy.
Common Mistakes to Avoid
Small errors can make an ice maker seem broken. Most are easy to prevent.
Filling the ice basket
The ice basket is designed to collect ice. It is not the water reservoir. Water poured there may leak into areas that should remain dry.
Overfilling the tank
The MAX line leaves room for water movement. Filling above it can cause spills when the pump starts or when the machine is moved.
Using warm or dirty water
Warm water can slow the first cycle. Dirty water can create odors and leave residue inside the machine.
Blocking the air vents
Ice makers need airflow to remove heat. Leave open space around the vents, especially at the rear and sides.
Moving the machine right away
After adding water, keep the unit level. If you move it while water is in the tank, water may enter the wrong area.
Ignoring the manual
Model designs vary. The manual will show the tank location, water capacity, cleaning method, and error light meanings.
One lesson I have learned from using portable ice makers is to treat them like small appliances, not simple trays. They have pumps, sensors, fans, and control boards. A little care helps them work better and last longer.

Troubleshooting Water and Ice Problems
If the ice maker does not make ice after you add water, check the basics first. Make sure the machine has power and that the water tank is above the minimum level.
Try these steps:
-
Turn the machine off.
-
Unplug it for several minutes.
-
Drain and refill the reservoir with clean water.
-
Check the basket and lid position.
-
Clean the water sensor and tank area.
-
Confirm that the room is not too hot.
-
Restart the ice cycle.
A “water shortage” warning can appear when the sensor is dirty, even when water is present. Mineral scale may prevent the sensor from detecting the correct level.
If the unit makes a humming sound but does not pump water, the pump may be blocked, frozen, or worn. Unplug the machine and follow the cleaning instructions. Do not open the electrical housing unless you are qualified to repair appliances.
For a refrigerator ice maker, check the water line, filter, shutoff valve, and fill tube. If the refrigerator leaks, trips a breaker, or shows repeated error codes, stop using it and contact a qualified appliance technician.
Safety Tips for Adding Water
Water and electricity require care. Follow these safety habits whenever you use an ice maker:
• Unplug the unit before cleaning or moving it.
• Keep the power cord and outlet dry.
• Use a grounded outlet when required.
• Do not pour water near vents, switches, or plugs.
• Keep the machine on a stable, level surface.
• Do not use a damaged cord or leaking unit.
• Keep children from placing objects inside the machine.
• Use only drinking water intended for food use.
Food safety also matters. Ice can pick up odors and germs from a dirty tank or scoop. Wash your hands before handling ice, and store finished ice in a clean container if you move it to the freezer.
If you notice mold, a strong chemical smell, or repeated slime after cleaning, stop using the machine until the cause is fixed. Replacing a contaminated water filter or having the unit serviced may be safer than continuing to use it.
How to Put Water in an Ice Maker: A Simple Checklist
Use this checklist each time you fill a countertop model:
• Identify the water reservoir.
• Remove the ice basket if needed.
• Use clean, cool drinking water.
• Fill only to the MAX line.
• Replace the basket and close the lid.
• Plug in the machine.
• Press the start or ice button.
• Wait for the first cycle to finish.
• Remove ice with a clean scoop.
• Drain and clean the machine when it is not in use.
For a refrigerator model, do not pour water into the ice mold unless the manufacturer specifically says to do so. Check the water line or internal tank instead.
This basic process makes how to put water in an ice maker much less confusing. The key is to find the correct reservoir and let the machine control the water flow.
Frequently Asked Questions About How to Put Water in an Ice Maker
Do you pour water directly into an ice maker?
You can pour water into a countertop ice maker’s labeled reservoir. Do not pour water into the ice basket or into a refrigerator ice mold unless the manual specifically instructs you to do so.
How much water do I put in an ice maker?
Fill the reservoir up to, but not beyond, the MAX line. The correct capacity varies by model, so use the tank marking or owner’s manual rather than guessing.
Can I use tap water in an ice maker?
Yes, clean tap water is usually suitable if it is safe to drink. Filtered water may improve taste and can reduce mineral buildup in areas with hard water.
Why does my ice maker say “add water” when it is full?
The water sensor may be dirty, blocked by mineral scale, or unable to detect water correctly. Unplug the unit, clean the reservoir and sensor area as directed, then refill it with clean water.
Should I use hot or cold water in an ice maker?
Use cool or room-temperature drinking water. Hot water may slow the machine, stress some parts, and increase the risk of spills or condensation near electrical components.
Can I leave water in my portable ice maker?
It is better to drain the water when the machine will not be used for a day or more. Standing water can develop odors, slime, or microbial growth.
Why is my refrigerator ice maker not filling with water?
A closed shutoff valve, blocked filter, frozen fill tube, kinked water line, or faulty inlet valve can stop the flow. Check the simple causes first, then contact a technician if the problem continues.
Conclusion
Knowing how to put water in an ice maker starts with identifying the machine type. Fill a countertop reservoir to the MAX line, use clean drinking water, and never pour water into the ice basket. Refrigerator models may fill through a water line or an internal tank, so the owner’s manual remains the best guide for model-specific steps.
Keep the tank, scoop, and water path clean. Avoid overfilling, hot water, blocked vents, and unsafe electrical contact. With these habits, your ice maker can produce fresh ice with fewer leaks, odors, and error warnings. Try the steps above, check your model’s instructions, and share your ice maker tips or questions in the comments.