Kitchen cabinet handles shape how your kitchen looks, feels, and works every day.
I’ve designed and installed thousands of kitchen cabinet handles in real homes. In this guide, I’ll show you how to choose, size, place, and care for kitchen cabinet handles with confidence. If you want handles that look great and feel right in your hand, you’re in the right place.

What Are Kitchen Cabinet Handles?
Kitchen cabinet handles are the parts you grab to open doors and drawers. They can be pulls, knobs, or edge grips. They seem small, but they drive comfort, speed, and style in daily use.
Good handles reduce hand strain. They guide the eye across the room. They also protect cabinet faces from oily fingers. Quality hardware can make a budget kitchen look luxe, while poor picks can age a new space fast.
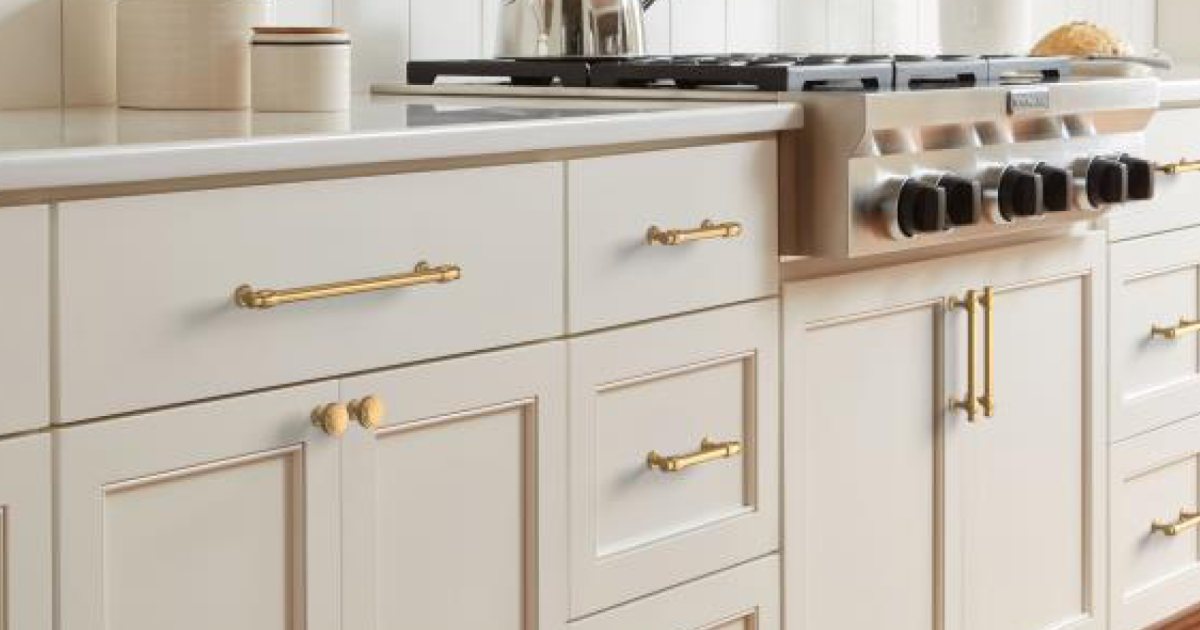
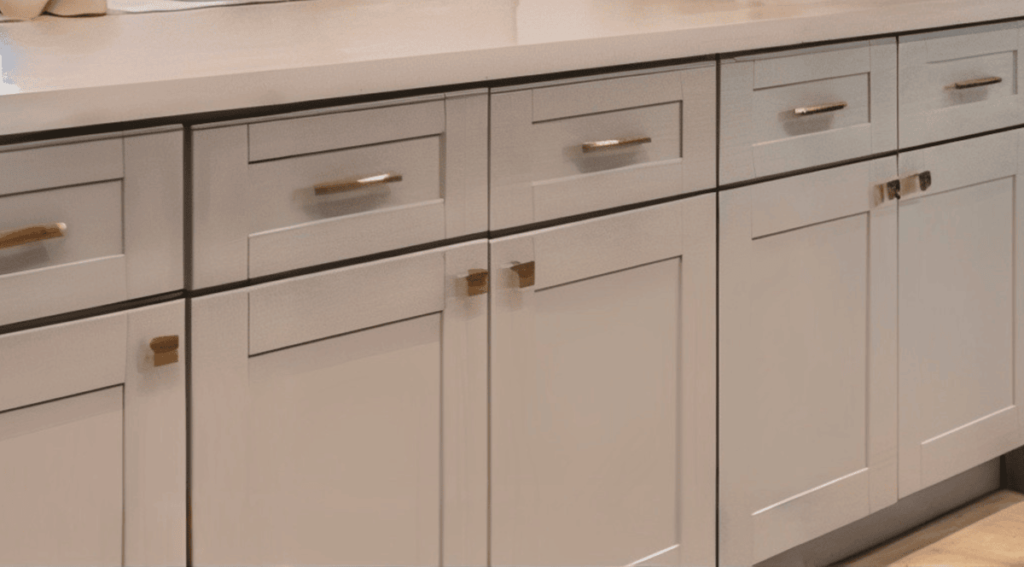
Many homeowners mix knobs for doors and pulls for drawers. That gives easy grip without visual clutter. The key is to match size, shape, and finish to your design and your hands. Kitchen cabinet handles should feel natural, even with wet or soapy fingers.

Types of Kitchen Cabinet Handles
There are many forms. Each has clear pros and cons.
Pulls
Long bars or curved pieces that you grab with your whole hand. Great for drawers and heavy doors.
- Pros: Easy to grip, fast to use, modern look.
- Cons: More holes to drill, can look busy if overused.
Knobs
Single points you pinch or hook with a finger.
- Pros: Simple, low cost, easy to swap.
- Cons: Less leverage on wide drawers, can twist in your hand.
Cup pulls
Half-moon pulls you grip from below.
- Pros: Classic look, hides fingerprints on top surface.
- Cons: Not ideal for tall doors or people with large hands.
Bar pulls
Straight bars with posts at each end.
- Pros: Clean lines, many sizes, easy to line up.
- Cons: Ends can catch clothes if they stick out too far.
Edge pulls and finger pulls
Thin pieces mounted on the top or side of a door or drawer.
- Pros: Minimal look, great for flat fronts.
- Cons: Less comfy for heavy drawers; needs precise fit.
Recessed pulls
Built into the face so they sit flush.
- Pros: Sleek, safe for tight walkways.
- Cons: More complex install; dust can collect inside.
Handleless with channels
No visible hardware; a routed channel or rail creates a grip.
- Pros: Ultra modern, very clean.
- Cons: Higher cost and maintenance; can trap crumbs.
Tip from the field: In busy family kitchens, I often pair 6 to 12 inch pulls on drawers with small knobs on doors. It balances comfort and cost while keeping kitchen cabinet handles visually calm.
Materials and Finishes
Your choice affects look, feel, and longevity.
- Stainless steel: Strong, corrosion resistant, timeless. Brushed is great for busy homes.
- Solid brass: Warm tone, weighty feel, ages to a patina unless sealed.
- Zinc alloy: Budget friendly, wide styles, lighter weight.
- Aluminum: Light, modern, resists rust; can dent if thin.
- Bronze: Deep tone, rustic charm; oil-rubbed finishes hide prints.
- Black finishes: Powder coat or PVD for better scratch resistance.
- Nickel and chrome: Satin nickel is soft and subtle; chrome is bright and reflective.
- Wood or leather accents: Warm touch, softer on hands, needs more care.
- Ceramic or glass: Decorative and vintage; be mindful with kids.
Look for finishes rated for high use. PVD coatings and quality powder coats resist wear and salt in kitchens near the coast. If you love brass, choose unlacquered for a living finish or sealed brass for stable color.

Style and Design: Matching Your Kitchen Aesthetic
Kitchen cabinet handles should fit the room’s story.
- Modern: Slim bar pulls, matte black or satin stainless, long lines.
- Transitional: Simple pulls with soft edges, satin brass or nickel.
- Traditional: Cup pulls and classic knobs, bronze or polished nickel.
- Farmhouse: Cup pulls with porcelain or wood knobs, warm brass or black.
- Scandinavian: Thin edge pulls, light finishes, low visual noise.
Use visual weight to guide choices. Big shaker doors can carry long pulls. Small slab drawers may need short pulls or knobs. Try laying a few options on a door to see how they balance. I keep a “hardware kit” in my bag so clients can feel grip, texture, and weight before we commit.
Pro tip: Repeat finish colors in faucets, lights, or stools for unity. Mixed metals can work, but anchor with one main finish and add a secondary in small doses.

Sizing and Placement: The Ergonomics That Matter
Size and position affect comfort more than any other factor.
- Pull length: A good rule for drawers is about one third of the drawer width. For a 24 inch drawer, an 8 inch pull looks and feels right.
- Centers (hole spacing): Common sizes are 3, 3.75, 5, 6.25, and 8 inches. Pick a standard and stick with it to keep symmetry.
- Hand clearance: Leave space between pull and cabinet to fit fingers, at least 1.25 inches.
- Door placement: Knobs go 2 to 3 inches from the door edge, centered vertically on the rail. Pulls go at the same distance from the edge, aligned with the stile.
- Drawer placement: Center pulls vertically. For tall drawers, two pulls can prevent racking.
- Tall pantry doors: Use two pulls or one long pull, 10 to 18 inches, placed near hand height.
If mobility is a concern, choose larger pulls with smooth edges. They work better for small hands, big hands, and aging joints. I test placement with tape before drilling. A few minutes here saves hours later.

Measuring and Installation Guide
You can install kitchen cabinet handles with basic tools.
- Gather tools: Tape, pencil, hardware template or jig, drill, sharp brad-point bit, level, screwdriver, blue tape.
- Mark holes: Use a jig for repeat work. Check every door swing before drilling.
- Prevent tear-out: Use blue tape on both sides and drill from the finished face halfway. Then finish from the back.
- Keep straight lines: Level your first row. Use the same reference points on every door and drawer.
- Test fit: Dry-fit one handle first. Confirm comfort and clearance.
- Final tighten: Hand-tighten screws. Do not over-torque; you can strip threads or warp wood.
Mistake to avoid: Mixing metric and inch screw lengths. Test different screws on a sample door to get a snug fit without poking through.
Cost, Quality, and Value
Budget ranges vary by material, finish, and brand.
- Entry level: 2 to 6 dollars per piece, zinc or aluminum, basic finishes.
- Mid-range: 7 to 20 dollars per piece, stainless or brass, better coatings.
- Premium: 25 to 80+ dollars per piece, solid brass, PVD, designer shapes.
Plan quantities first. A typical 10 by 10 kitchen uses 30 to 50 pieces. Buying in sets can cut cost. Value rises with good finish, solid construction, and standard hole spacing. Kitchen cabinet handles with lifetime finish warranties are worth it in humid areas.

Maintenance and Care
Keep handles clean to protect finishes and keep hands safe.
- Wipe weekly with warm water and a drop of mild dish soap.
- Dry right away to stop spots and mineral marks.
- Avoid bleach, ammonia, and abrasive pads.
- For unlacquered brass, use a gentle polish or let it age.
- For textured or knurled pulls, use a soft brush to clear grime.
If a screw loosens, add a tiny drop of thread locker. If a finish chips, replace the piece; spot fixes rarely match.

Common Mistakes and How to Avoid Them
I see the same errors again and again. Here is how to dodge them.
- Choosing style over comfort: Test grip with wet hands. Comfort wins.
- Too-small pulls on wide drawers: Use longer pulls or two pulls to spread load.
- Sharp edges: Look for chamfered or rounded profiles if kids use the space.
- Poor alignment: Use a jig and a level. Measure twice, drill once.
- Finish mismatch: Match warm metals with warm tones and cool with cool. Sample under your real lighting.
Kitchen cabinet handles should work like tools. If they hurt to use or slow you down, swap them.
Trends and Sustainability
Design shifts every year, but function stays king.
- Long pulls that span most of the drawer front.
- Knurled textures for grip and subtle detail.
- Warm metallics like satin brass with matte black accents.
- Mixed metals done with intention, not chaos.
- Recycled metals and low-VOC coatings for cleaner air.
If you care about sustainability, pick durable kitchen cabinet handles with replaceable screws, strong finishes, and standard sizes. Durable parts reduce waste and keep your look fresh for years.
Frequently Asked Questions
How many kitchen cabinet handles do I need?
Count every door and drawer. Plan a few extra for mistakes, future add-ons, or damage replacements.
Should I use knobs or pulls?
Use knobs on doors and pulls on drawers for easy grip. If you have heavy drawers, choose pulls every time.
What size pulls look best on 24 inch drawers?
Eight or 10 inch pulls usually look right and feel strong. Center them and check hand clearance.
Can I mix finishes in one kitchen?
Yes, but anchor with one main finish and use a second in small accents. Keep the sheen level consistent to avoid visual noise.
How do I avoid fingerprints?
Choose brushed, satin, or textured finishes. Cup pulls also hide prints on the top surface.
Are black kitchen cabinet handles durable?
Yes, if they use quality powder coat or PVD. Cheaper paint chips faster, so check warranty terms.
What is the best way to place handles on shaker doors?
Place knobs 2 to 3 inches from the outer edge and centered on the rail. For pulls, align with the stile and match across doors.
Conclusion
Great kitchen cabinet handles blend comfort, style, and strength. Choose the right type, size them well, place them with care, and they will serve you every day. Small hardware can spark big joy each time you cook.
Try a sample set at home this week. Tape them in place. Test with wet hands and full drawers. When you are sure, install with care and enjoy the upgrade. Want more tips and sample checklists? Subscribe or drop a question in the comments so I can help.