
To clean a countertop ice maker, unplug it, wash removable parts, sanitize the water system, rinse, and dry it fully.
Learning how to clean a countertop ice maker helps protect ice quality, reduce odors, and keep the machine running well. This guide explains the safest method, common mistakes, cleaning frequency, and signs that your ice maker needs extra care.
Why You Should Clean a Countertop Ice Maker
A countertop ice maker uses water again and again. Even when the water looks clean, minerals, dust, and germs can build up inside the reservoir, ice basket, scoop, and water lines.
Dirty parts may cause:
• Cloudy or soft ice
• A stale or plastic-like taste
• Bad smells
• Slow ice production
• Slimy buildup in the water tank
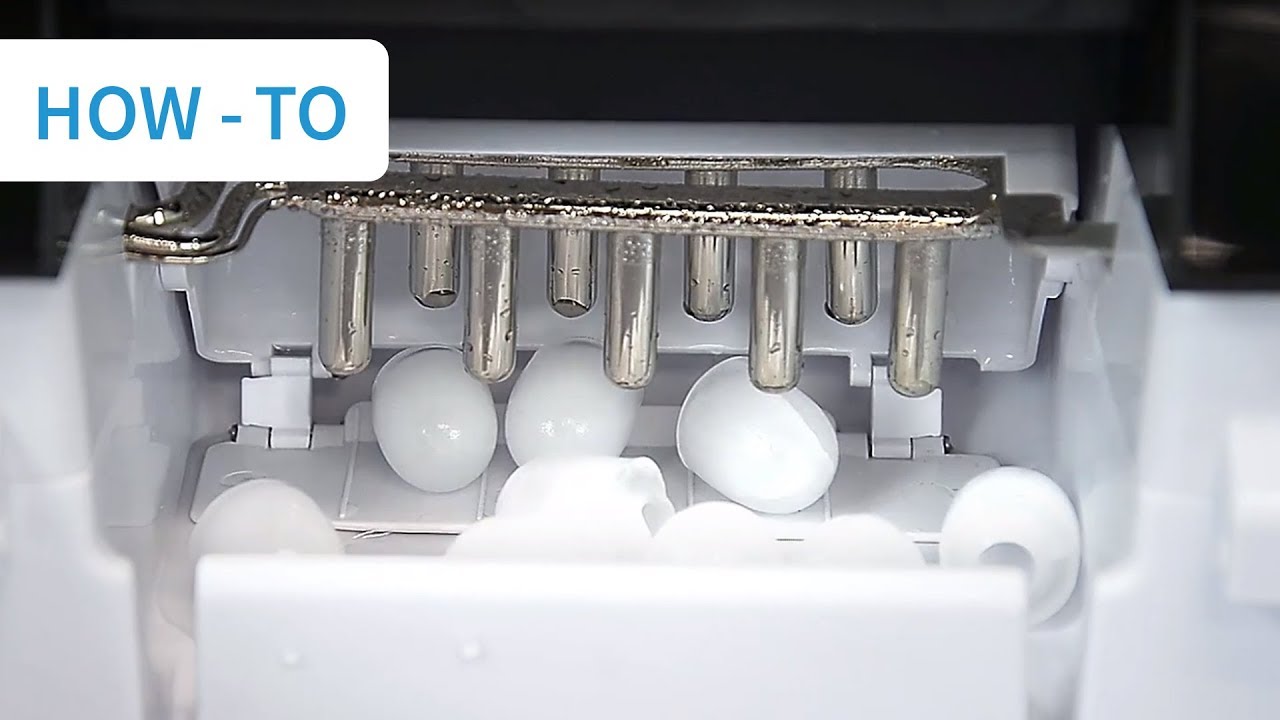
• Mineral scale on the evaporator fingers
• Mold growth in damp areas
Learning how to clean a countertop ice maker is also a food safety habit. Ice touches the same surfaces that hold drinking water, so the machine needs regular care.
The exact cleaning method can vary by brand. Always check your owner’s manual first, especially if it gives a specific cleaner or warns against vinegar. Never mix cleaning products, such as bleach and vinegar.

What You Need Before Cleaning
Gather your supplies before you start. This makes the job faster and helps you avoid using harsh products that may damage plastic or metal parts.
You will need:
• Clean water
• Mild dish soap
• A soft cloth or sponge
• A soft toothbrush or small cleaning brush
• A clean towel
• A bowl or bucket
• White vinegar or the cleaner approved by your manufacturer
• Food-safe sanitizer, if the manual allows it
Avoid steel wool, rough scouring pads, abrasive powders, and strong bathroom cleaners. These products can scratch the machine and leave behind residue.
If your model has a water filter, check whether it is washable or replaceable. Many small filters should be replaced rather than scrubbed.
How to Clean a Countertop Ice Maker Step by Step
The best way to learn how to clean a countertop ice maker is to follow a simple order: unplug, empty, wash, descale, rinse, and dry.
1. Unplug the Ice Maker
Turn off the machine and remove the plug from the wall. This protects you from electric shock and prevents the ice maker from starting during cleaning.
Move it to a clear area near a sink if possible. Keep the power cord and electrical inlet away from water.
2. Empty the Ice Basket and Water Tank
Remove all ice from the basket. Throw away ice that has been sitting in the machine during cleaning.
Drain the water reservoir. If your model has a drain plug, open it over a sink or bowl. Wipe away any water left at the bottom.
3. Remove Washable Parts
Take out the ice basket, scoop, drain plug, water filter, and other removable parts. Do not force a part that does not come out easily.
Some parts may look removable but connect to a sensor or pump. Your manual will show which parts are safe to remove.
4. Wash the Basket, Scoop, and Cover
Wash removable parts with warm water and mild dish soap. Use a soft brush to clean corners, seams, and the scoop handle.
Rinse each piece well. Soap left behind can give the next batch of ice a bitter taste.
5. Wipe the Interior
Dip a soft cloth in soapy water and wipe the water reservoir, inside walls, lid, and ice-making area. Use a soft toothbrush around the water inlet and other tight spaces.
Do not pour water over the control panel, fan openings, or electrical parts. A damp cloth is safer than spraying the entire machine.
6. Remove Mineral Scale
Mineral scale often appears as white spots or rough patches. It comes from minerals in tap water, especially hard water.
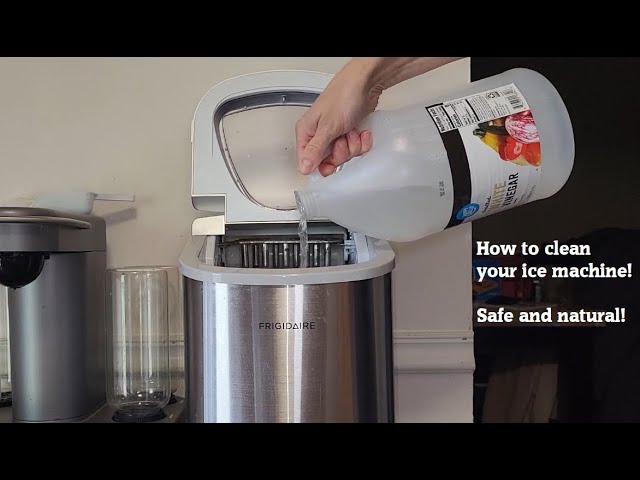
To descale the machine, use the cleaning solution recommended in the manual. If the manufacturer allows vinegar, mix equal parts white vinegar and water. Add the solution to the reservoir, then run the machine’s cleaning cycle.
If there is no cleaning cycle, let the solution sit for about 15 to 30 minutes. Do not make ice for drinking while the cleaning solution is inside.
7. Rinse the Water System
Drain the used solution completely. Fill the reservoir with clean water, run one cycle if the manual permits it, and drain the water again.
Repeat the rinse at least two times. If you still smell vinegar or cleaner, rinse again. A clean ice maker should not give ice a sharp, sour, or chemical smell.
8. Sanitize When Needed
Cleaning removes dirt and scale. Sanitizing helps reduce microorganisms on food-contact surfaces.
Use only a food-safe sanitizer approved for the machine. Follow its label carefully, including the correct dilution and contact time. Never assume that more sanitizer is better.
Rinse only if the product label says to rinse. Some sanitizers are designed for no-rinse use, while others must be washed away.
9. Dry the Machine Completely
Wipe the interior with a clean towel. Leave the lid open and allow the reservoir to air-dry.
Drying matters because moisture trapped in a dark machine can encourage mold and odor. Think of it like drying a wet lunchbox before closing it.
10. Make and Discard the First Batch
Once the machine is clean and dry, add fresh water. Make one batch of ice and discard it.
This final step removes any remaining taste or residue. After that, the ice should smell fresh and look normal.

How to Clean a Countertop Ice Maker With Vinegar
Vinegar can help dissolve light mineral scale, but it is not right for every model. Some manufacturers warn that acidic cleaners may affect seals, coatings, or certain metal parts.
If your manual permits vinegar, use this method:
- Unplug and empty the ice maker.
- Remove and wash the basket and scoop.
- Mix one part white vinegar with one part water.
- Add the mixture to the reservoir.
- Run the cleaning cycle, if available.
- Let the solution sit for 15 to 30 minutes if the manual allows it.
- Drain the machine.
- Rinse with fresh water two or three times.
- Make and discard the first batch of ice.
Never mix vinegar with bleach or another cleaner. The combination can create dangerous fumes.
For heavy scale, vinegar may not be strong enough. An approved descaling product may work better, but use only the amount and method stated on the label.
How to Clean a Countertop Ice Maker Without a Cleaning Cycle
Some basic countertop ice makers do not have a built-in cleaning mode. You can still clean one by hand.
First, unplug the unit and drain the tank. Wash the removable parts with dish soap and clean the interior with a soft cloth.
Then add the approved cleaning solution to the water tank. Let it sit for the time stated in the manual. Drain it fully, rinse the tank several times, and wipe away any remaining scale.
Do not repeatedly make ice with a cleaning solution unless the manufacturer specifically instructs you to do so. In many cases, the pump is designed to move water, not chemical cleaner.

How to Clean a Countertop Ice Maker With Mold or Slime
Mold or slime usually means the ice maker stayed wet for too long. It can also develop when old water remains in the tank or when the lid stays closed between uses.
Follow these steps:
• Unplug the machine and remove all ice.
• Drain the old water.
• Wash removable parts with warm, soapy water.
• Scrub seams, corners, and the drain area with a soft brush.
• Use a manufacturer-approved sanitizer.
• Rinse or air-dry as directed.
• Leave the lid open until the machine is fully dry.
If mold remains in a hidden tube, pump, or sealed part, stop using the machine. Contact the manufacturer or a qualified appliance technician.
Do not use a household mold spray inside an ice maker. These products may leave unsafe residues on food-contact surfaces.

How Often Should You Clean a Countertop Ice Maker?
Cleaning frequency depends on use, water quality, and storage conditions. A machine used every day needs more care than one used only during parties.
A practical schedule is:
• Wipe the interior and wash the scoop every few days.
• Empty and dry the reservoir after each long period of use.
• Wash the basket and removable parts once a week.
• Descale the water system every two to four weeks.
• Sanitize when recommended by the manual or after long storage.
• Clean the machine before using it after several weeks of nonuse.
Hard water may require more frequent descaling. If you see white flakes, rough buildup, or slower ice production, clean the machine sooner.
A useful rule is simple: if you would not drink the water from the tank, do not use it to make ice.

How to Keep a Countertop Ice Maker Clean Longer
Good daily habits can make deep cleaning much easier. They also help prevent odors and mineral buildup.
Use these tips:
• Use fresh, cold drinking water.
• Do not leave water in the tank for several days.
• Empty unused ice before storing the machine.
• Wipe spills as soon as they happen.
• Wash the scoop often and store it in a clean place.
• Keep the lid open while the unit dries.
• Keep the ice maker away from dust, grease, and cooking steam.
• Use filtered water if your manual allows it.
• Replace the water filter on the recommended schedule.
Filtered water may reduce mineral buildup, but it does not remove the need for cleaning. Filters also do not make dirty surfaces safe.
One lesson many owners learn the hard way is that the scoop can be dirtier than the ice basket. Avoid touching the scoop with unwashed hands, and never place it on a wet counter.

Common Mistakes to Avoid
Even a careful cleaning can cause problems if the wrong method is used. These mistakes are easy to avoid.
Using Bleach Without Instructions
Bleach may damage parts and leave harmful residue. Use it only if the manufacturer specifically approves it and gives clear directions.
Spraying the Whole Machine
Water can enter the control panel, fan, motor, or electrical connections. Apply cleaner to a cloth instead of spraying the machine.
Skipping the Rinse
A cleaner that remains in the water system can affect ice taste and safety. Rinse until no smell or residue remains.
Scrubbing With Abrasive Tools
Rough pads can create small scratches. Those scratches can trap dirt and make future cleaning harder.
Cleaning While the Machine Is Plugged In
Always disconnect power before wiping the interior or removing parts. This is one of the simplest and most important safety steps.
Closing the Lid While It Is Wet
A closed, damp reservoir is an ideal place for odors and slime to grow. Let the machine dry with the lid open.
Signs Your Ice Maker Needs Professional Service
Cleaning can solve many common issues, but it cannot fix every problem. Contact the manufacturer or a trained technician if:
• The pump makes a loud grinding sound.
• Water leaks from the base.
• The machine trips the circuit breaker.
• Ice has a chemical taste after repeated rinsing.
• The machine keeps showing a water or cleaning error.
• Mold returns quickly after proper cleaning.
• The unit stops making ice after descaling.
• A sealed tube or internal part needs to be opened.
Do not take apart the refrigeration system yourself. Countertop ice makers contain electrical and cooling components that need proper tools and training.
How to Clean a Countertop Ice Maker Before Storage
Before storing the machine, clean and dry it fully. Old water left inside can create a strong odor and sticky residue.
Use this storage routine:
- Turn off and unplug the ice maker.
- Remove all ice.
- Drain the water reservoir.
- Wash the basket and scoop.
- Wipe the interior and exterior.
- Run the approved cleaning process.
- Rinse the water system.
- Drain it again.
- Dry all surfaces.
- Store it with the lid slightly open if the design allows.
Wrap the cord loosely. Avoid placing heavy items on top of the ice maker, as this may damage the lid or control panel.
When you use the machine again, rinse the reservoir, fill it with fresh water, and discard the first batch of ice.
Frequently Asked Questions About How to Clean a Countertop Ice Maker
How often should I clean a countertop ice maker?
Clean removable parts at least once a week if you use the machine often. Descale and sanitize the water system every two to four weeks, or more often when using hard water.
Can I use vinegar to clean a countertop ice maker?
You can use vinegar only when the manufacturer allows it. Mix equal parts white vinegar and water, then rinse the machine several times before making drinkable ice.
Can I clean a countertop ice maker with bleach?
Do not use bleach unless the owner’s manual specifically approves it. Bleach can damage components and may leave unsafe residue if it is mixed or rinsed incorrectly.
Why does my ice maker smell bad after cleaning?
A bad smell may come from trapped water, soap, cleaner, mold, or a dirty drain area. Drain the unit, rinse it again, clean the seams, and leave the lid open until every part dries.
Should I throw away the first batch of ice after cleaning?
Yes. Discard the first batch after using vinegar, descaler, sanitizer, or another cleaning product. This helps remove any remaining taste or residue.
Can I put ice maker parts in the dishwasher?
Only use a dishwasher for parts that the manual labels as dishwasher-safe. Heat can warp plastic baskets, covers, and scoops.
Why is my countertop ice maker making cloudy ice?
Cloudy ice can result from minerals, trapped air, or the quality of the water. Cleaning the water system and using approved filtered water may help, but some machines naturally make cloudy ice.
Conclusion
Knowing how to clean a countertop ice maker keeps the ice fresh and helps the machine work smoothly. Unplug the unit, wash removable parts, remove mineral scale, rinse the water system, sanitize when needed, and dry everything before storage.
Use your owner’s manual as the final guide, especially for cleaning products and removable parts. Start with a simple cleaning today, and share your best ice maker care tip or explore more appliance maintenance guides.