
To install an ice maker, connect a water line, secure the unit, check power, and test it for leaks.
Learning how to install an ice maker is easier when you treat the job like setting up a small appliance with three needs: water, power, and proper space. This guide explains the full process for refrigerator ice makers and stand-alone units, including tools, safety checks, common mistakes, and simple fixes.
Before You Install an Ice Maker
An ice maker freezes water, releases the ice into a bin, and repeats the cycle. Most refrigerator ice makers use a small water inlet valve and a thin water supply tube. Stand-alone ice makers may need only a water supply and a drain, depending on the model.
Before learning how to install an ice maker, identify the type of unit you have:
• Refrigerator ice maker: This fits inside a compatible freezer or refrigerator.
• Under-counter ice maker: This is built into a cabinet and often needs a drain.
• Portable ice maker: This usually needs no permanent water line. You fill its tank by hand.
• Commercial ice maker: This often needs special plumbing, drainage, ventilation, and electrical work.
Always read the installation instructions for your exact model. Ice makers may look alike, but their water connections, power needs, and drainage systems can differ.
Tools and Materials You May Need
Gather your supplies before you begin. A prepared work area makes the job faster and helps prevent leaks.
• Adjustable wrench
• Phillips and flat-head screwdrivers
• Drill and drill bits, if needed
• Measuring tape
• Bucket or shallow pan
• Towels
• Tubing cutter
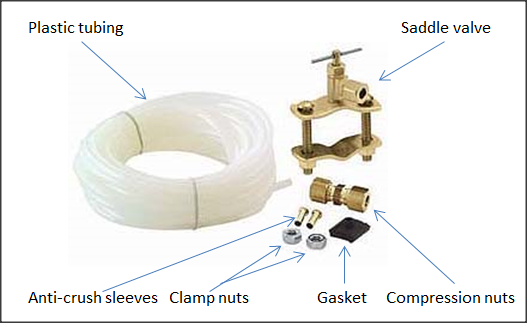
• Food-safe, appliance-rated water tubing
• Compression fittings or push-fit connectors
• Shutoff valve
• Teflon tape, if the fitting instructions allow it
• Level
• A flashlight
Use copper, braided stainless steel, or approved plastic tubing made for refrigerator water lines. Do not use a random hose from a sink or garden supply. The material must be rated for drinking water and appliance use.
Most refrigerator ice maker kits include the tubing, fittings, valve, and mounting hardware. If your kit does not include a shutoff valve, add one. A local shutoff valve lets you stop water quickly if a leak starts.
Check the Location and Water Supply
The best location has a nearby cold-water pipe, a grounded electrical outlet, and enough room for air to move around the appliance. Measure the space before moving the unit into place.
Check these points:
• The floor should be firm and fairly level.
• The appliance should not press tightly against the wall.
• The water line should not bend sharply.
• The outlet should match the voltage listed on the appliance label.
• The area should stay dry and free from extreme heat.
For a refrigerator ice maker, the back of the refrigerator usually connects to a cold-water line under the kitchen sink or behind the cabinet. For an under-counter ice maker, check whether the model uses a gravity drain or a built-in drain pump.
A gravity drain must slope downward. If the drain cannot slope down, the appliance may need a pump. Do not guess here. Poor drainage can cause standing water, odors, and damage to cabinets.
Turn Off Water and Power
Safety comes first when you install an ice maker. Water and electricity are a risky mix, even during a small repair.
Follow these steps:
-
Unplug the refrigerator or ice maker.
-
Close the home’s main water valve or the nearby cold-water shutoff valve.
-
Open a cold-water faucet to release pressure.
-
Place a bucket under the connection point.
-
Wipe the area dry before making any electrical connection.
Never work on a plugged-in appliance when water may reach the outlet. If the outlet has no ground, shows heat damage, or trips often, stop and call a licensed electrician.
In the United States, many appliances use a grounded 120-volt outlet, but the exact requirement depends on the model. Check the rating label and manual. Never remove the ground pin or use an unsafe extension cord.

How to Install an Ice Maker in a Refrigerator
The following steps apply to many standard refrigerator ice maker kits. Your model may use a different bracket or connector, so use the manual as the final guide.
1. Confirm refrigerator compatibility
Look for a model number on the refrigerator label. Check that the ice maker kit matches that model. A kit that almost fits may fail to align with the water fill tube or mounting holes.
Remove the freezer shelf or storage items that block access. Let the freezer warm slightly if ice has built up around the mounting area. Never chip thick ice with a knife, since this can damage cooling parts.
2. Locate the mounting points
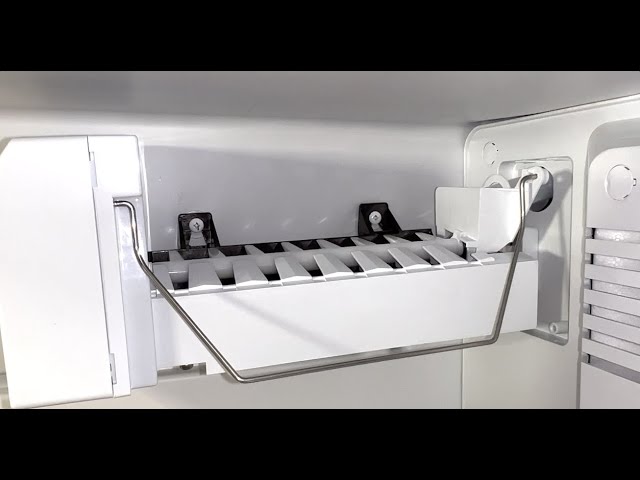
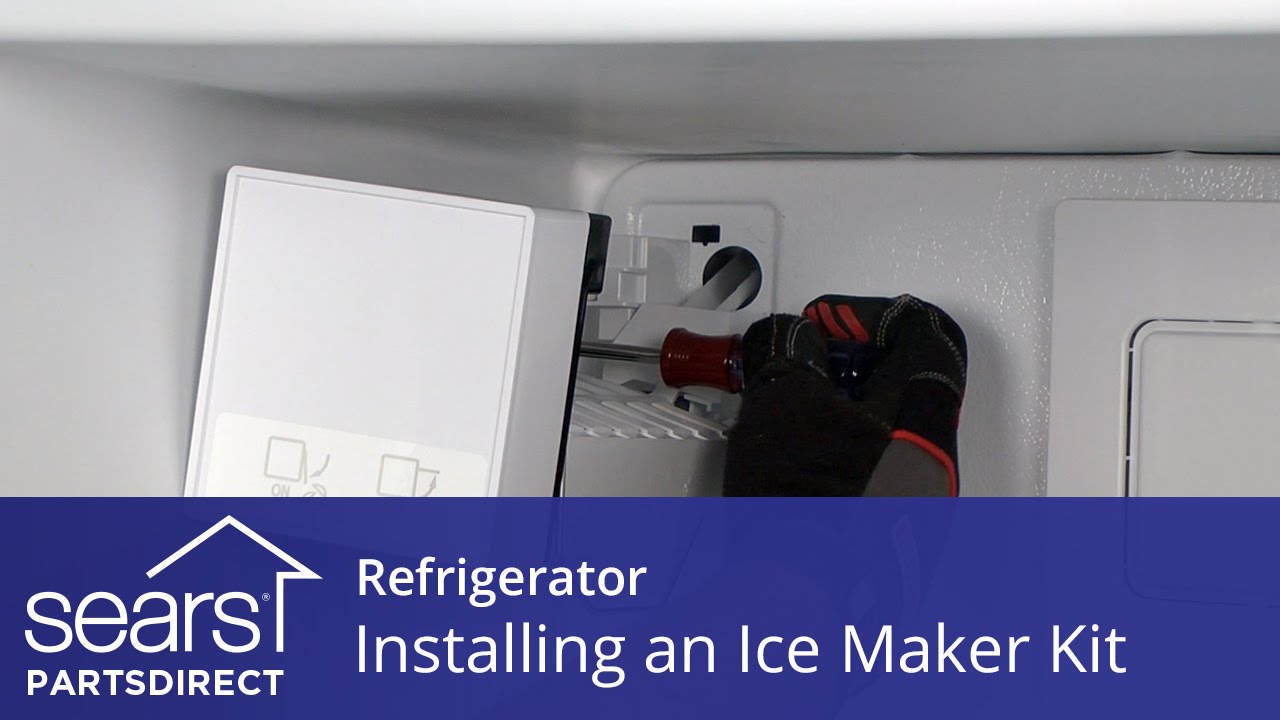
Most refrigerator ice makers attach to the freezer wall with screws or a mounting bracket. Some models have factory-installed holes covered by small plastic plugs.
Hold the ice maker in place without tightening it. Check that the shutoff arm or sensor can move freely. The unit should not touch the freezer wall, shelf, or food bin.
3. Attach the ice maker
Install the mounting screws by hand first. Keep them slightly loose until the unit is aligned. Then tighten them evenly.
Do not overtighten the screws. Too much force can crack plastic parts or strip the mounting holes. The ice maker should sit firmly but should not flex when you touch it.
4. Install the fill tube
The fill tube directs water into the ice mold. Slide it through the opening in the back of the freezer or into the matching inlet on the ice maker.
Make sure the tube points into the mold. If it points toward the wall, water may spray inside the freezer and form a sheet of ice.
5. Connect the wiring harness
Many refrigerator ice makers use a plug-in wiring harness. Match the connector by shape and press it together until it is secure.
Keep the wire away from the ice mold, fan, and moving parts. Do not cut or alter the harness unless the manufacturer specifically instructs you to do so.
6. Connect the water inlet valve
The water inlet valve is often located at the back of the refrigerator. Remove the rear access panel if needed.
Connect the water tube to the valve using the supplied fitting. Push-fit connections must be fully seated. Compression fittings should be snug, but do not crush the tubing with excessive force.
7. Connect the home water line
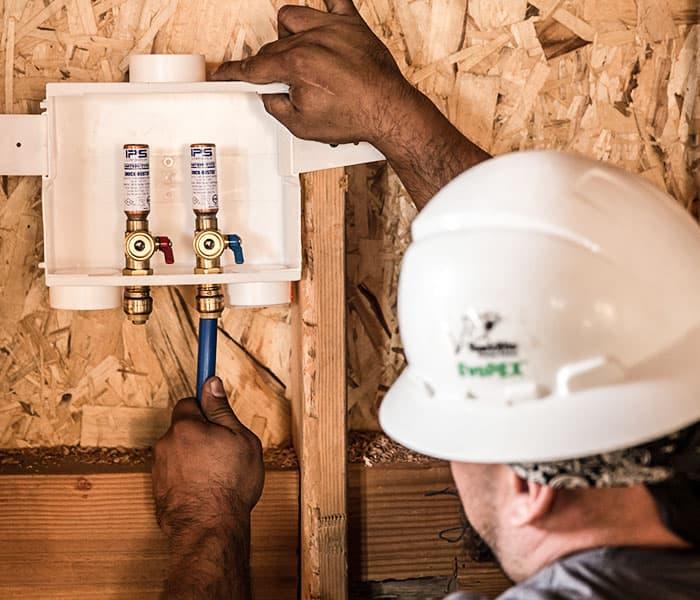
Run the water tubing from the shutoff valve to the refrigerator inlet. Leave a small loop behind the refrigerator so you can pull the appliance forward later.
Cut the tubing straight across. A crooked cut may prevent the fitting from sealing. Avoid sharp bends, pinches, and contact with hot surfaces.
8. Turn on the water slowly
Open the shutoff valve a little at a time. Watch every connection for at least two minutes.
Dry each fitting with a paper towel. A dry towel makes small leaks easier to see. If the towel becomes wet, close the valve and remake the connection.
9. Restore power and test the unit
Plug in the refrigerator. Lower the ice maker shutoff arm or turn the control to the on position, depending on the design.
The first batch may take several hours. Throw away the first one or two batches if the manual recommends it. This clears dust, manufacturing residue, and stale water from the system.

How to Install an Ice Maker Under a Counter
Under-counter ice makers need more planning than refrigerator ice makers. They often require a water line, a drain, ventilation space, and a dedicated location.
Start by checking the cabinet opening. Compare the appliance width, height, and depth with the available space. Leave the clearance listed in the manual, especially around the front grille and condenser.
Connect the water line to the inlet on the back of the machine. Use a shutoff valve that you can reach without removing the appliance. Then connect the drain hose if your model has one.
The drain hose should:
• Stay below the drain outlet when using gravity drainage
• Avoid kinks and sharp bends
• Remain secure at the sink, standpipe, or floor drain
• Follow local plumbing rules
Some models drain meltwater into a reservoir. Others need a pump to move water upward. If the drain layout is unclear, ask a plumber before cutting cabinets or connecting pipes.
After installation, level the machine from side to side and front to back. A level unit drains better and makes less noise.
How to Install a Portable Ice Maker
Portable ice makers are usually the simplest type to set up. They do not normally need a permanent water connection.
Place the machine on a dry, level counter with open space around the vents. Fill the tank with clean drinking water up to the marked line. Plug it directly into a suitable grounded outlet.
Select the ice size and start the cycle. The first batch may be small because the machine must cool the system before freezing water.
Portable models have limits. They can produce ice quickly, but they may not store ice for long periods. Most units do not keep ice frozen forever. As the ice melts, the water returns to the tank or collects in a tray, depending on the model.
Clean and dry the machine often. A damp tank can develop odors or slimy buildup, much like a forgotten water bottle.

Connect the Water Line Correctly
The water line is the part most likely to cause trouble. A clean connection is more important than a tight connection.
Use these practices:
• Cut tubing with a proper cutter.
• Keep the tube free of dust and burrs.
• Push tubing fully into push-fit connectors.
• Use an insert sleeve when required for plastic tubing.
• Support the tubing so it does not pull on the valve.
• Leave enough slack for appliance movement.
• Inspect the line after several hours and again the next day.
Some older installations use saddle valves. These valves can work, but they may clog or develop leaks over time. A proper tee fitting with a dedicated shutoff valve is often more reliable and easier to service.
Do not connect an ice maker to a hot-water line. Hot water can damage parts, affect ice quality, and create unsafe pressure conditions.

Check for Leaks and Water Pressure
After you install an ice maker, inspect the system carefully. A leak may start as one small drop and later damage a floor or cabinet.
Look at these areas:
• The shutoff valve
• The tubing ends
• The inlet valve
• The rear of the ice maker
• The drain hose
• The floor beneath the appliance
Water pressure must also stay within the range listed by the manufacturer. Too little pressure can cause small or hollow ice cubes. Too much pressure can stress the valve and fittings.
If your home has unusual water pressure, a plumber can test it with a pressure gauge. Do not add a pressure regulator unless the plumbing or appliance requirements call for one.
Test the First Ice-Making Cycle
A new ice maker may need time before it produces a full batch. Refrigerator models often take several hours, while portable models may produce ice sooner.
During the first cycle, check that:
• Water enters the mold without spraying.
• The ice mold fills to the correct level.
• The motor runs without grinding.
• The shutoff arm or sensor moves freely.
• Ice releases into the bin.
• No water collects under the appliance.
The first cubes may have an unusual taste if the water line or filter is new. Flush the line according to the manual. Replace the filter if it is overdue or has been stored for a long time.
From my experience helping with appliance setups, the most common error is checking for leaks only once. I suggest checking again after the first full cycle, when the valve opens and closes under normal use.
Common Ice Maker Installation Problems
The ice maker does not make ice
Check that the appliance has power and that the ice maker is switched on. Confirm that the water shutoff valve is open and that the line is not kinked.
A clogged filter, frozen fill tube, failed inlet valve, or incorrect wiring can also stop production. If the freezer is too warm, the ice maker may not begin a cycle. Many refrigerator ice makers need a freezer temperature near 0°F for reliable operation, but follow the product manual.
Water leaks from the connection
Turn off the water first. Then inspect the tubing cut, fitting, washer, and connection depth.
A compression fitting may need a new ferrule. A push-fit connector may need the tube pushed farther into the fitting. Do not simply tighten everything harder, since this can damage the fitting or tubing.
Ice cubes are small or hollow
Small cubes often point to low water flow, a clogged filter, a partially open valve, or low water pressure. They may also appear when the freezer temperature is too warm.
Measure the amount of water entering the mold if the manual provides a test method. If the water level is wrong, the inlet valve or control system may need service.
The ice maker is noisy
A brief click, hum, or motor sound can be normal. Loud grinding, repeated buzzing, or vibration may signal an unlevel appliance, a blocked fan, a damaged motor, or ice stuck in the mechanism.
Turn the unit off before removing stuck ice. Never force the ejector fingers or use a sharp tool near wiring.
The water tastes or smells strange
Flush the line and replace the water filter if needed. Clean the ice bin and the ice maker with products approved by the manufacturer.
If the odor remains, stop using the ice and test the household water. A plumbing problem may affect more than the ice maker.
Maintenance After Installation
Regular care helps an ice maker work well and keeps the ice fresh. Follow the cleaning schedule in the manual, since some machines have special cleaning cycles.
A simple routine includes:
• Emptying and washing the ice bin
• Wiping the inside with a clean, damp cloth
• Cleaning the water reservoir on portable models
• Replacing the filter on schedule
• Checking the water line for wear
• Inspecting the drain for blockage
• Cleaning condenser vents when the manual permits it
Do not use harsh chemicals inside the water path unless the manufacturer approves them. Never mix cleaners. Rinse every part well after cleaning.
If you leave the appliance unused for a long time, close the water valve and follow the manual’s winterizing or shutdown steps. Standing water can freeze, smell stale, or damage internal parts.
When to Call a Professional
Many people can install a refrigerator ice maker with a complete kit and an accessible water line. However, some jobs need professional help.
Call a licensed plumber or appliance technician when:
• A new water line must be added inside a wall
• The drain needs a pump or major plumbing changes
• The appliance needs hardwiring
• The outlet is damaged or ungrounded
• The water pressure is unusually high or low
• A leak continues after the fitting is remade
• You smell burning or see melted wiring
• The unit requires gas, special ventilation, or commercial plumbing
Local building and plumbing rules may require permits or approved fittings. Manufacturer instructions also take priority over general advice. When in doubt, professional service is cheaper than repairing water damage or an electrical fault.
Frequently Asked Questions About How to Install an Ice Maker
Can I install an ice maker myself?
You can often install a refrigerator or portable ice maker yourself if the water line and electrical outlet already exist. Call a professional for new plumbing, drainage changes, damaged wiring, or unclear connections.
Does an ice maker need its own water line?
A refrigerator ice maker needs a cold-water supply line. A portable ice maker usually has a refillable tank and does not need a permanent water connection.
How long does it take to install an ice maker?
A basic refrigerator ice maker installation may take about one to two hours when the water line is nearby. An under-counter unit can take longer because it may need drainage, leveling, and cabinet work.
Why is my new ice maker not making ice?
Check power, the ice maker switch, freezer temperature, water supply, filter, and water line. A new unit may also need several hours before the first batch is ready.
Do I need a water filter for an ice maker?
A filter is not always required, but it can improve taste and reduce particles that may clog the inlet valve. Use a filter approved for your appliance and replace it on the recommended schedule.
Can I use a garden hose to connect an ice maker?
Do not use a garden hose unless the appliance manufacturer specifically approves it. Use food-safe tubing designed for drinking water and ice maker connections.
How often should I clean an ice maker?
Clean the unit based on the manufacturer’s schedule and whenever the ice develops an odor or unusual taste. Portable ice makers often need more frequent cleaning because their water tanks are open to the room.
Conclusion
Learning how to install an ice maker comes down to careful preparation, a safe water connection, correct power, proper drainage, and a thorough leak test. Choose the right tubing, keep the appliance level, follow the model manual, and give the first cycle time to complete.
A few extra minutes spent checking fittings can prevent a major leak later. Use this guide as a starting point, and consult a licensed professional whenever plumbing or electrical work goes beyond your comfort level. Try the installation carefully, then share your questions or results in the comments.