
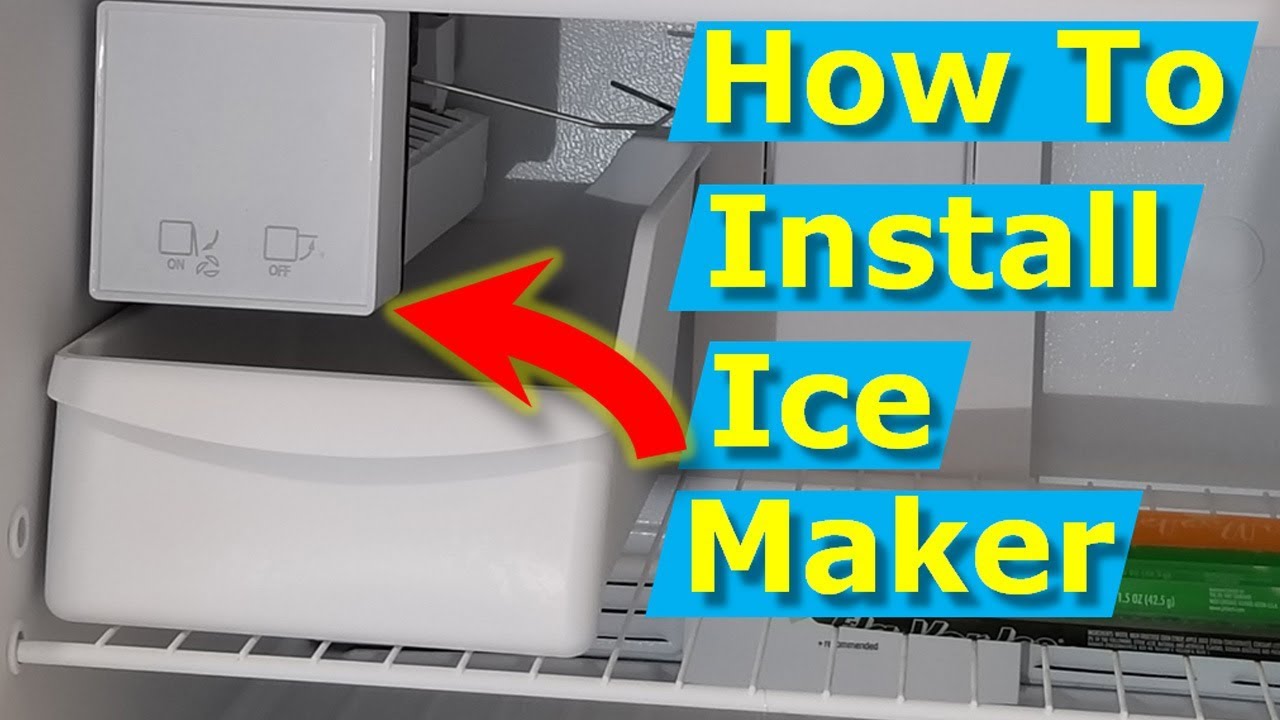
Replace an ice maker by unplugging the refrigerator, removing the old unit, installing the matching model, and testing water flow.
Learning how to replace an ice maker is often easier than replacing many other refrigerator parts. Most modular ice makers use a few screws, one wire plug, and a simple water connection. This guide explains the process in clear steps, with safety tips, tool advice, testing instructions, and common mistakes to avoid.
Before you replace an ice maker
An ice maker that stops working may not need replacement. A frozen fill tube, closed water valve, clogged filter, or faulty door switch can cause the same symptoms.
Before learning how to replace an ice maker, check these basic items:
• Make sure the ice maker is switched on. Many models have a wire shutoff arm or an on/off switch.
• Confirm that the refrigerator has power and is cold enough. Most ice makers need a freezer temperature near 0°F to work well.
• Check whether the ice maker mold contains frozen cubes. If it does, the motor may not be cycling.
• Look for a frozen water inlet tube at the back of the ice maker.
• Replace an old or clogged water filter if your refrigerator uses one.
• Check that the water supply valve under the sink or behind the refrigerator is open.
A simple diagnosis can save you the cost of a new part. If the ice maker has cracked plastic, a burned motor, damaged wiring, or a failed control module, replacement is usually the practical choice.
Find the correct replacement ice maker
The replacement ice maker must match your refrigerator. Ice makers may look similar, but their mounting points, wire plugs, water inlet position, and control systems can differ.
Find the refrigerator model number before ordering a part. You can usually find it in one of these places:
• Inside the fresh food section, on a side wall
• Along the refrigerator ceiling
• Behind the crisper drawers
• On the door frame
• On the back panel
Use the complete model number, including letters and numbers. A part listed as “universal” may fit some refrigerators but not others. The safest choice is an original equipment part or a verified replacement that lists your exact model.
Compare the old and new units. Check the following details:
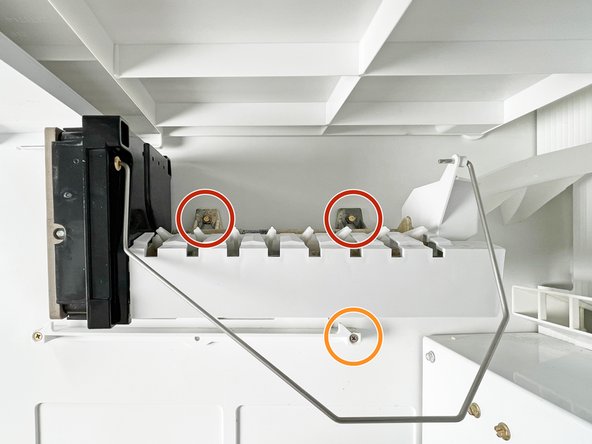
• Mounting screw locations
• Wire harness shape
• Water fill cup design
• Ice bucket position
• Shutoff arm or switch style
• Control module shape
When researching how to replace an ice maker, many people focus only on size. The electrical connector is just as important. A unit that fits physically may still fail to operate if its wiring is not compatible.
Tools and safety steps
You usually need only a few tools for how to replace an ice maker:
• Phillips screwdriver
• Quarter-inch nut driver or socket
• Small flat screwdriver, if needed
• Work gloves
• Towel or shallow container
• Flashlight
Turn off the ice maker before you begin. Then unplug the refrigerator from the wall. If the plug is hard to reach, switch off the refrigerator circuit at the electrical panel.
Some refrigerators have a water line connected near the bottom or back. Close the household water supply valve if you plan to disconnect any water tubing. Keep a towel nearby because a small amount of water may spill.
Do not work on a powered refrigerator with exposed wiring. The ice maker uses household electricity, and wet surfaces increase the risk of shock. The U.S. Consumer Product Safety Commission advises caution with appliances, power cords, and electrical components, so unplugging the appliance is an important first step.
Never use a knife or sharp metal tool to remove ice from the fill tube. You can damage the tube or injure your hand. Use a hair dryer on a low setting from a safe distance, or allow the ice to thaw naturally.
How to replace an ice maker step by step
The exact design varies by brand, but most modular ice makers follow the same process. Take a photo before removing anything. That small step makes reassembly much easier.
1. Empty the ice bucket
Remove the ice bucket and set it in the sink. Discard old ice if it has a stale smell or has clumped together.
This also gives you more room to work. Wipe away loose frost around the ice maker, but do not force frozen parts.
2. Turn off power and water
Unplug the refrigerator. If the water inlet tube or water line must be disconnected, close the water supply valve first.
Wait a few minutes before touching the wiring. This allows moving parts to stop and reduces the chance of accidental operation.
3. Remove the ice maker cover
Many ice makers have a plastic front cover over the control module. Pull it straight off gently, or release the small tabs with a flat screwdriver.
Do not pry hard. The cover can become brittle in a cold freezer and may crack.
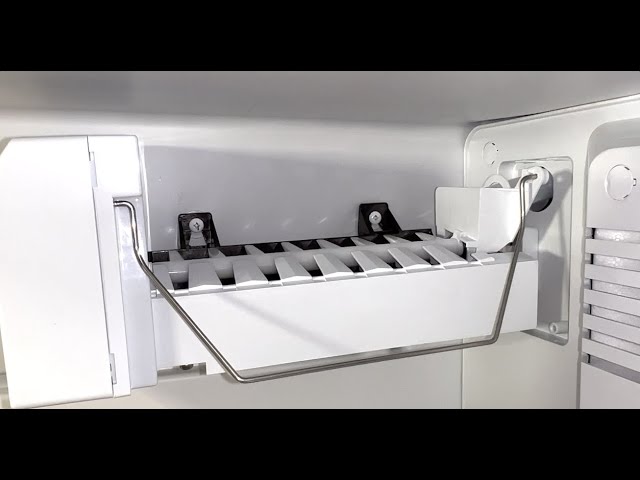
4. Loosen the mounting screws
Most units hang from two screws near the top. Loosen these screws without removing them completely.
The ice maker may slide upward and then forward. Some models also have a lower support screw, so inspect the bottom edge before pulling.
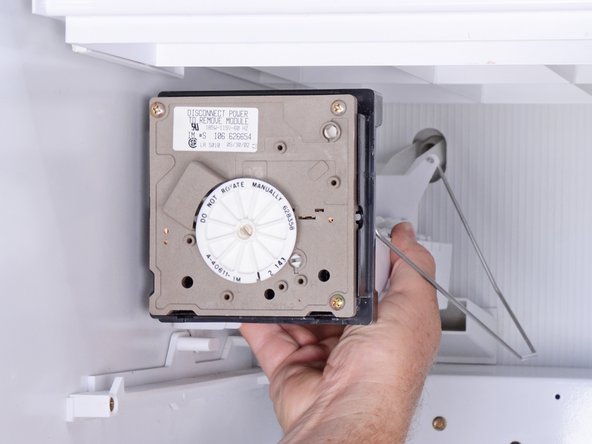
5. Disconnect the wire harness
Support the ice maker with one hand. Press the locking tab on the wire connector, then pull the plug apart.
Pull on the connector, not the wires. Tugging the wires can loosen a terminal inside the plug and create a difficult electrical problem.
6. Remove the old ice maker
After the screws and plug are free, lift the old unit out of the freezer. Place it on a towel.
Compare it with the new unit. If the mounting brackets or wire plug do not match, stop and verify the part number before continuing.
7. Connect the new ice maker
Plug the new unit into the refrigerator wiring harness. Make sure the connector clicks into place and sits in the same position as the original.
Keep the wire away from the ice mold, motor, and mounting edge. A pinched wire can cause a short or prevent the ice maker from cycling.
8. Mount the new unit
Hang the ice maker on the upper screws. Tighten the screws until the unit is stable, but do not over-tighten them.
If the model uses a lower support screw, install it as well. The ice maker should sit level and should not move when you touch it lightly.
9. Reinstall the cover and ice bucket
Snap the front cover back into place. Then slide the ice bucket into its normal position.
Check that the bucket does not press against the shutoff arm. The arm must move freely so the ice maker can stop when the bin is full.
10. Restore power and water
Plug the refrigerator back in. Open the water supply valve if you closed it.
Turn on the ice maker. Depending on the model, you may need to lower the wire arm or press a test button.
11. Run a test cycle
The first cycle may take several hours. The freezer must reach the correct temperature before the ice maker fills with water.
Watch for these signs:
• The motor rotates or the ejector fingers move
• The water valve opens briefly
• Water enters the mold
• The mold freezes and releases cubes
• No water leaks from the fill tube or connections
A new ice maker may discard its first batch of ice. This is normal if dust or manufacturing residue is present.
How long does a new ice maker take to make ice?
A new ice maker often produces its first batch within 6 to 24 hours. The exact time depends on freezer temperature, water pressure, refrigerator design, and room temperature.
Do not judge the replacement too quickly. The freezer needs time to cool after the refrigerator has been unplugged. Opening the door often can also delay the first cycle.
If there is still no ice after 24 hours, check the following:
• The ice maker is turned on
• The freezer is near 0°F
• The water supply valve is open
• The water filter is installed correctly
• The fill tube is not frozen
• The wire connector is fully seated
• The ice bucket is positioned correctly
If the ice maker cycles but does not fill, the water inlet valve or fill tube may be the real problem. If it never cycles, the replacement unit may be faulty, incorrectly installed, or incompatible with the refrigerator.

Common mistakes to avoid
Knowing how to replace an ice maker is useful, but small mistakes can damage the refrigerator or the new part.
• Ordering by appearance alone: Always use the refrigerator model number and compare the connector.
• Forgetting to unplug the appliance: This creates an avoidable electrical hazard.
• Pulling on wires: Remove connectors by pressing their locking tabs.
• Over-tightening screws: Excess force can crack plastic mounting brackets.
• Ignoring a frozen fill tube: A new ice maker will not solve a blocked water path.
• Testing too soon: Give the freezer enough time to cool and complete a cycle.
• Leaving the water valve partly open: This can cause weak filling or slow leaks.
• Installing the wrong shutoff arm: Some parts use different arm shapes and positions.
One mistake I often see in repair work is replacing the ice maker before checking the water supply. A new unit cannot make ice if water cannot reach it. Treat the system like a chain: power, temperature, controls, water flow, and the ice maker must all work together.

When replacement is not the best repair
Replacing the ice maker may not fix the problem if another part has failed. Consider professional service when:
• The refrigerator trips the circuit breaker
• Wires are burned or damaged
• The water line leaks inside the cabinet
• The control board has visible damage
• The freezer does not stay cold
• The water inlet valve does not open
• The refrigerator has a sealed-system cooling problem
Built-in refrigerators and models with complex electronic controls can be harder to service. In these cases, a technician can test voltage, water pressure, thermistors, and control signals safely.
Repair costs vary by brand and location. A basic modular ice maker may cost less than a service visit, while a built-in unit can require specialized parts and labor. Check the warranty before ordering anything. Opening or modifying some appliances may affect warranty coverage.

Maintenance after installing an ice maker
A few simple habits can help the new ice maker last longer.
• Replace the water filter on the schedule listed in the refrigerator manual.
• Keep the freezer close to 0°F, but avoid blocking air vents.
• Do not force an ice jam with a sharp object.
• Empty and wash the ice bucket from time to time.
• Check for water leaks around the fill tube and valve.
• Keep the freezer door seal clean and tight.
• Avoid overfilling the ice bucket.
Clean water and stable temperature matter more than frequent adjustments. If ice develops a strange taste, clean the bucket and replace the filter. If the smell continues, check the household water supply.

Frequently asked questions about how to replace an ice maker
Can I replace an ice maker myself?
Yes, many modular refrigerator ice makers are designed for simple replacement. You need basic tools, the correct part, and careful attention to power and water safety.
How do I know if my ice maker needs replacement?
Replacement may be needed when the motor does not cycle, the unit has cracked parts, or the control module has failed. First check the freezer temperature, water supply, filter, and fill tube.
Do I need to turn off the water to replace an ice maker?
You should turn off the water if you will disconnect a water tube or work near a water connection. For some modular units, you only disconnect an electrical plug, but shutting off the water is still a safe precaution.
Why is my new ice maker not making ice?
The freezer may need several hours to cool, or the ice maker may be off. Also check the water valve, filter, fill tube, wire connector, and ice bucket position.
How long does it take to replace an ice maker?
The physical replacement often takes about 20 to 45 minutes for a standard modular unit. Testing can take much longer because the freezer may need up to 24 hours to produce the first full batch.
Can I use a universal ice maker?
Some universal models work with several refrigerator brands, but compatibility is not guaranteed. Confirm the mounting points, electrical connector, shutoff system, and model specifications before buying one.
Conclusion
Learning how to replace an ice maker is a manageable home repair when the refrigerator uses a standard modular unit. Identify the correct part, unplug the appliance, remove the old unit, connect the new one, and test water flow and ice production.
Take your time, avoid forcing frozen parts, and check the water supply before assuming the ice maker is bad. With the right replacement and a careful installation, you can restore fresh ice without an unnecessary service call. Use your refrigerator manual for model-specific details, and share your repair experience or questions in the comments.