
To use a handheld knife sharpener, place it on a stable surface, then pull the blade through each slot slowly.
Learning how to use a handheld knife sharpener can bring a dull kitchen knife back to life in just a few minutes. The key is to use light pressure, the correct sharpening slot, and steady strokes. This guide explains the process clearly, including common mistakes, safety tips, and ways to protect your knife.
What Is a Handheld Knife Sharpener?
A handheld knife sharpener is a small tool that restores a knife’s edge. Most models have two or more sharpening slots. One slot uses coarse material to reshape a dull edge, while another uses fine material to smooth and polish it.
Many handheld sharpeners use:
• Carbide blades for fast edge repair
• Ceramic rods for fine honing
• Diamond abrasives for hard or damaged edges
• A rubber base or handle for better control
A sharpener does not simply “add sharpness.” It removes a small amount of steel to create a new edge. That is why repeated heavy sharpening can shorten a knife’s life.
Before learning how to use a handheld knife sharpener, check the instructions for your model. Slot order, pressure, and the number of strokes can vary. A pull-through sharpener for a standard Western chef’s knife may not suit a Japanese knife with a thin or single-sided edge.
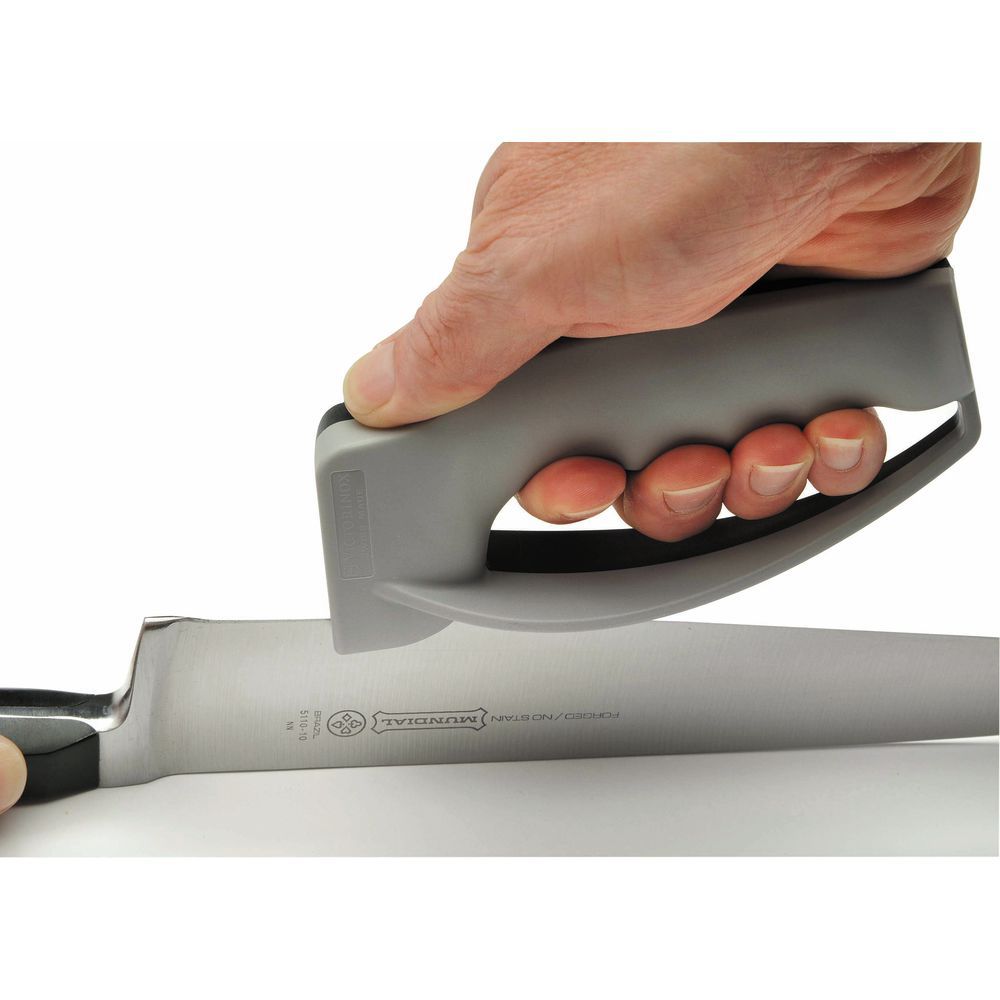
How to Use a Handheld Knife Sharpener Safely
Safety should come first. A dull knife often needs extra force, which increases the chance of slipping. A sharpener also contains hard abrasive parts that can damage a counter or cause injury if held poorly.
Use these basic safety steps:
• Place the sharpener on a flat, dry, stable surface.
• Keep your free hand behind the sharpener, not near the blade path.
• Hold the sharpener by its handle if the design allows it.
• Keep fingers away from the sharpening slots.
• Pull the knife from heel to tip in one smooth motion.
• Never push the blade forward through the slot.
• Keep children and pets away while sharpening.
• Wipe away loose metal dust after use.
Never sharpen a knife while holding the sharpener in your palm unless the product instructions clearly permit it. A stable countertop gives you much better control.
When I first tested a compact pull-through sharpener, my biggest mistake was pressing too hard. The knife moved slowly, but the edge did not improve much. Light pressure worked better because the abrasive could contact the edge evenly.

How to Use a Handheld Knife Sharpener Step by Step
The best way to learn how to use a handheld knife sharpener is to follow a simple routine. Work slowly at first. Speed does not improve the edge.
1. Clean and inspect the knife
Wash and dry the knife before sharpening. Look at the edge under a bright light. A dull edge may look shiny, while a sharp edge usually reflects less light along the cutting line.
Check for chips, bends, rust, or deep damage. A small handheld sharpener can fix normal dullness, but it may not repair a badly chipped blade.
2. Choose the correct sharpening slot
Most sharpeners have labels such as coarse, fine, ceramic, or polish.
• Use the coarse slot for a very dull knife or a damaged edge.
• Use the fine slot for routine maintenance.
• Use a ceramic slot to smooth and finish the edge.
• Use a special slot only if it matches the knife’s design.
Do not begin with the coarse slot every time. Coarse abrasives remove more metal than fine abrasives.
3. Set the sharpener on the counter
Place the sharpener near the edge of the counter, with the handle facing you. Make sure the base does not slide.
If the sharpener moves during use, stop immediately. A sliding tool can cause the knife to twist or jump.
4. Insert the heel of the blade
Place the heel, or widest part near the handle, into the slot. Keep the blade vertical unless the instructions say to use a different angle.
The sharpening slot usually controls the angle for you. Do not twist the blade from side to side.
5. Pull the knife toward you
Pull the knife through the slot from heel to tip. Use one smooth motion. Lift the knife out after the tip reaches the end.
Do not saw back and forth. Repeated back-and-forth motion can create an uneven edge and may damage the sharpener.
6. Repeat with the recommended number of strokes
Many knives need three to six strokes in a coarse slot, followed by a few strokes in a fine slot. However, the instructions for your tool should take priority.
Use fewer strokes when the knife only needs light maintenance. Stop and check the edge instead of sharpening endlessly.
7. Finish with the fine slot
Move to the fine or ceramic slot. Use gentle strokes to remove rough burrs and smooth the cutting edge.
This step often makes the knife feel cleaner and more controlled during cutting.
8. Clean the knife and test it carefully
Wipe the blade with a damp cloth, then dry it. Do not test sharpness with your finger.
Instead, try slicing a sheet of paper or a soft vegetable. A sharp kitchen knife should cut with little pressure.

How Much Pressure Should You Use?
Use light to moderate pressure. The sharpener’s abrasive surface does the work. Heavy pressure can remove too much steel, create an uneven bevel, and wear down the tool.
A good rule is to use about the pressure you would use when drawing a line with a pencil. The knife should move smoothly, without scraping or sticking.
If the blade feels stuck, do not force it. Remove it, inspect the slot, and check whether the knife is too thick or the sharpener is unsuitable.
The correct pressure also depends on the sharpening material. Diamond and carbide surfaces can work quickly, while ceramic surfaces usually need a lighter touch.
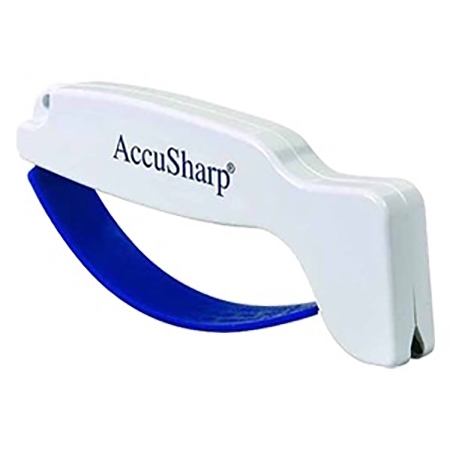
Coarse Versus Fine Sharpening Slots
Understanding the slots is an important part of learning how to use a handheld knife sharpener.
Coarse slot
A coarse slot reshapes a dull edge. It may remove noticeable steel, so use it only when needed.
Use it when:
• The knife will not slice paper.
• The edge feels rounded or blunt.
• The knife has not been sharpened for a long time.
• The fine slot alone does not improve performance.
Fine slot
A fine slot refines and smooths the edge. It is better for regular care.
Use it when:
• The knife still cuts but feels less sharp.
• You want to maintain an already good edge.
• The blade has small burrs after coarse sharpening.
• You sharpen the knife often.
Think of the coarse slot as a file and the fine slot as sandpaper. Both have a role, but using the rougher tool too often is unnecessary.

Which Knives Work With a Handheld Sharpener?
Most handheld sharpeners work well with common Western-style kitchen knives. These include chef’s knives, utility knives, paring knives, and many hunting knives with double-beveled edges.
Use caution with:
• Japanese single-bevel knives
• Very thin slicers
• Serrated knives
• Ceramic knives
• Damascus knives with a delicate edge
• Knives with unusual bevel angles
• Blades with large chips or bends
A standard pull-through sharpener may change the edge geometry of a high-quality Japanese knife. Serrated knives also need a tapered rod or a sharpener made for serrations.
Ceramic knives are very hard but brittle. A regular handheld sharpener may chip them. Always follow the knife maker’s care instructions.

Common Mistakes to Avoid
Many sharpening problems come from technique, not from the tool. Avoid these common errors when learning how to use a handheld knife sharpener.
Pressing too hard
Heavy pressure can damage the edge and remove excess steel. Start gently and increase pressure only if the instructions recommend it.
Using the coarse slot every time
A coarse slot is not a daily maintenance tool. Use the fine slot for routine touch-ups.
Pulling too quickly
Fast strokes can skip over parts of the edge. A slow, steady pull gives more consistent contact.
Moving the knife at an angle
Let the sharpener set the angle. Tilting the blade may create an uneven bevel.
Sharpening only one part of the blade
Pull from the heel all the way to the tip. Stopping halfway can leave the tip dull.
Ignoring the manufacturer’s directions
Handheld sharpeners differ. Some need one stroke, while others need several. The product guide is the safest reference for your model.
Testing sharpness with a finger
Never run a finger along the edge. Paper, a tomato, or a carrot offers a safer test.

How Often Should You Use a Handheld Knife Sharpener?
The right schedule depends on how often you cook and how much work the knife does. A home cook may need a light touch-up every few weeks or once a month.
You may need sharpening sooner if you:
• Prepare food every day
• Cut hard vegetables often
• Use a glass or stone cutting board
• Store knives loose in a drawer
• Notice crushing instead of slicing
• Apply more force than usual
A honing rod and a sharpener serve different purposes. Honing realigns a slightly misaligned edge, while sharpening removes steel to create a new edge. Use a honing rod for frequent maintenance and a handheld sharpener when the knife remains dull.
Professional chefs may sharpen more often, but they also use their knives more heavily. There is no single schedule for every kitchen.

How to Care for a Handheld Knife Sharpener
Good care helps the tool work safely and consistently.
• Brush or wipe away metal particles after use.
• Follow the cleaning instructions for the model.
• Do not soak an electric or nonwashable sharpener.
• Store the tool in a dry place.
• Check the base for worn rubber or loose parts.
• Replace the sharpener if the abrasive slot becomes damaged.
Do not use oil unless the manufacturer specifically recommends it. Oil can clog some abrasive surfaces and attract dust.
Also inspect the knife after sharpening. If you see large scratches, a bent edge, or uneven bevels, stop using the sharpener. The tool may not match the blade.

Benefits and Limitations of Handheld Knife Sharpeners
Handheld sharpeners are popular because they are simple and affordable. They can help many people maintain everyday kitchen knives without learning advanced whetstone skills.
Benefits include:
• Easy operation
• Low purchase cost
• Fast results
• Built-in angle control
• Small storage size
• Useful for basic kitchen maintenance
They also have limits. A pull-through sharpener may remove more metal than necessary. It may create a fixed bevel that does not match the original knife angle. It also offers less control than a whetstone or professional sharpening service.
For an inexpensive everyday knife, these limits may be acceptable. For a premium blade, a whetstone or trained professional may be a better choice.
Handheld Sharpener Versus Whetstone
A handheld sharpener is faster to learn. It guides the blade and requires little setup. A whetstone gives more control, but it requires practice with angle, pressure, water, and stroke technique.
Choose a handheld sharpener if you want:
• Quick maintenance
• Simple instructions
• A compact tool
• Basic results for common knives
Choose a whetstone if you want:
• Greater control over the bevel
• A refined edge
• Care for premium knives
• The ability to repair specific areas
Neither method is automatically best. The right choice depends on the knife, your skill level, and how much control you want.
Practical Tips for Better Results
These small habits can make a major difference when learning how to use a handheld knife sharpener.
• Start with a clean, dry blade.
• Use a bright light to inspect the edge.
• Keep every stroke steady and complete.
• Use the fewest strokes needed.
• Sharpen both sides evenly on double-bevel knives.
• Finish with the fine slot.
• Clean away metal dust before using the knife.
• Practice first on an inexpensive knife.
• Keep knives on a wood or plastic cutting board.
• Store knives in a block, sheath, or magnetic strip.
One useful lesson from real kitchen work is that sharpening cannot fix poor knife care. A sharp knife used on glass, stone, or ceramic boards will lose its edge quickly. Good storage and the right cutting surface extend the time between sharpening sessions.
Frequently Asked Questions About How to Use a Handheld Knife Sharpener
Do you push or pull a knife through a handheld sharpener?
You usually pull the knife toward you, from the heel to the tip. Do not push the blade forward or saw it back and forth unless the product instructions say otherwise.
How many times should you pull a knife through the sharpener?
Most knives need three to six pulls in the correct slot, but the exact number depends on the tool and the knife’s condition. Stop when the edge improves instead of continuing automatically.
Should I use the coarse or fine slot first?
Use the coarse slot first only when the knife is very dull or damaged. For a knife that needs a light touch-up, start and finish with the fine slot.
Can a handheld sharpener ruin a knife?
It can damage a knife if you use too much pressure, sharpen too often, or use the wrong slot. It may also be unsuitable for single-bevel, serrated, ceramic, or very thin knives.
How do I know when my knife is sharp?
A sharp knife should slice paper or a soft tomato with little pressure. Test the knife carefully with food or paper, never with your finger.
Can I sharpen a serrated knife with a handheld sharpener?
Only use a sharpener designed for serrated blades. Standard V-shaped pull-through slots can flatten or damage the teeth.
Is a handheld sharpener better than a honing rod?
They do different jobs. A sharpener removes steel to restore a dull edge, while a honing rod mainly realigns an edge that is slightly out of place.
Conclusion
Learning how to use a handheld knife sharpener is simple when you focus on safety, light pressure, steady strokes, and the correct slot. Use the coarse setting only for serious dullness, then refine the edge with a fine setting. Clean the knife, test it safely, and avoid using a basic sharpener on specialty blades without checking the care instructions.
With a little practice, you can keep everyday kitchen knives working well and reduce the force needed to cut food. Start with an inexpensive knife, follow the sharpener’s guide, and share your own sharpening tips or questions in the comments.