
Place the sharpener on a stable surface, use the correct slot, and pull the knife through with gentle, even pressure.
Learning how to use a pull through knife sharpener is simple, but good results depend on the right angle, light pressure, and a clean blade. After testing several styles of sharpeners, I have found that a calm, slow technique works far better than forcing the knife through the slots. This guide explains each step, common mistakes, safety tips, and when a pull through sharpener may not be the best choice.

What Is a Pull Through Knife Sharpener?
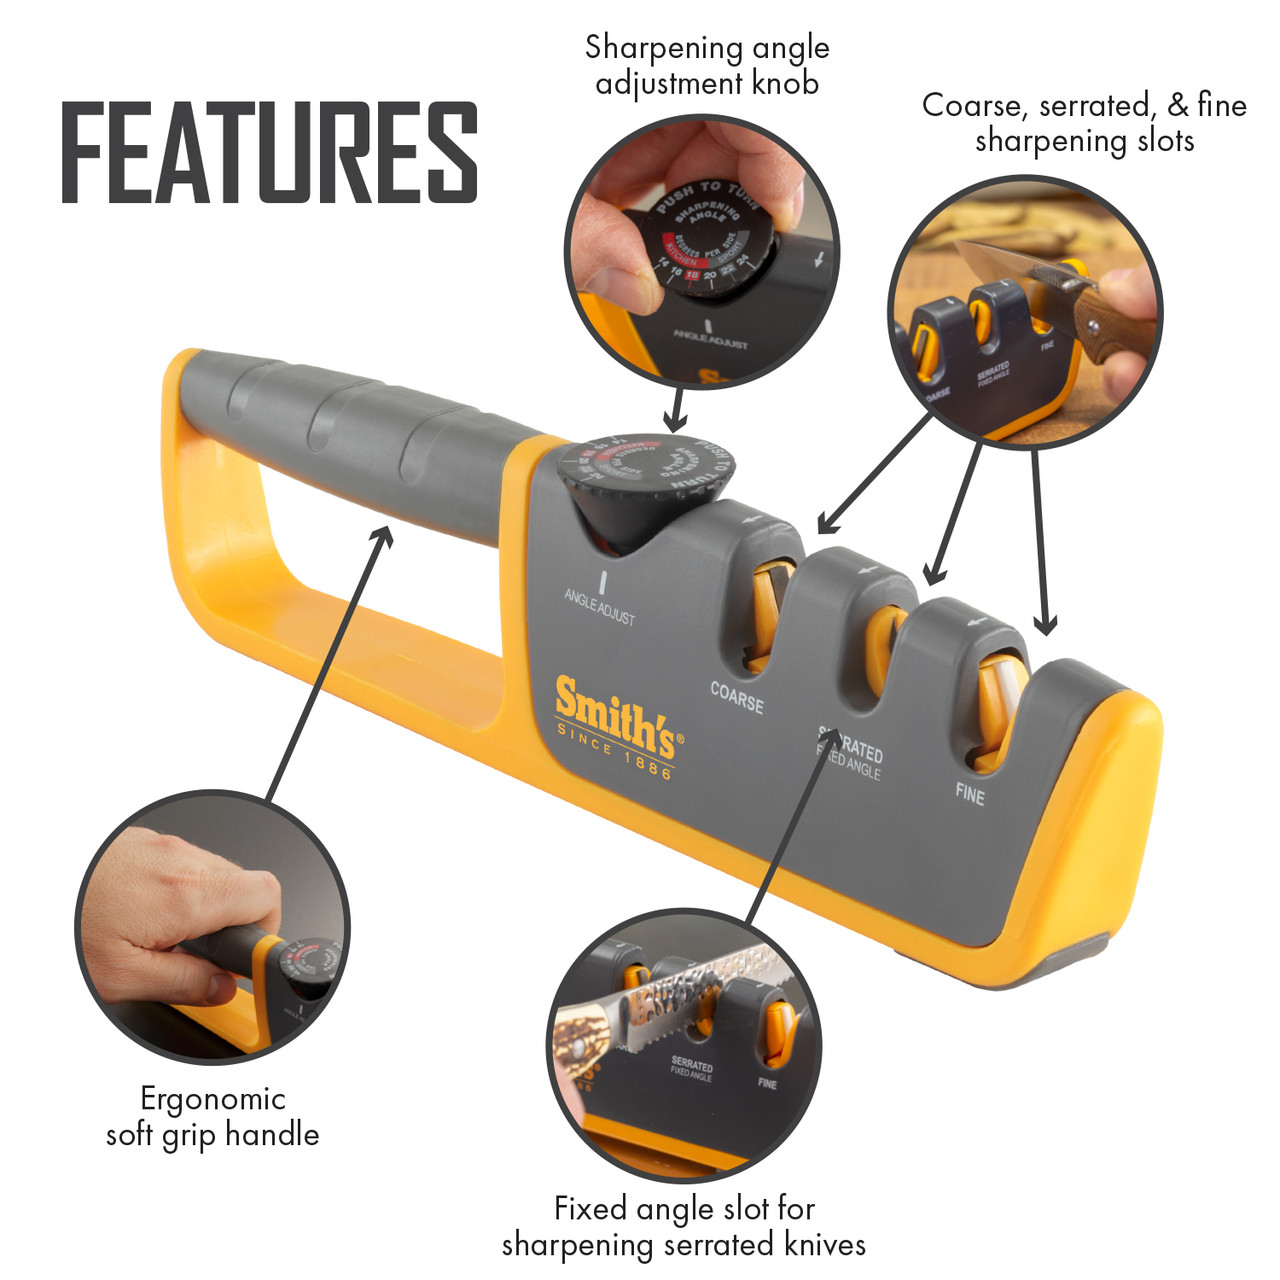
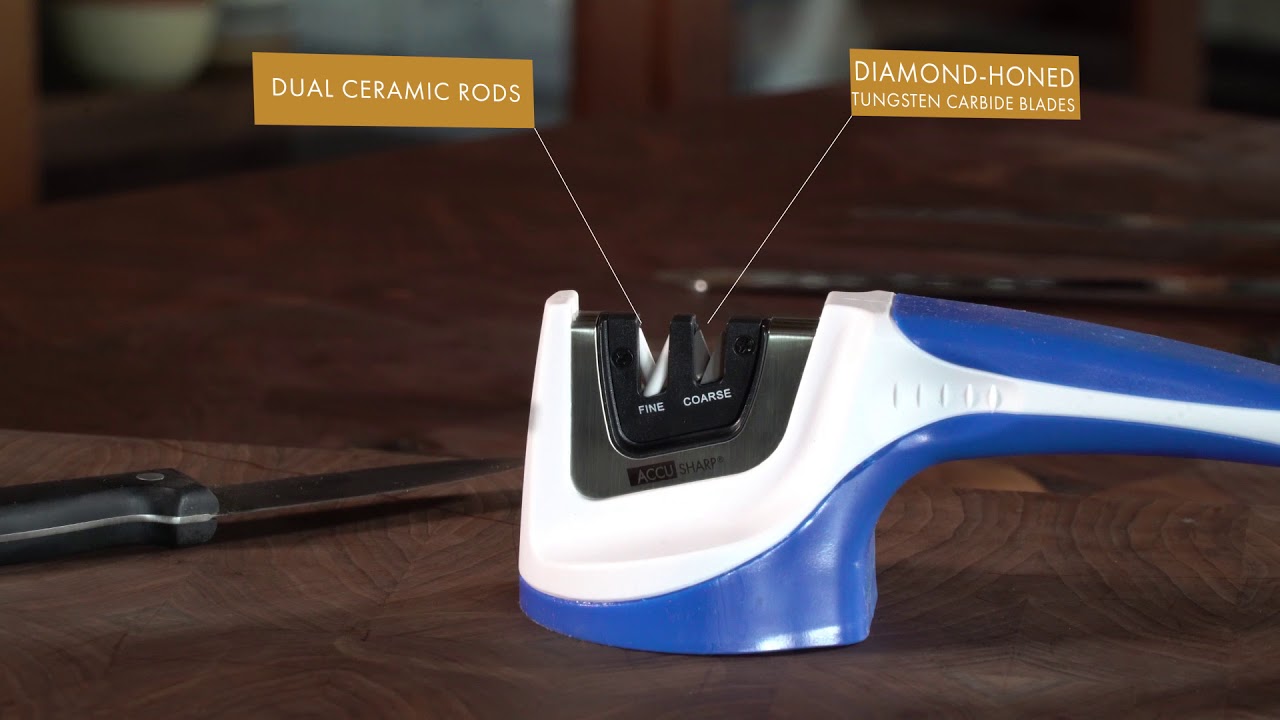
A pull through knife sharpener is a compact tool with one or more sharpening slots. Each slot contains abrasive wheels, ceramic rods, or carbide plates that contact the knife edge as you pull the blade through.
Most models include two or three stages:
• Coarse sharpening removes damaged metal and rebuilds a dull edge.
• Fine sharpening smooths and refines the edge.
• Honing or polishing removes small burrs and improves the final feel of the edge.
The sharpener controls the blade angle for you. This makes it easier for beginners than using a whetstone or sharpening rod. However, the fixed angle may not suit every knife.
A pull through sharpener is often useful for basic kitchen knives, pocket knives, and everyday utility blades. It is less suitable for delicate Japanese knives, single bevel knives, serrated knives, and high value blades unless the manufacturer specifically approves it.
How to Use a Pull Through Knife Sharpener Step by Step
Follow these steps for a safe and even result. The key is to let the sharpener do the work instead of pressing hard.
1. Clean and inspect the knife
Wash the knife with warm water and mild dish soap. Dry it fully before sharpening.
Check the blade for chips, deep bends, rust, or loose handles. A small dull area is easy to improve, but a large chip may need professional repair or a proper sharpening stone.
2. Place the sharpener on a stable surface
Set the sharpener on a flat counter or table. Hold the handle firmly if it has one.
Some models have rubber feet or a suction base. Make sure these parts grip the surface before you begin. Keep your fingers behind the sharpener and away from the blade path.
3. Choose the correct sharpening slot
Use the coarse slot only when the knife is very dull or damaged. Use the fine slot for regular sharpening and light touchups.
If the sharpener has a honing slot, use it after the coarse or fine stage. Read the product instructions because the slot order can vary by model.
4. Start at the heel of the blade
Place the heel, or widest end, of the knife into the slot. Keep the blade straight and centered.
Do not start with the tip. Pulling from the heel to the tip helps the abrasive contact the full cutting edge in one smooth motion.
5. Pull the blade toward you
Use a slow, steady pull from the heel toward the tip. Lift the knife out when the tip reaches the end of the slot.
Do not push the blade back and forth. One complete pull is usually counted as one stroke. Repeated sawing motions can create an uneven edge and may damage the sharpener.
6. Use light and even pressure
Apply only enough pressure to keep the blade in contact with the abrasive. Heavy pressure can remove too much metal and may leave deep scratches.
When I first used a pull through sharpener, I pressed too hard because I thought more force meant faster sharpening. The edge became rough, and the knife felt worse. A lighter touch produced a cleaner result.
7. Repeat the recommended number of strokes
Many sharpeners need three to six strokes in the coarse slot and two to four strokes in the fine slot. Some require only one or two passes.
Follow the instructions for your exact model. Stop when the knife feels sharp and the edge looks even. Extra strokes do not always improve the result.
8. Finish with the fine or honing slot
Move to the fine slot after using the coarse stage. Pull the blade through slowly and gently.
The fine stage removes the rough burr created during sharpening. It also makes the edge smoother, which can improve slicing performance.
9. Clean and test the knife
Wipe the blade with a damp cloth to remove metal dust. Wash and dry it before storing or using it with food.
Test the knife on a sheet of paper or a soft tomato. Do not test sharpness with your finger. A sharp knife should cut cleanly without excessive force or tearing.
How Many Times Should You Pull a Knife Through?
The correct number of pulls depends on the knife condition and sharpener design. A very dull knife may need several passes through a coarse slot, while a regularly maintained knife may need only a few passes through a fine slot.
As a general guide:
• Very dull knife: Three to six slow pulls through the coarse slot, followed by two to four fine pulls.
• Slightly dull knife: Two to four pulls through the fine slot.
• Routine maintenance: One or two pulls through a honing slot, if available.
Never treat these numbers as a strict rule. Stop and check the blade after each set. If the edge feels smooth and cuts well, more sharpening is unnecessary.
Using the sharpener too often can shorten the life of the knife. Carbide sharpeners remove metal quickly, so they should not replace light honing or careful knife maintenance.

Common Mistakes to Avoid
Knowing how to use a pull through knife sharpener also means knowing what not to do. Most poor results come from pressure, speed, or using the wrong slot.
Pulling too fast
A fast pull can skip over parts of the edge. It may also create an uneven bevel from the heel to the tip.
Move at a steady pace. A full pull should usually take about two to four seconds.
Pressing too hard
Heavy force makes the abrasive bite into the blade. This can leave a jagged edge, remove excess metal, and wear down the sharpener.
Use the lightest pressure that keeps the blade in the slot.
Using the coarse slot every time
The coarse slot is not designed for daily touchups. It is meant to repair a very dull edge or establish a new bevel.
For normal care, use the fine or honing stage when the manufacturer allows it.
Sharpening a serrated knife in a standard slot
A standard pull through sharpener can flatten or damage the teeth of a serrated blade. Use a tapered ceramic rod or a sharpener made for serrated knives.
Sharpening wet or dirty knives
Food residue can clog the abrasive surfaces. Water may also cause rust on some metal parts.
Clean and dry the knife before sharpening. Clean the sharpener according to its instructions.
Sharpening valuable or delicate knives
A fixed angle may not match the original bevel. This matters with thin Japanese knives, single bevel knives, and handmade blades.
For these knives, a whetstone or skilled professional service is often safer.

How to Choose the Right Pull Through Knife Sharpener
Not every pull through sharpener works in the same way. Check these features before buying one.
Sharpening material
Carbide plates remove metal quickly. They are useful for restoring dull blades but can be aggressive.
Ceramic abrasives are often better for fine sharpening and polishing. Diamond abrasives can sharpen hard steels, but they still require light pressure.
Number of stages
A two stage model may include coarse and fine slots. A three stage model may add honing or polishing.
More stages do not always mean better sharpening. The quality of the abrasive and the angle control matter more.
Angle range
Common sharpening angles include about 15, 20, and 22 degrees per side. Asian style kitchen knives often use a narrower angle, while many Western kitchen knives use a wider angle.
Choose a sharpener that matches your knife. If the angle is not listed, check the manual or product label.
Base and handle design
A wide base, rubber feet, and a strong handle improve control. A small sharpener that slides across the counter can create a safety risk.
A stable base is especially important when sharpening large chef’s knives.
Blade compatibility
Look for clear information about:
• Straight edge knives
• Serrated knives
• Double bevel knives
• Single bevel knives
• Hard Japanese steel
• Pocket and outdoor knives
If the instructions do not mention your knife type, do not assume the sharpener is suitable.

Pull Through Sharpener Versus Whetstone
A pull through sharpener is faster and easier to learn. It controls the angle and needs little setup. This makes it practical for busy home cooks who want basic knife care.
A whetstone offers more control and can preserve a blade more carefully. You can choose the bevel angle, use different grits, and repair more types of damage. However, sharpening with a stone takes practice.
A useful comparison looks like this:
• Pull through sharpener: Easy, fast, and convenient for common knives.
• Whetstone: More precise and better for skilled users.
• Honing rod: Maintains alignment but does not remove much metal.
• Professional sharpening: Best for major damage, rare knives, or expensive blades.
The best tool depends on your knife, skill level, and goals. For a basic stainless steel kitchen knife, a good pull through sharpener may be enough. For a premium Japanese blade, more control is usually worth the effort.

How to Maintain a Pull Through Knife Sharpener
Good maintenance keeps the sharpener working well and helps prevent contamination.
Empty metal filings from removable trays after use. Wipe the body with a dry or slightly damp cloth. Do not place the sharpener in a dishwasher unless the manufacturer clearly says it is dishwasher safe.
Inspect the abrasive wheels or plates from time to time. Replace the sharpener if the parts are loose, cracked, heavily worn, or no longer hold the blade at a steady angle.
Store the tool in a dry cabinet. Keep it away from children and avoid placing heavy objects on top of it.
Clean the knife separately after sharpening. Tiny metal particles can remain on the blade, so wash it before cutting food.

Safety Tips for Using a Pull Through Knife Sharpener
Knife sharpening is usually safe when you control the blade and keep your hands away from the edge.
• Keep the sharpener on a stable, dry surface.
• Hold the sharpener by its handle or base.
• Keep your free hand behind the blade path.
• Pull the knife in one direction only.
• Do not sharpen a knife while holding the sharpener in your hand.
• Wear cut resistant gloves only if they do not reduce your control.
• Keep children and pets away from the work area.
• Wash the knife after sharpening.
Remember that a newly sharpened knife may cut with less effort than expected. Use a cutting board, keep the blade pointed away from your body, and store it safely after use.

When a Pull Through Knife Sharpener Is Not the Best Choice
A pull through sharpener has clear limits. It can remove a lot of metal, and its fixed angle may not suit every blade.
Avoid using one on a knife with a single bevel unless the product is designed for that shape. A single bevel blade has one flat side and one sharpened side, so sharpening both sides can change its performance.
Be careful with serrated knives, ceramic knives, very thin blades, and knives with decorative finishes. The abrasive may damage the teeth, chip ceramic, or scratch the blade.
If a knife has a large chip, bent edge, deep rust, or loose handle, stop using it until the problem is repaired. A professional sharpener can assess damage that a simple household tool cannot safely fix.
Practical Tips for Better Results
A few small habits can make sharpening easier and more consistent.
Start with an inexpensive everyday knife while learning. This lets you practice the motion without worrying about damaging a favorite blade.
Use the same number of strokes on each side only if your sharpener requires side by side sharpening. Many pull through models sharpen both sides at once, so you do not need to flip the knife.
Keep the blade centered. Tilting it can create an uneven bevel, especially with narrow knives.
Do not chase a razor edge for every task. A durable edge is often better for chopping and daily kitchen work than an extremely thin edge.
Most importantly, sharpen before the knife becomes completely dull. Small, regular touchups are easier than trying to rebuild a neglected edge.
Frequently Asked Questions About How to Use a Pull Through Knife Sharpener
Is a pull through knife sharpener safe for beginners?
Yes, most models are designed to make sharpening easier by controlling the blade angle. Beginners should still use light pressure, a stable surface, and slow pulls.
How often should I use a pull through knife sharpener?
Use it only when the knife becomes dull or fails to cut cleanly. Many home cooks need a full sharpening every few weeks or months, depending on use, cutting boards, and knife steel.
Can I sharpen a serrated knife with a pull through sharpener?
Only use a pull through model that specifically supports serrated knives. A standard straight edge slot can flatten or damage the serrations.
Should I use the coarse or fine slot first?
Use the coarse slot first only when the knife is very dull or damaged. For a slightly dull knife, begin with the fine slot to remove less metal.
Why does my knife feel rough after sharpening?
The rough feeling may come from a remaining burr, too much pressure, or too many passes through the coarse slot. Use the fine or honing stage with light pressure, then clean the blade.
Can a pull through sharpener sharpen a Japanese knife?
Some can, but the angle and abrasive must match the knife. Check the manufacturer’s instructions before using one on a thin Japanese blade or hard powder steel.
How do I know when the knife is sharp?
A sharp knife should slice paper or a soft food smoothly without force. Test it carefully with an object, never with your finger.
Conclusion
Learning how to use a pull through knife sharpener takes only a few minutes, but technique matters. Clean the blade, secure the sharpener, choose the correct slot, and pull from heel to tip with gentle pressure. Finish with the fine or honing stage, then wash the knife before use.
A pull through sharpener is convenient for many everyday knives, but it is not right for every blade. Match the sharpener to the knife, avoid aggressive sharpening, and maintain the edge before it becomes severely dull. Try these steps on a common kitchen knife, then share your sharpening experience or explore more knife care guides for better results.