
To clean an ice maker, unplug it, wash removable parts, sanitize surfaces, rinse well, and dry completely.
Learning how to clean an ice maker helps protect ice quality, reduce odors, and keep the machine working well. This guide explains the safest method for countertop, freezer, and under-counter ice makers, with simple steps based on appliance care and food safety practices.
Why You Should Clean an Ice Maker
Ice makers handle water and food-grade surfaces every day. Over time, mineral scale, mold, slime, dust, and old ice can build up inside the machine. These deposits may affect the taste and smell of your ice.
Regular cleaning also helps water flow through the machine. A dirty water reservoir or clogged inlet can make ice smaller, cloudy, or slow to form.
Learning how to clean an ice maker is also important for hygiene. Ice touches internal trays, scoops, bins, and chutes, so these parts need care just like a glass or food container.
Most manufacturers suggest cleaning an ice maker at least every six months. Clean it sooner if:
• The ice smells or tastes strange
• The ice looks cloudy or dirty
• You see slime, mold, or black spots
• The machine makes less ice than usual
• The water has a strong mineral taste
• The ice bin has not been cleaned for several months

What You Need to Clean an Ice Maker
Gather your supplies before you begin. Having everything nearby makes the job faster and helps you avoid using harsh products that may damage the machine.
You will usually need:
• A clean microfiber cloth
• A soft sponge
• A soft toothbrush or small cleaning brush
• Warm water
• Mild dish soap
• White vinegar or a manufacturer-approved ice maker cleaner
• A clean towel
• A bowl or bucket
• Food-safe sanitizer, only if the product label and appliance manual allow it
Avoid steel wool, rough scouring pads, and abrasive powders. These can scratch plastic parts and create tiny grooves where dirt can collect.
Never mix vinegar with bleach or other cleaning chemicals. Chemical mixtures can create dangerous fumes.
Before learning how to clean an ice maker, check the owner’s manual. Some machines have a special cleaning cycle, removable water filters, or parts that should not be soaked.
How to Clean an Ice Maker Step by Step
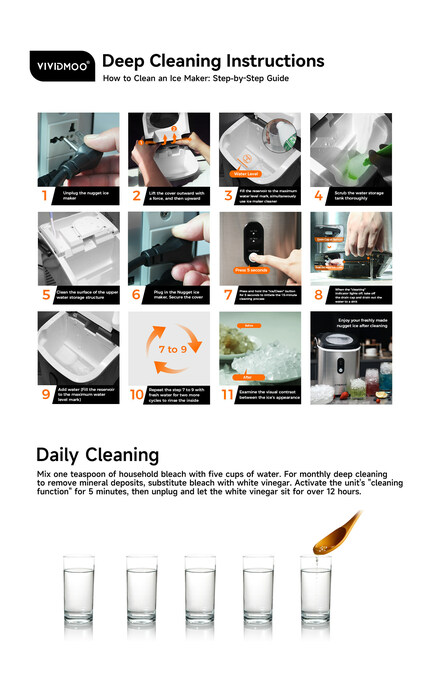
The basic process is simple, but each step matters. Do not rush the rinse and drying stages. Leftover cleaner can affect the taste of your ice.
1. Turn Off and Unplug the Ice Maker
Turn off the ice maker and unplug it from the wall. If it is built into a refrigerator, follow the manual’s instructions for stopping the ice-making function.
Do not clean around moving parts while the machine is running. Unplugging the unit protects you from electrical hazards and prevents the machine from making ice during cleaning.
Remove all ice from the bin. Do not keep old ice for drinks, since it may have absorbed odors or collected dirt.
2. Remove the Ice Bin and Loose Parts
Take out the ice bin, scoop, water reservoir cover, ice basket, and other removable parts. Only remove pieces that the manual identifies as removable.
Wash these parts in warm water with mild dish soap. Use a soft brush to clean corners, hinges, grooves, and the underside of the ice scoop.
Rinse each part well. Soap left behind can create a bitter taste and extra foam when the machine runs again.
3. Empty the Water Reservoir
Drain the water reservoir completely. If the water looks cloudy, has particles, or smells stale, wash the reservoir before adding any cleaner.
Use a soft cloth or sponge to wipe the inside. For narrow areas, a soft toothbrush can help loosen mineral deposits.
Do not pour boiling water into the machine. Very hot water may warp plastic parts or damage seals.
4. Clean the Interior
Mix warm water with a small amount of mild dish soap. Dip a clean cloth into the mixture, wring it out well, and wipe the interior walls, water tray, ice chute, and accessible surfaces.
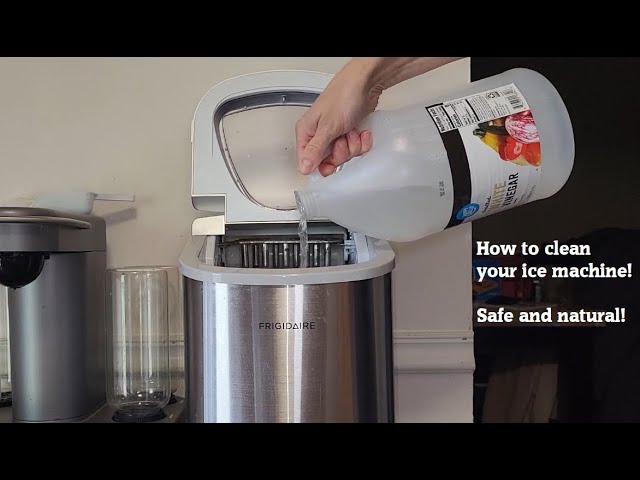
For mineral scale, use diluted white vinegar or a commercial cleaner made for ice machines. Follow the product label and the manufacturer’s instructions for the correct amount and contact time.
Do not pour cleaner into hidden electrical sections. Keep liquids away from buttons, wiring, fans, vents, and the compressor area.
5. Clean the Ice-Making Parts
Wipe the ice mold, evaporator plate, water lines that are easy to reach, and the area around the ice chute. A soft brush can lift residue from small grooves.
Never force ice off a metal evaporator plate with a knife or sharp tool. You could scratch the surface or damage the cooling system.
If the machine has heavy scale inside the water lines, a normal home cleaning may not be enough. In that case, use the approved cleaning cycle or contact a qualified appliance technician.
6. Rinse the Machine
Rinse all cleaned surfaces with a cloth dampened with fresh water. Repeat this step until no cleaner smell remains.
For machines with a cleaning cycle, run the cycle as directed. Some models need one cycle with cleaner and one or more cycles with plain water.
Rinsing is one of the most important parts of learning how to clean an ice maker. A clean machine is not truly ready if cleaner remains inside.
7. Dry Every Part
Dry removable parts with a clean towel. Leave the ice bin and other pieces outside the machine for a short time so they can air-dry fully.
Wipe standing water from the interior. Moisture left in dark corners can encourage mold and odor.
Make sure the plug, cord, and outside controls are dry before reconnecting the machine.
8. Reassemble and Make a Test Batch
Put every part back in its correct position. Add fresh drinking water if your appliance uses a refillable reservoir.
Turn the machine on and allow it to make one batch of ice. Discard that batch, especially if you used vinegar or a commercial cleaner.
Make another batch and check the smell, taste, shape, and color. If the ice still tastes unusual, run another plain-water rinse and check the filter.
How to Clean a Portable Ice Maker
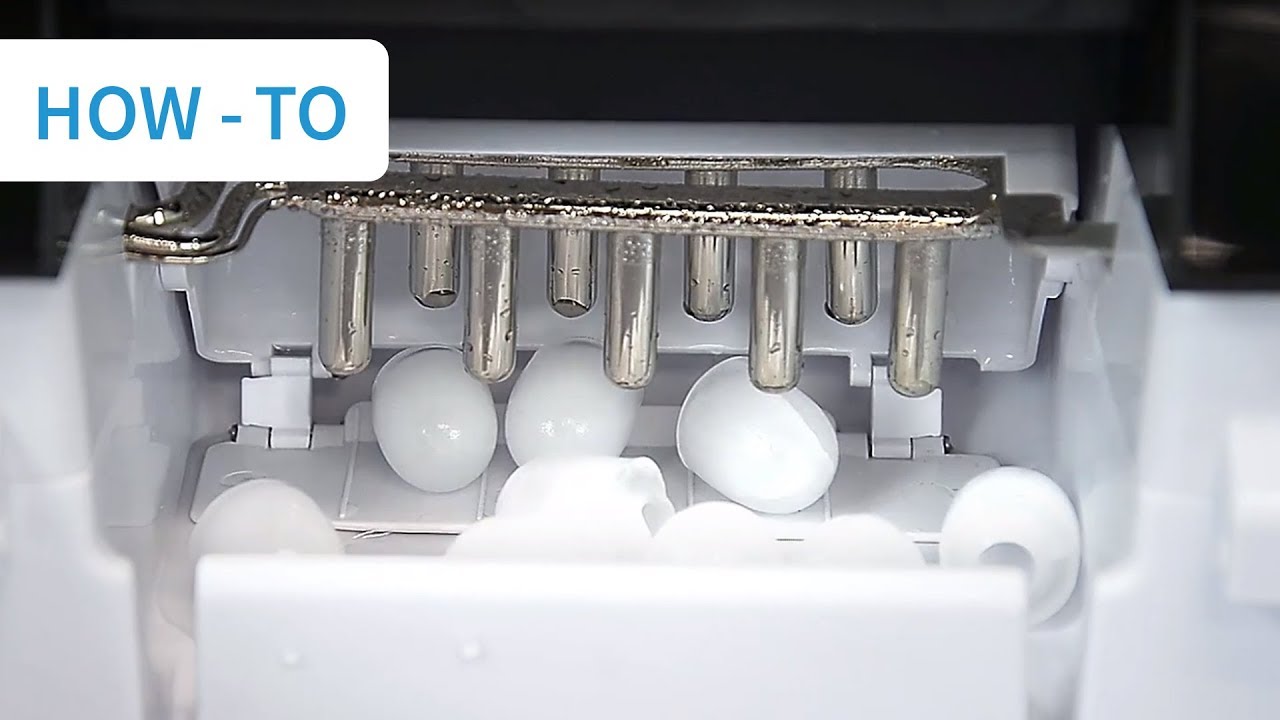
Portable ice makers often have a water reservoir, ice basket, scoop, drain plug, and small internal water system. These machines need frequent cleaning because water can sit inside them between uses.
To clean a portable ice maker:
-
Turn off the machine and unplug it.
-
Remove the ice basket and scoop.
-
Open the drain plug and empty all water.
-
Wash the basket and scoop with warm, soapy water.
-
Wipe the reservoir with a soft cloth.
-
Add the approved cleaning solution or diluted vinegar.
-
Let the solution sit only as long as the product instructions allow.
-
Drain the solution completely.
-
Rinse the reservoir with clean water.
-
Run one or two cleaning cycles with fresh water.
-
Dry the inside and leave the lid open.
Portable units often hold water in small channels that are easy to miss. Tilt the machine only if the manual says it is safe to do so.
When learning how to clean an ice maker, remember that portable models vary widely. Some use a self-cleaning button, while others require manual draining and wiping.

How to Clean a Refrigerator Ice Maker
A refrigerator ice maker has more parts than a portable unit. It may include an ice mold, motor, auger, water inlet valve, filter, dispenser chute, and storage bin.
Start by turning off the ice maker. Then remove the ice bin and wash it with warm water and mild dish soap.
Wipe the dispenser chute and the area around the door opening. These spots often collect melted ice, crumbs, dust, and sticky residue from hands.
Clean the ice maker compartment with a slightly damp cloth. Do not spray cleaner directly into the ice maker or dispenser.
If your refrigerator has a water filter, check its replacement schedule. A worn filter can affect water taste and may reduce ice quality. Replace it with the correct model listed in the refrigerator manual.
Never soak electrical parts, the ice-making motor, or the wiring harness. If you see thick mold, damaged plastic, leaks, or heavy scale, arrange professional service.

How to Clean an Under-Counter Ice Maker
Under-counter ice makers are often connected to a water line and drain. They can produce large amounts of ice, so they need a careful cleaning routine.
First, turn off the ice-making function and unplug the unit. If the appliance has a water shutoff valve, close it before disconnecting any water line.
Remove the ice bin and wash it separately. Clean the inside surfaces with the approved ice machine cleaner, following the exact dilution instructions.
Many under-counter models have a cleaning or harvest cycle. Run that cycle as described in the manual. The machine may need several rinses before it is safe to make fresh ice.
Check the drain for slow flow or standing water. A blocked drain can cause dirty water to remain inside the machine.
If the ice maker is connected to a permanent water line, do not remove plumbing parts unless you understand the connections. A small leak can damage cabinets and flooring.

Vinegar, Ice Maker Cleaner, or Bleach?
The best cleaner depends on the appliance and the type of buildup. Mineral scale responds well to an acid-based cleaner, while light dirt often needs only mild soap and water.
White vinegar can help loosen some mineral deposits. However, vinegar may not remove heavy scale, and its smell can linger if the machine is not rinsed well.
Commercial ice maker cleaners are often made for the materials used in ice machines. Choose a product labeled for ice makers or food-contact equipment, and follow the directions closely.
Bleach requires extra caution. Do not use it unless the appliance manufacturer specifically allows it and the product is suitable for food-contact surfaces. Never mix bleach with vinegar, ammonia, or other cleaners.
A simple guide is:
• Mild dirt: Warm water and mild dish soap
• Light mineral scale: Approved diluted vinegar or ice maker cleaner
• Heavy scale: Manufacturer-approved cleaner or professional service
• Mold or repeated slime: Thorough cleaning, approved sanitizer, and inspection for trapped water
Learning how to clean an ice maker safely means using the least harsh product that can solve the problem.
How to Sanitize an Ice Maker Safely
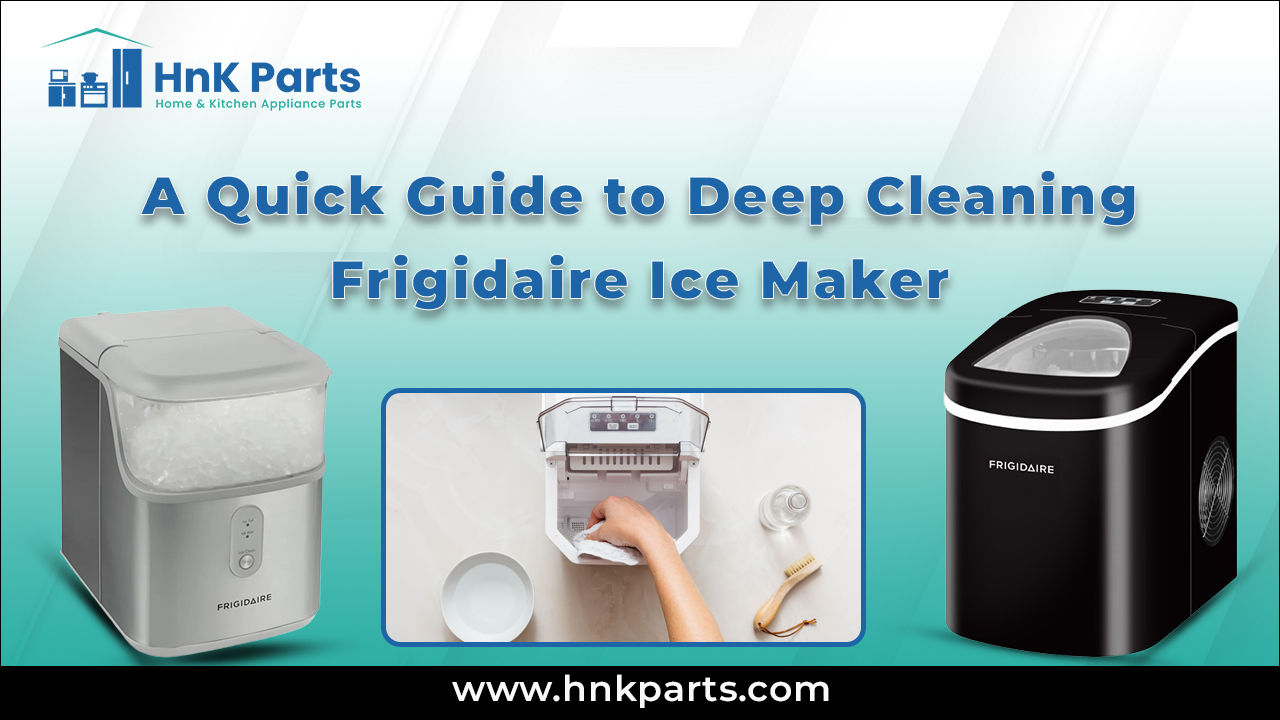
Cleaning removes dirt and scale. Sanitizing lowers the number of germs on clean surfaces. These are related steps, but they are not the same.
Only sanitize after washing and rinsing the machine. A sanitizer works best on a clean surface.
Use a food-contact sanitizer that is approved for the appliance. Follow the label for dilution, contact time, and rinsing instructions. Some sanitizers require rinsing, while others do not.
Do not guess the strength. Too much sanitizer can damage parts or leave a chemical taste. Too little may not work as intended.
After sanitizing, allow the machine to air-dry if the manual permits it. Then run and discard the first batch of ice.

Common Mistakes to Avoid
Small mistakes can damage an ice maker or leave unsafe residue behind. Avoid these common problems:
• Cleaning while the machine is plugged in
• Using a sharp tool to remove ice or scale
• Spraying liquid into vents or controls
• Using strong cleaners without checking the manual
• Mixing vinegar, bleach, ammonia, or other chemicals
• Skipping the rinse cycle
• Returning a damp ice bin to the machine
• Keeping the first batch of ice after cleaning
• Ignoring a dirty water filter
• Leaving water inside the machine for long periods
One mistake I often see in real-world appliance care is focusing only on the ice bin. The bin is easy to see, but the water reservoir, chute, drain, and hidden corners can hold most of the residue.
Another common mistake is using too much vinegar. More cleaner does not always mean better cleaning. The correct dilution and a complete rinse are safer and more effective.
How Often Should You Clean an Ice Maker?
For most homes, clean the ice maker every six months. A busy machine, hard water, or frequent use may require cleaning every three months.
Clean the machine sooner when you notice:
• Bad-tasting ice
• A musty smell
• Slower ice production
• Smaller or misshapen ice
• Visible scale
• Slime or dark marks
• Water pooling inside the machine
Replace water filters according to the appliance manual. Filter life depends on the model, water quality, and amount of use.
A cleaning schedule can be simple. Add a reminder to your calendar at the start of spring and fall. This habit helps prevent heavy buildup instead of forcing you to solve a larger problem later.
How to Keep Your Ice Maker Clean Longer
A few easy habits can reduce buildup between deep cleanings. These habits do not replace regular cleaning, but they make each cleaning easier.
• Use fresh drinking water
• Keep the ice bin covered when possible
• Wash the scoop often
• Never touch ice with bare hands
• Empty old ice during long periods of nonuse
• Keep the lid or door closed
• Replace water filters on time
• Wipe spills as soon as they happen
• Let the machine dry before storing it
If you will not use a portable ice maker for several days, drain it and leave the lid open. This helps prevent stale water, odors, and microbial growth.
Do not store food, drinks, or other items inside an ice bin. Ice absorbs odors easily, much like a sponge absorbs water.
When to Call a Professional
Home cleaning can solve normal dirt, odor, and light mineral buildup. It cannot fix every ice maker problem.
Contact a qualified appliance technician if:
• The machine leaks after cleaning
• The motor makes a grinding sound
• The ice maker will not start
• The unit trips a circuit breaker
• The water line is frozen or damaged
• Heavy scale blocks internal tubing
• Mold returns soon after cleaning
• Ice remains dirty after several rinses
• The machine has exposed wires or damaged insulation
Do not open sealed refrigeration parts or attempt electrical repairs without proper training. Ice makers contain electrical and cooling components that can be dangerous.
A professional can test the water inlet valve, thermostat, fan, drain, pump, motor, and control board. This may save money compared with replacing a machine that only needs a small repair.
Frequently Asked Questions About How to Clean an Ice Maker
How often should you clean an ice maker?
Clean a household ice maker about every six months. Clean it more often if you have hard water, heavy use, bad odors, or visible buildup.
Can you use vinegar to clean an ice maker?
You can use diluted white vinegar on some ice makers to loosen light mineral deposits. Check the manual first, follow the correct dilution, and rinse the machine several times before making ice.
Should you throw away the first batch of ice after cleaning?
Yes, discard the first batch after cleaning. This removes any remaining cleaner, vinegar, loosened residue, or stale water from the ice-making system.
Can you clean an ice maker without unplugging it?
It is safer to unplug the machine before cleaning removable parts or wiping the interior. If the appliance has a cleaning cycle, follow the manual and use the controls as directed.
Is bleach safe for cleaning an ice maker?
Bleach is not automatically safe for every ice maker. Use it only when the manufacturer and product label allow it for food-contact equipment, and never mix it with vinegar or other cleaners.
Why does my ice maker still smell after cleaning?
A lingering smell may come from cleaner residue, a dirty filter, trapped water, the drain, or the ice bin seal. Rinse again, replace the filter if needed, and inspect hidden areas for buildup.
Conclusion
A clean ice maker produces better-tasting ice and works with less strain. The safest method is to unplug the machine, remove and wash loose parts, clean the reservoir and interior, rinse completely, dry every surface, and discard the first batch of ice.
Use the manufacturer’s instructions whenever they differ from general advice. Make cleaning part of your regular appliance routine, and inspect the machine early if odors, leaks, or poor ice production continue.
Now that you know how to clean an ice maker, set a cleaning reminder and give your machine a careful refresh this week. Share your experience or explore more appliance care guides for simple ways to keep your kitchen running smoothly.