
Use a knife sharpener stone by soaking it, setting a steady angle, and gently sliding each blade side across the grit.
Learning how to use a knife sharpener stone can turn a dull kitchen knife into a clean, useful tool again. The process looks simple, but small details matter. The right stone, angle, pressure, and finishing steps will help you sharpen safely and avoid damaging the blade.
What Is a Knife Sharpener Stone?
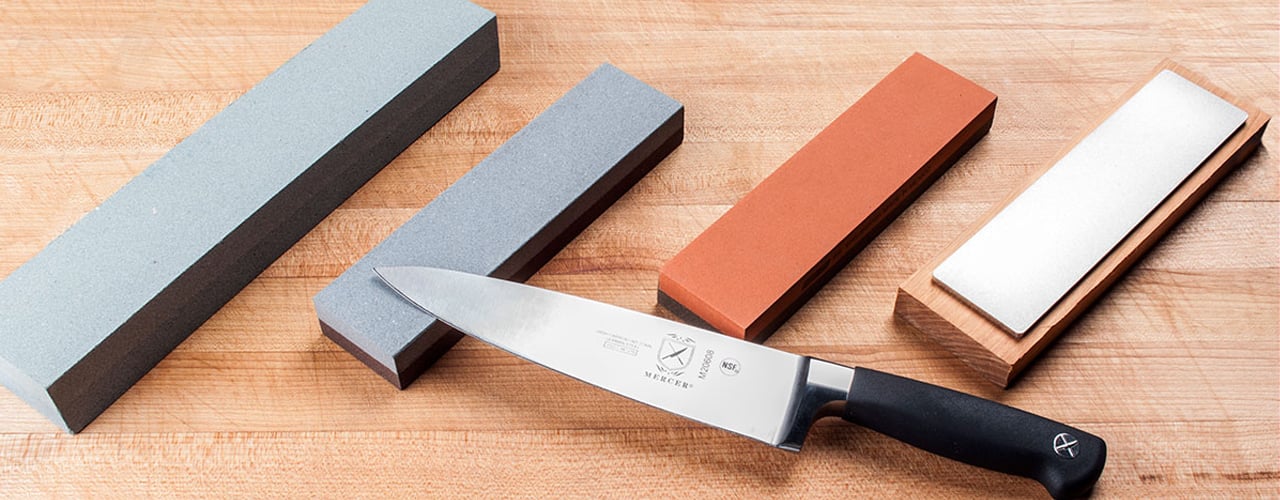
A knife sharpener stone, also called a whetstone, sharpening stone, or water stone, is an abrasive block that removes a small amount of metal from a knife edge. This creates a new, sharper bevel.
Despite the name, not every whetstone needs water. Some stones use water, while others use honing oil or work dry. Always follow the care instructions for your specific stone.
Most sharpening stones have a grit rating:
• Coarse grit, usually 100 to 400, repairs chips and very dull edges.
• Medium grit, usually 600 to 1,000, creates a sharp working edge.
• Fine grit, usually 2,000 to 8,000 or more, polishes and refines the edge.
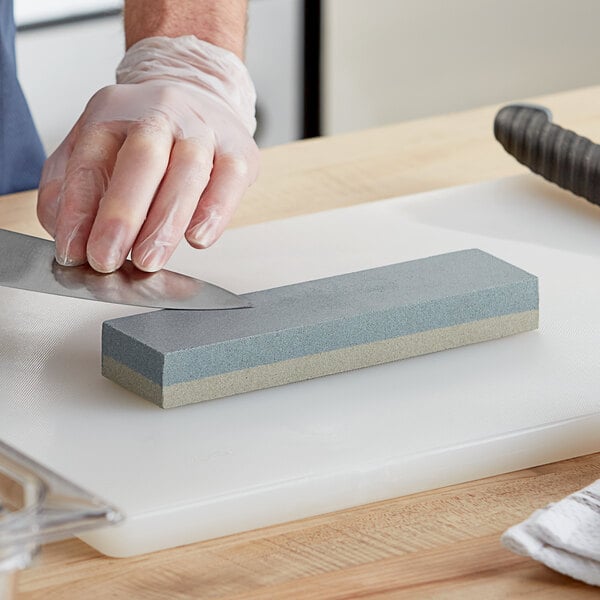
A beginner-friendly two-sided stone often has a 1,000-grit side and a 6,000-grit side. This setup works well for many home kitchen knives.
A sharpening stone does not simply “smooth” a dull edge. It removes metal in a controlled way. That is why correct technique matters. Too much pressure or a poor angle can create an uneven edge.
What You Need Before Sharpening
Gather your tools before you begin. A stable setup makes the work safer and helps you keep a consistent angle.
You will need:
• A knife sharpener stone with a suitable grit.
• Water or honing oil, based on the stone type.
• A non-slip base, damp towel, or sharpening stone holder.
• A clean towel.
• A small cup or bowl for water.
• A cutting board or stable work surface.
• A nagura stone or flattening plate, if your stone needs surface maintenance.
Check your knife first. Look for chips, rust, a bent tip, or damage along the blade. A small chip may require a coarse stone and extra work. A badly damaged blade may need professional repair.
Clean the knife before sharpening. Food and grease can make the handle slippery. Dry the handle, but keep the stone properly lubricated during the process.
Choose a quiet space with good light. Rushing near a sink or crowded counter is an easy way to lose control of the knife.

How to Prepare a Sharpening Stone
Preparation depends on the kind of stone you own. Read the manufacturer’s instructions before adding water or oil.
Preparing a water stone
Many traditional water stones need soaking. Place the stone in clean water for about 5 to 15 minutes, or until air bubbles stop rising. Some splash-and-go stones need only a light spray on the surface.
Do not soak every stone for a long time. Certain ceramic stones, diamond stones, and resin-bonded stones can crack or weaken if left underwater.
Keep a small amount of water nearby while sharpening. The surface should stay damp, but it should not be covered by a deep pool of water.
Preparing an oil stone
Oil stones use a thin layer of honing oil. Do not use water on a stone designed for oil. Oil helps carry away metal particles and keeps the abrasive surface working smoothly.
Use only the recommended oil. Household cooking oil can become sticky or rancid and may clog the stone.
Securing the stone
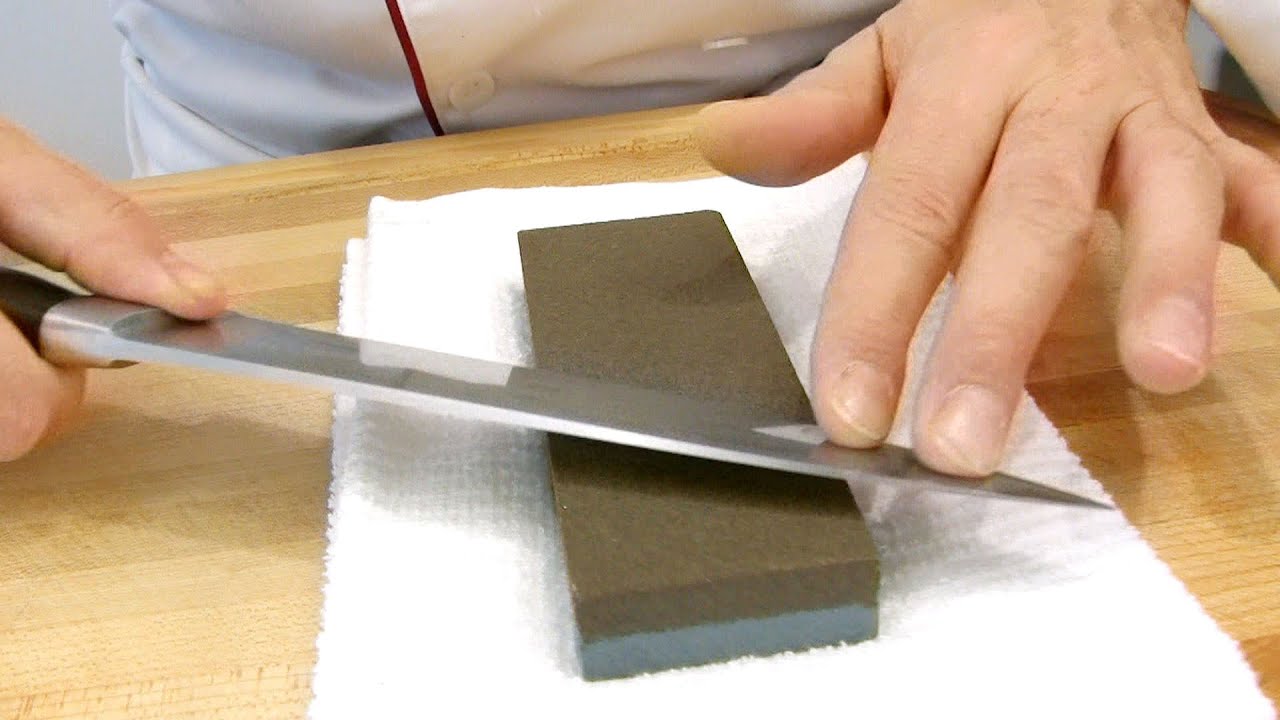
Place the stone on a damp folded towel or in a stone holder. The stone must not slide during use.
This step is easy to overlook. In my early sharpening practice, I focused so much on the blade angle that I ignored the moving stone. A non-slip towel made a bigger difference than I expected. It improved both control and confidence.

How to Use a Knife Sharpener Stone Step by Step
The following method works for most double-bevel kitchen knives. A double-bevel knife has a sharpened angle on both sides of the blade.
1. Start with the coarse or medium side
Use the coarse side only when the knife is very dull, damaged, or chipped. For normal maintenance, begin with a medium grit around 800 to 1,000.
Place the stone securely with the long side facing you. Keep the surface wet or oiled as required.
2. Find the correct sharpening angle
Most Western kitchen knives work well at about 15 to 20 degrees per side. Many Japanese kitchen knives use a lower angle, often around 10 to 15 degrees per side.
A lower angle can create a very sharp edge, but it may be more fragile. A wider angle is usually stronger and better for heavy cutting.
To estimate the angle:
-
Hold the knife straight up at 90 degrees.
-
Tilt it halfway to about 45 degrees.
-
Tilt it halfway again to reach roughly 20 degrees.
-
Lower it slightly for a 15-degree angle.
You can also place two stacked coins under the spine of some kitchen knives to help estimate the angle. The exact height varies with blade width, so use this only as a guide.
The most important rule is consistency. A steady 17-degree angle is better than changing between 12 and 25 degrees during each stroke.
3. Position the blade
Hold the knife handle with your dominant hand. Place the other hand lightly on the flat side of the blade near the middle.
Keep your fingers away from the cutting edge. Do not press directly on the sharp edge.
Point the blade away from you. Keep your wrist firm and use your arms to guide the movement.
4. Slide the knife across the stone
Start with the heel of the blade near the lower end of the stone. Maintain the chosen angle and slowly slide the blade forward and across the stone toward the tip.
The movement should feel like you are trying to slice a thin layer from the stone. Do not scrape the blade straight up and down.
Move the blade so the entire edge contacts the stone. Follow the curve toward the tip by slightly lifting the handle as you reach the front of the knife.
Use light to moderate pressure. A useful starting point is the weight of your hand plus a little extra pressure. Heavy force removes metal quickly but makes angle control harder.
Make about 5 to 10 slow strokes, then inspect the edge. Repeat as needed.
5. Raise a burr
A burr is a tiny fold of metal that forms along the opposite side of the edge. It is one of the best signs that you have sharpened one side far enough.
To feel for it, carefully run your fingertip from the spine toward the edge, never along the edge. You may feel a slight roughness or wire-like ridge.
Work on the first side until the burr runs from the heel to the tip. Do not continue for many extra strokes after the burr appears. Excess sharpening removes more metal than necessary.
6. Sharpen the opposite side
Turn the knife over and repeat the same process. Match the angle and use a similar number of strokes.
If you used 10 strokes on one side, begin with about 10 on the other side. This helps keep the bevel centered.
Experienced sharpeners often use fewer strokes on the second side because the burr is already close to being removed. For beginners, equal and controlled strokes are easier to manage.
7. Move to a finer grit
Rinse or wipe the stone if its instructions allow it. Then use the finer side.
The fine side removes the rough marks left by the coarse or medium grit. Use lighter pressure and fewer strokes. Around 5 to 10 strokes per side is often enough, but the exact number depends on the knife and stone.
A fine stone can polish the bevel, but polish is not the same as sharpness. A knife needs a clean, centered edge first.
8. Remove the remaining burr
Finish with alternating strokes. Use one light stroke on one side, then one light stroke on the other side.
Keep the pressure very light. This step helps detach the remaining burr instead of folding it back and forth.
Some sharpeners finish with a leather strop. A strop can refine the edge, but it is optional. If you use one, keep the blade spine leading rather than dragging the edge forward into the leather.
9. Clean and test the knife
Rinse the knife carefully and dry it right away. Clean the stone according to its instructions.
Test the blade on a sheet of paper, a tomato, or a piece of soft produce. A sharp kitchen knife should cut with gentle pressure.
Avoid testing sharpness with your thumb. That method can cause a painful cut and does not give reliable information.

How Much Pressure Should You Use?
Use firm pressure on a coarse stone and lighter pressure as you move to finer grits. Too much pressure can dig into the stone, round the edge, or create an uneven bevel.
Think of the blade as a paintbrush, not a shovel. You want contact and control, not force.
A common mistake is pressing harder when the knife does not sharpen quickly. The real problem may be the angle, a dry stone, or a burr that has not formed across the full edge.
If the knife feels rough but does not cut well, stop and inspect it. You may have created a large burr instead of removing it.

How to Keep a Consistent Sharpening Angle
Angle control is the hardest part of learning how to use a knife sharpener stone. Your hands naturally want to lift or drop the spine during each stroke.
Try these techniques:
• Keep your elbow and wrist steady.
• Use your shoulder and arm to move the knife.
• Watch the contact point between the bevel and stone.
• Use slow strokes instead of fast ones.
• Practice on an inexpensive knife before using a valuable blade.
• Mark the bevel with a washable marker.
The marker method is useful. Color the existing bevel, then make one gentle stroke on the stone. Check the mark. If the color disappears only at the shoulder or edge, your angle needs adjustment.
This simple trick shows exactly where the stone is touching. It is often more helpful than guessing by feel.
Common Mistakes to Avoid
Learning how to use a knife sharpener stone takes practice. These mistakes are common, but each one has a simple fix.
Using the wrong lubricant
Water, oil, and dry use are not interchangeable. Using the wrong lubricant can clog or damage the stone.
Check the product instructions first. When the instructions are unclear, contact the manufacturer rather than guessing.
Letting the stone dry out
A dry water stone creates extra friction and may produce poor results. Add water when the surface begins to look dry.
Do not flood the work area. A thin wet film is usually enough.
Using too much pressure
Heavy pressure can round the edge and wear the stone unevenly. Use enough pressure to keep steady contact, then reduce it as the edge becomes sharp.
Changing the angle
An inconsistent angle creates a wide, uneven bevel. It can also make one side of the knife much thicker than the other.
Slow down and use fewer strokes. Accuracy matters more than speed.
Ignoring the knife tip
The tip curves upward, so it needs a small lift of the handle as you move across the stone. If you keep the handle flat, the tip may remain dull.
Use gentle strokes near the tip. It is easy to remove too much metal from this area.
Sharpening only one side
Most kitchen knives need work on both sides. Sharpening one side alone can push the edge off center.
Single-bevel knives are different. Their flat side and angled side require a special method. If you own a single-bevel sushi or sashimi knife, follow its specific sharpening design.
Failing to flatten the stone
Water stones wear and develop a hollow area in the center. A hollow stone makes it difficult to keep a straight bevel.
Use a flattening plate or stone fixer when needed. Place a pencil grid on the stone, rub it against the flattening tool, and continue until the pencil marks disappear evenly.

How to Sharpen Different Types of Knives
The basic method stays the same, but the angle and pressure may change.
Chef’s knife
A chef’s knife usually works well at 15 to 20 degrees per side. Use a medium grit for regular sharpening and a fine grit for a smoother finish.
Paring knife
A paring knife has a short blade, so use smaller strokes. Keep the same angle from heel to tip.
Serrated knife
Do not drag a serrated knife flat across a sharpening stone. Sharpen each serration with a tapered ceramic rod that matches the groove.
Serrated knives have teeth on one side and a flat surface on the other. Usually, only the beveled side needs sharpening. Follow the manufacturer’s instructions when possible.
Single-bevel knife
A single-bevel knife has one flat side and one angled side. Sharpen the angled side on the stone, then lightly remove the burr from the flat side.
These knives can require more precise technique. Avoid using the same method as a standard double-bevel chef’s knife.
Pocket knife
A pocket knife may have a thicker or more durable edge. Use a moderate angle and avoid excessive pressure.
Check the locking mechanism before sharpening. Keep the blade fully controlled, and never sharpen a folding knife while it is loosely open or unstable.
How Often Should You Use a Sharpening Stone?
Sharpening frequency depends on how often you use the knife, the cutting board material, and the food you prepare.
A home cook may need a full sharpening every one to three months. Someone who cooks daily may need it more often. A professional kitchen may sharpen certain knives weekly or even more frequently.
Use a honing rod between sharpening sessions if your knife is slightly misaligned but not dull. A honing rod does not remove much metal. It mainly straightens the edge.
A stone is needed when honing no longer restores cutting performance. If the knife slides over food instead of entering it, the edge likely needs sharpening.
Avoid cutting on glass, stone, ceramic, or hard metal surfaces. These materials can damage a sharp edge quickly. Use a quality wood or soft plastic cutting board instead.
How to Care for Your Sharpening Stone
Good stone care improves results and extends its life.
Follow these habits:
• Rinse away metal particles after use.
• Dry the stone fully before storing it, unless the manufacturer says otherwise.
• Store it in a dry place away from extreme heat.
• Keep water stones flat and protected from impact.
• Flatten the stone when it develops a hollow.
• Do not mix oil and water on the same stone.
• Keep coarse and fine stones clean and clearly labeled.
A water stone may develop small cracks if it dries too fast or experiences large temperature changes. Let it air-dry naturally rather than placing it on a heater or in direct sun.
Is a Sharpening Stone Better Than Other Knife Sharpeners?
A sharpening stone offers excellent control and can create a refined edge. It also works with many blade shapes and allows you to choose the edge angle and finish.
However, stones require practice. Pull-through sharpeners are faster and easier for beginners, but they may remove more metal than needed. Electric sharpeners are convenient, yet they can also be aggressive and may not suit delicate or single-bevel knives.
A honing rod is useful for maintenance but cannot repair a truly dull edge. Professional sharpening is a good option for expensive knives, major chips, or blades that feel unsafe to handle.
The best tool depends on your skill, knife type, time, and comfort level. A stone is not automatically better in every situation, but it gives the most hands-on control.
Safety Tips for Sharpening Knives
Treat sharpening as a controlled task, not a race.
• Keep the stone stable.
• Point the blade away from your body.
• Keep your fingers behind the edge.
• Use slow, deliberate strokes.
• Wipe water from the handle when needed.
• Keep children and pets away from the work area.
• Never try to catch a falling knife.
• Wear cut-resistant gloves only if they do not reduce your grip or control.
Some people assume gloves make sharpening completely safe. They do not. Good technique and a stable setup matter more than protective gear alone.
If the blade has a serious crack, loose handle, or deep damage, stop using it. A professional knife service can inspect it more safely.
Frequently Asked Questions About How to Use a Knife Sharpener Stone
Do you soak every knife sharpening stone?
No. Many water stones need soaking, but splash-and-go stones need only a little water. Oil stones, diamond stones, and some ceramic stones may need oil or no lubricant at all, so check the product instructions.
What angle should I use on a sharpening stone?
Most Western kitchen knives work well at 15 to 20 degrees per side. Japanese knives often use a lower angle, but the correct angle depends on the blade design and intended use.
How do I know when the knife is sharp?
A consistent burr along the full edge shows that one side has been sharpened. After removing the burr, the knife should cut paper or soft food with little pressure.
Can a sharpening stone damage a knife?
Yes, too much pressure, a poor angle, or excessive sharpening can remove unnecessary metal. Use controlled strokes, inspect the edge often, and use the coarsest grit only when needed.
How long does it take to sharpen a knife on a stone?
A lightly dull knife may take 5 to 10 minutes. A very dull or damaged knife can take much longer, especially if you need to repair the edge with a coarse grit.
Should I sharpen both sides of the blade?
Most kitchen knives have a double bevel and need both sides sharpened. Single-bevel knives require a different process, with most sharpening done on the angled side.
Can I use cooking oil on a sharpening stone?
Usually, no. Cooking oil can become sticky and may clog the stone. Use the lubricant recommended for your specific oil stone, or use water if the stone is designed for water.
Conclusion
Using a knife sharpener stone becomes easier when you focus on four things: a stable stone, a steady angle, light controlled pressure, and a clean burr-removal step. Start with a medium grit for regular sharpening, use a coarse grit only for serious dullness, and finish with lighter strokes on a fine stone.
Practice on a basic kitchen knife and take your time. Each session will improve your angle control and help you understand how the edge feels. Try these steps on your next dull knife, then explore more knife care guides or share your sharpening experience in the comments.