
Use an electric knife sharpener by guiding the blade slowly through each correct stage with light, steady pressure.
Learning how to use an electric knife sharpener can make dull kitchen knives feel useful again in just a few minutes. The key is to match the sharpener’s stages to your knife, keep the blade level, and let the abrasive wheels do the work. This guide explains safe techniques, common mistakes, knife care tips, and practical steps for getting a clean, even edge.
What an Electric Knife Sharpener Does
An electric knife sharpener uses powered abrasive wheels or belts to reshape and polish a knife’s edge. Most models have one or more slots for different sharpening stages.
The first stage usually removes metal and creates a new edge. The second stage refines that edge. A final polishing stage may smooth the bevel and improve cutting performance.
Electric sharpeners are popular because they are fast and simple. However, they remove more metal than a honing rod, so they should not be used every day unless the manufacturer says otherwise.

Before You Use an Electric Knife Sharpener
A little preparation makes the process safer and more accurate. Read the manual first, even if the sharpener looks simple. Slot layouts and pressure rules vary by brand.
Place the sharpener on a flat, dry counter. Make sure it does not slide while you work. Keep your fingers away from the slots, and remove any food, oil, or moisture from the knife.
Check the blade before sharpening. Look for chips, bends, rust, or cracks. A small dull area is easy to fix, but a badly damaged blade may need professional repair.
You should also identify the knife type:
• Standard kitchen knives usually work well with electric sharpeners.
• Serrated knives often need a special serrated sharpener or ceramic rod.
• Scissors, cleavers, and thick outdoor knives may require a dedicated tool.
• Ceramic knives need a sharpener designed for ceramic blades.
Using the wrong slot can damage the knife or produce a poor edge. When in doubt, check the product instructions.

How to Use an Electric Knife Sharpener Step by Step
The exact process depends on the model, but these steps work for many home electric knife sharpeners.
1. Set up the sharpener
Plug the sharpener into a safe outlet. Keep the cord away from water and hot surfaces. Turn the unit on only when you are ready to sharpen.
Hold the knife by its handle. Keep your thumb and fingers behind the heel of the blade. Never place a hand under the blade or near the abrasive opening.
2. Choose the correct stage
Start with the coarse stage only when the knife is very dull, damaged, or unable to cut paper or soft food. A lightly dull knife may need only the fine or polishing stage.
Many users make the mistake of starting with the most aggressive setting every time. This can remove too much steel and shorten the life of the knife.
3. Place the heel in the slot
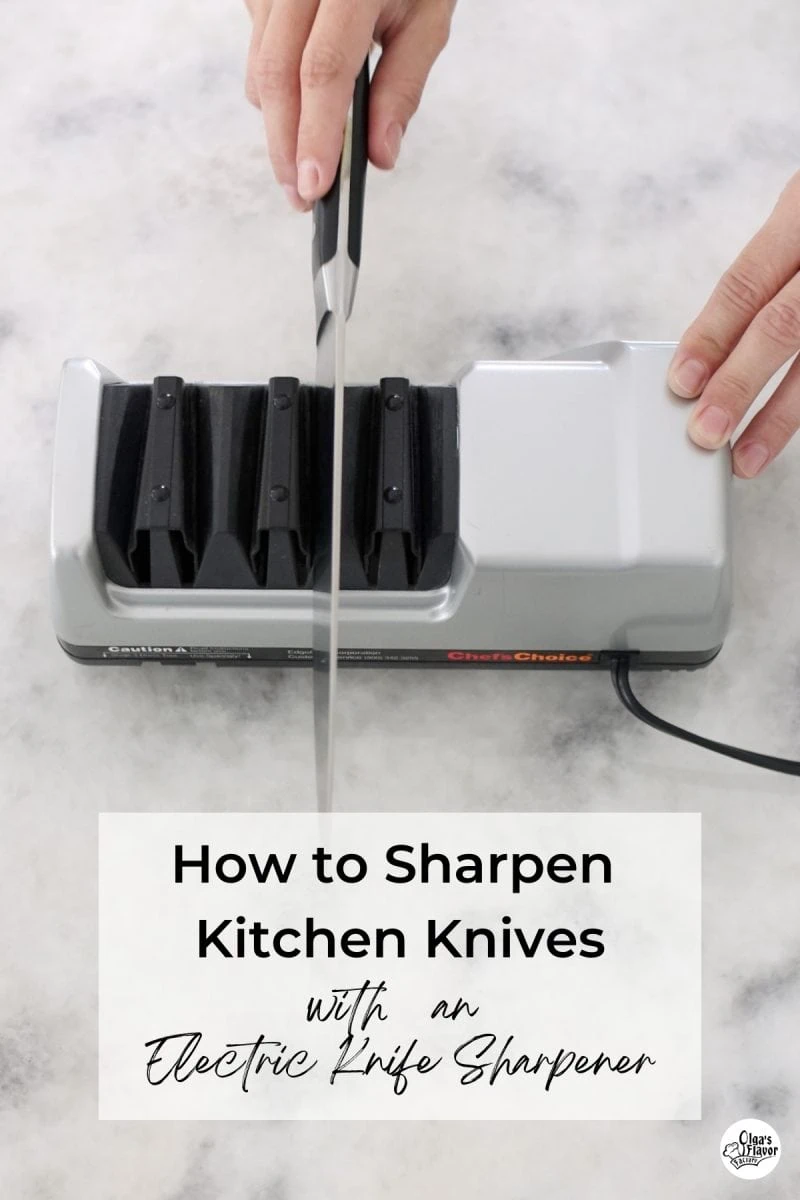
Insert the heel of the blade into the correct slot. The heel is the part closest to the handle.
Keep the blade centered and vertical unless the manual gives different instructions. Do not twist the knife. An uneven angle can create an uneven bevel.
4. Pull the blade through slowly
Move the knife from the heel toward the tip in one smooth motion. Follow the speed listed in the manual. If no speed is given, use a slow, steady pull that takes about two to four seconds for a standard chef’s knife.
Do not push the blade forward and backward. Most electric knife sharpeners are designed for a single pass from heel to tip.
5. Repeat on both sides
Some sharpeners sharpen both sides at once. Others use separate left and right slots. Follow the markings on the unit.
Use the same number of passes on each side. Balanced passes help create a centered edge and prevent the blade from leaning to one side.
6. Move to the fine stage
After the coarse stage creates the edge, use the fine stage to smooth it. Make fewer passes here, since the fine abrasive is meant to refine rather than reshape.
A common routine is one to three passes in the coarse stage, followed by one or two passes in the fine stage. Always follow your model’s instructions if they differ.
7. Clean and test the knife
Unplug the sharpener when you finish. Wipe the blade with a damp cloth, then dry it fully. Small metal particles can remain on the edge after sharpening.
Test the knife on a sheet of paper, a ripe tomato, or a soft vegetable. A sharp knife should cut with light pressure. Do not test sharpness by dragging your finger across the edge.
This basic process explains how to use an electric knife sharpener without forcing the blade or rushing the job. Think of the sharpener as a small belt sander for the edge: steady movement gives better results than strength.
How Much Pressure Should You Use?
Use very light pressure. In many cases, the motorized wheel pulls the blade through the slot. Your hand should guide the knife, not force it.
Heavy pressure can grind away too much metal. It may also heat the edge, create deep scratches, or cause the blade to catch in the slot.
A useful rule is to support the knife with a relaxed grip. Let the sharpener’s abrasive surface make contact with the blade. If the motor slows or sounds strained, reduce your pressure.
Different knives need slightly different care. A thin paring knife needs less pressure than a thick chef’s knife, but neither should be forced.

How to Choose the Right Sharpening Stage
Understanding the stages helps you avoid unnecessary wear.
Coarse stage
Use the coarse stage for:
• Very dull knives
• Blades with a rounded edge
• Minor edge damage
• Knives that fail to cut even soft foods
This stage removes the most material. Use it only as often as needed.
Fine stage
Use the fine stage for:
• Refining a newly shaped edge
• Maintaining a knife that is only slightly dull
• Smoothing rough marks from the coarse stage
• Improving the final cutting feel
The fine stage is usually the best choice for regular maintenance.
Polishing or honing stage
Some electric sharpeners include a polishing stage. It can remove small burrs and leave a smoother edge.
This stage does not replace proper sharpening. It works best after the edge has already been formed and refined.

Common Mistakes to Avoid
Knowing how to use an electric knife sharpener also means knowing what not to do. Most poor results come from rushing, using the wrong slot, or applying too much force.
Avoid these common errors:
• Using the coarse stage on every knife every time
• Pulling the blade too quickly
• Stopping before the tip reaches the end of the slot
• Tilting or twisting the knife
• Sharpening only one side
• Using a sharpener that does not support the blade type
• Failing to clean metal dust from the knife
• Sharpening a wet or oily blade
• Ignoring unusual sounds or a jammed blade
One lesson that stands out from hands-on sharpening is that speed rarely improves the result. A calm, even pass produces a cleaner edge than several rushed passes.
Another common mistake is over-sharpening. Many people continue because they expect the knife to become sharper with every pass. Once the blade cuts cleanly, stop. More grinding will not always improve it.
How to Use an Electric Knife Sharpener on Different Knives
Chef’s knife
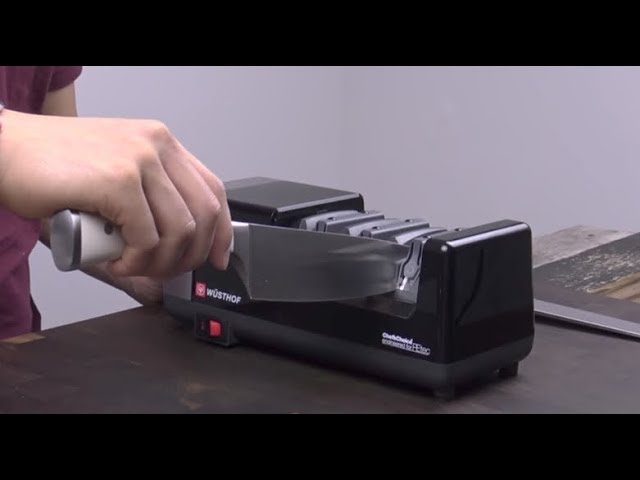
A chef’s knife is usually easy to sharpen with a standard electric model. Use the coarse stage only if the edge is very dull, then finish with the fine stage.
Pay close attention to the curved tip. Continue the same smooth motion until the tip fully exits the slot.
Paring knife
A paring knife has a smaller blade, so use gentle pressure and a slow pull. Keep the entire edge aligned with the slot.
Short blades can feel awkward at first. Hold the handle firmly and avoid pushing the blade into the abrasive wheel.
Utility knife
A utility knife often responds well to the same process as a chef’s knife. Check the blade angle listed by the manufacturer, especially if the knife has a narrow edge.
Serrated knife
Do not place a serrated knife in a standard flat-edge slot unless the manual specifically allows it. Serrations have individual teeth and require a compatible sharpening system.
Some electric sharpeners include a dedicated serrated slot. Use it only as directed.
Ceramic knife
Ceramic blades are hard but brittle. They require a ceramic-compatible sharpener, often with a diamond abrasive.
If your sharpener does not clearly support ceramic knives, do not use it. A mismatch can chip the blade.

How Often Should You Use an Electric Knife Sharpener?
The right schedule depends on how often you cook, what foods you cut, and how you store your knives. A home cook may need a full sharpening every few months, while a busy kitchen may need it more often.
Use a honing rod or fine ceramic rod between sharpening sessions if your knife manufacturer recommends one. Honing can realign a slightly bent edge, while sharpening removes metal and creates a new edge.
Watch the knife rather than the calendar. If it crushes tomatoes, slips on onions, or needs extra force, it may need attention.
To extend the time between sharpening sessions:
• Use a wood, bamboo, or soft composite cutting board
• Avoid glass, stone, ceramic, and metal cutting surfaces
• Wash knives by hand when possible
• Dry knives soon after washing
• Store knives in a block, sheath, or magnetic strip
• Avoid tossing loose knives into a drawer
These habits protect the edge and improve safety. A dull knife often needs more force, which makes slipping more likely.

How to Tell Whether the Knife Is Sharp
A sharp knife should cut food with little pressure. It should glide through a tomato skin instead of crushing it. It should also slice paper smoothly without snagging.
Try these safe tests:
• Slice a soft tomato
• Cut a sheet of paper away from your body
• Slice a cooked potato or apple
• Check whether the blade starts a cut without slipping
Do not run your thumb along the blade. Even a dull-looking edge can cause a serious cut.
Also inspect the edge under bright light. A dull or rounded section may reflect light, while a sharp edge is harder to see directly. This visual check is useful, but cutting performance remains the best practical test.

Cleaning and Maintaining an Electric Knife Sharpener
Unplug the unit before cleaning it. Follow the manufacturer’s instructions for removing metal dust, crumbs, or debris from the sharpening slots.
Never rinse the electrical body under a faucet. Use a dry brush, soft cloth, or approved cleaning tool. Avoid oils unless the manual specifically recommends them.
Store the sharpener in a dry cabinet or on a stable shelf. Keep it away from steam, splashes, and heavy heat.
Inspect the abrasive wheels from time to time. If the unit produces uneven results, excessive noise, or visible damage, stop using it and contact the manufacturer. Replacing a worn wheel is safer than trying to repair it without proper instructions.
Electric Sharpener Safety Tips
Safety should come first when learning how to use an electric knife sharpener. The blade moves close to a powered abrasive surface, so small mistakes can cause injury.
Follow these precautions:
• Keep the sharpener on a stable, non-slip surface
• Keep children and pets away while using it
• Wear closed-toe shoes and avoid loose clothing
• Keep hands dry
• Unplug the unit before cleaning or moving it
• Never force a stuck blade
• Stop if the motor smells hot or sounds unusual
• Use eye protection if the model creates visible dust or sparks
Do not sharpen a knife while holding it in the air. The sharpener should rest securely on the counter. Good control starts with a stable setup.
Electric Knife Sharpener Benefits and Limitations
Electric sharpeners offer several useful benefits:
• They are quick and easy to learn
• They can restore many dull kitchen knives
• They provide a consistent sharpening angle
• They require less skill than freehand sharpening
• They work well for busy home cooks
They also have limitations. Most models remove more metal than manual honing tools. Cheap or poorly designed models may create uneven edges, and some cannot handle serrated, ceramic, or unusually thick blades.
An electric sharpener is a practical tool, not a magic solution. The best results come from using the correct stage, gentle pressure, and suitable knives.
Frequently Asked Questions About How to Use an Electric Knife Sharpener
Can an electric knife sharpener damage a knife?
Yes, it can damage a knife if you use the wrong slot, apply heavy pressure, or make too many passes. Follow the manual and use the least aggressive stage that restores the edge.
How many times should I pull a knife through an electric sharpener?
The number varies by model and blade condition. Many knives need one to three passes in a coarse stage and one or two passes in a fine stage, but the manufacturer’s instructions should take priority.
Should I use the coarse stage every time?
No. Use the coarse stage for very dull or damaged blades. For routine maintenance, the fine or polishing stage is usually enough.
Can I sharpen a serrated knife with an electric sharpener?
Only if the sharpener has a slot designed for serrated blades. A standard flat-edge slot may damage the teeth or fail to sharpen them properly.
How do I know when to stop sharpening?
Stop when the knife cuts cleanly with light pressure. Continuing to sharpen after the edge is restored removes extra metal without providing much benefit.
Is an electric knife sharpener better than a sharpening stone?
Neither is best for every user. An electric sharpener is faster and easier, while a sharpening stone offers more control but requires practice and careful angle control.
Can I wash a knife right after sharpening it?
Yes, but wash it carefully to remove fine metal particles. Dry the knife completely before storing it, and follow the care instructions for the blade material.
Conclusion
Learning how to use an electric knife sharpener is mainly about control, patience, and choosing the correct stage. Set the sharpener on a stable surface, guide the blade from heel to tip, use light pressure, and sharpen both sides evenly.
Start with the least aggressive setting that fits the knife’s condition. Clean the blade after sharpening, test it with food rather than your finger, and protect the edge with proper storage and cutting surfaces.
With a little practice, an electric knife sharpener can keep everyday kitchen knives safer and more enjoyable to use. Try these steps on a suitable knife, then explore more knife care guides or share your sharpening experience in the comments.