
To clean old cooking oil, cool it, strain out debris, check its quality, and store it safely.
Learning how to clean old cooking oil can help reduce waste and keep frying oil useful for another batch. The key is knowing the difference between oil that is merely cloudy and oil that is spoiled, burnt, or unsafe. This guide explains safe filtering methods, storage tips, warning signs, and when tossing the oil is the better choice.

What “Cleaning” Old Cooking Oil Really Means
Cleaning old cooking oil usually means removing crumbs, batter, and food bits. It does not make spoiled oil fresh again. Filtering can improve the oil’s texture and reduce burnt flavors, but it cannot remove every chemical change caused by heat.
Each time oil is heated, it slowly breaks down. High heat, water, salt, food crumbs, and long cooking times speed up this process. Oil may become darker, thicker, foamy, or rancid.
You can often reuse oil when:
• It smells neutral or lightly like the food cooked in it
• It has no mold or strange growth
• It is not thick, sticky, or unusually foamy
• It has not reached its smoke point many times
• It contains only small food particles
You should discard oil when:
• It smells sour, stale, paint-like, or strongly rancid
• It smokes at a lower heat than usual
• It looks very dark and syrupy
• It creates heavy foam during normal heating
• It contains water, mold, or a large amount of burnt food
• It causes food to taste bitter or stale
A simple rule helps: if the oil looks questionable before heating, do not taste it and do not risk using it.

How to Clean Old Cooking Oil Safely
The safest method uses cooling, straining, settling, and proper storage. Work slowly and avoid adding water to hot oil.
1. Let the oil cool completely
Turn off the heat and allow the oil to cool. It should be cool enough to handle safely but still fluid.
Never pour hot oil into a plastic container. Hot oil can melt plastic and cause serious burns. Also, never pour water into hot oil. Water turns into steam quickly and can make the oil splatter or erupt.
2. Remove large food pieces
Use a slotted spoon or fine skimmer to remove large crumbs. This step keeps burnt food from breaking apart during straining.
Large crumbs can continue to burn the next time you heat the oil. They may also make clean oil look darker than it really is.
3. Strain the oil
Place a fine-mesh strainer over a clean, dry metal bowl or heat-safe glass container. For finer filtering, line the strainer with cheesecloth, a clean coffee filter, or several layers of paper towel.
Pour the oil slowly through the filter. If the oil moves too slowly, do not press the crumbs through. Pressing can force tiny particles back into the oil.
A coffee filter works well for small amounts. For a large amount of frying oil, a fine-mesh strainer is faster and less likely to clog.
4. Let the oil settle
After filtering, allow the oil to sit for several hours. Fine particles may sink to the bottom.
Pour the clearer oil into a clean container. Stop before the cloudy layer or sediment reaches the opening. This process is called decanting. It is similar to pouring clear water off settled sand.
5. Check the smell and appearance
Look at the filtered oil under good light. Fresh-looking reusable oil is usually clear or slightly cloudy, depending on the type of oil and food used.
Smell it before storing it. A mild food scent is normal. A sharp, sour, bitter, or chemical smell means the oil should be discarded.

The Best Tools for Filtering Used Cooking Oil
You do not need expensive equipment to clean old cooking oil. The right tool depends on how much oil you have and how fine the particles are.
• Slotted spoon: Removes large pieces after frying
• Fine-mesh strainer: Catches crumbs and bits of batter
• Cheesecloth: Filters smaller particles
• Paper coffee filter: Produces a cleaner result but works slowly
• Funnel: Helps prevent spills during storage
• Clean glass jar: Holds filtered oil safely
• Label and marker: Helps track the oil and its cooking history
Use only clean, dry tools. Even a small amount of water can cause hot oil to splatter later.
Avoid using a dirty cloth, loose paper towel, or a container that previously held chemicals. Oil absorbs odors easily, so a container with soap, paint, or strong food smells can affect the next batch.
A Simple Method for How to Clean Old Cooking Oil
Follow these steps when you want a quick and safe routine.
- Turn off the heat and let the oil cool fully.
- Remove large food pieces with a slotted spoon.
- Place a fine strainer over a dry, clean container.
- Add cheesecloth or a coffee filter if the oil has fine crumbs.
- Pour the oil through the filter slowly.
- Leave the filtered oil undisturbed for a few hours.
- Pour the clear top layer into another dry container.
- Check the color, smell, thickness, and foam level.
- Label the container with the type of food and date.
- Store it in a cool, dark place.
This method is especially useful after frying foods such as chicken, fish, French fries, or vegetables. Foods with flour or breading leave more particles, so their oil may need extra filtering.
From practical kitchen testing, the most common mistake is rushing the pour. When people pour too fast, sediment slips through or the filter collapses. Slow pouring takes an extra minute but gives a much cleaner result.

How to Store Filtered Cooking Oil
Good storage protects oil from heat, light, air, and moisture. These four factors can make oil turn rancid faster.
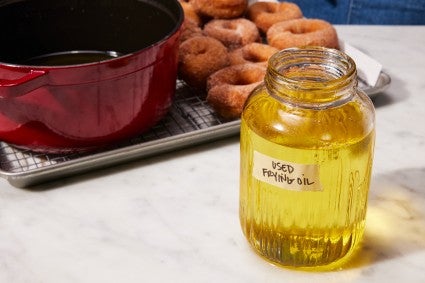
Use a clean, dry, airtight container. A dark glass jar is a good choice because it blocks more light than a clear container. If you use a clear jar, keep it inside a dark cabinet.
Store filtered oil:
• Away from the stove and oven
• Away from sunlight
• Away from steam and sinks
• In a cool, dry cabinet
• With the lid tightly closed
Always label the oil. Write the date and the food cooked in it. Do not mix oil used for fish with oil you plan to use for sweet foods. Strong flavors can remain in the oil.
For longer storage, refrigeration can slow quality loss. However, some oils become cloudy or partly solid in the refrigerator. This change does not always mean spoilage. Let the oil return to room temperature and check its smell before use.
How Many Times Can You Reuse Cooking Oil?
There is no single number that fits every oil. Reuse depends on the oil type, cooking temperature, food, filtering method, and storage conditions.
Oil used for lightly seasoned vegetables may last longer than oil used for breaded fish. Oil used at a stable frying temperature usually holds up better than oil repeatedly overheated in an empty pan.
Before reusing oil, ask:
• Was the oil heated until it smoked?
• Was it exposed to water or steam?
• Was it used for heavily breaded food?
• Was it filtered soon after cooling?
• Was it stored in a sealed, dark container?
• Does it still smell and look normal?
If the oil passes these checks, use it for a similar savory dish. For example, oil used for fries can work well for another savory frying task. Avoid using strongly flavored oil in delicate foods.
Food safety agencies generally advise watching for changes in color, smell, taste, smoke, and foam rather than relying only on a fixed reuse count. Quality drops faster when oil is overheated or contaminated with food particles.

Can You Clean Old Cooking Oil With Water?
Adding water is not a safe way to clean cooking oil. Water and oil separate, and trapped water can create violent splattering when the oil is heated.
Some commercial oil-cleaning systems use water-based processes under controlled conditions. These systems are not the same as pouring water into a home frying pan. Home cooks should use dry filtering instead.
If water has already entered the oil, do not heat it to “dry it out.” The safest choice is usually to discard the oil after it cools completely. Place it in a sealed container and follow local disposal rules.
Can Baking Soda, Flour, or Cornstarch Clean Used Oil?
Many home tips suggest adding flour, cornstarch, baking soda, or other powders to dirty oil. These methods may trap some particles, but they can also leave residue behind and make the oil harder to filter.
Flour and cornstarch can form a paste with water or food moisture. That paste may burn during the next cooking session. Baking soda may also change the taste and does not restore oil that has already gone rancid.
Dry straining is more predictable. Use a fine filter, let the oil settle, and discard it when quality has declined.

How to Dispose of Old Cooking Oil
Never pour cooking oil down the sink or toilet. Oil can stick to pipes and contribute to plumbing blockages. It may also harm wastewater systems and create problems in local drains.
To dispose of small amounts:
- Let the oil cool completely.
- Pour it into a sealed container.
- Mix in absorbent material if your local rules allow it.
- Place the closed container in the trash.
- Check local recycling or household waste guidance.
Some communities collect used cooking oil for biodiesel or other recycling programs. A restaurant or recycling center may accept larger amounts. Do not pour oil onto soil, lawns, or storm drains.
Common Mistakes to Avoid
Knowing what not to do is just as important as learning how to clean old cooking oil.
• Filtering hot oil near children or pets
• Pouring oil into a plastic container while it is very hot
• Adding water to oil
• Using a wet jar or wet strainer
• Pressing crumbs through a clogged filter
• Mixing old oil with fresh oil without checking it
• Storing oil beside a hot stove
• Reusing oil that smells rancid
• Keeping oil in an open bowl
• Pouring oil down the drain
One mistake I often see in home kitchens is saving oil simply because it feels wasteful to throw it away. Saving food matters, but questionable oil is not worth ruining a meal or causing stomach discomfort. A small amount of oil is cheaper than a spoiled dish.
Tips for Better Frying Oil Quality
The best way to clean old cooking oil is to keep it cleaner while cooking.
• Shake off excess flour before frying
• Keep the heat steady
• Avoid heating oil past its smoke point
• Remove loose crumbs during cooking
• Do not overcrowd the pan
• Keep water away from the oil
• Filter the oil soon after it cools
• Store it in a sealed container
• Use oil for foods with similar flavors
• Avoid adding salt directly to the oil
A thermometer can help maintain a steady frying temperature. Many home frying tasks work around 350°F to 375°F, but the correct temperature depends on the food and recipe. If the oil smokes, lower the heat and inspect it before continuing.
Stable heat is important because very high heat speeds up oxidation and oil breakdown. In simple terms, overheated oil becomes tired faster.
Signs That Old Cooking Oil Is Unsafe
Color alone does not tell the whole story. Some oils are naturally dark, while some foods darken oil quickly.
Look for several signs together:
Bad smell
Rancid oil may smell like old nuts, crayons, paint, or stale food. This smell usually means the oil has oxidized.
Heavy foam
A little bubbling is normal when wet food enters hot oil. Persistent foam during heating can signal moisture, food residue, or oil breakdown.
Thick texture
Old oil may become sticky, gummy, or unusually thick. This often happens after repeated high-heat use.
Low smoke point
If oil begins smoking much sooner than expected, it may have degraded. Stop heating it and allow it to cool safely.
Poor taste
Never taste oil while it is hot. If a cooked food tastes bitter, stale, or harsh, discard the oil and the affected food if needed.
When several warning signs appear, cleaning will not solve the problem. Disposal is the safer choice.
Frequently Asked Questions About How to Clean Old Cooking Oil
Can I filter old cooking oil and use it again?
Yes, you can filter oil if it has a normal smell, reasonable color, and no signs of rancidity. Strain it while cool, store it in a clean airtight container, and check it again before reheating.
What is the best filter for used cooking oil?
A fine-mesh strainer removes larger crumbs, while cheesecloth or a coffee filter catches smaller particles. A coffee filter gives a cleaner result but may work slowly, especially with thick or cold oil.
Can I clean old cooking oil with water?
No. Water can remain in the oil and cause dangerous splattering when heated. Use dry filtering instead, and discard oil that has been contaminated with a large amount of water.
How long can filtered cooking oil be stored?
Filtered oil should be kept sealed in a cool, dark, dry place. Storage time varies by oil type and use, so check the smell, color, thickness, and cooking performance before using it.
Can I mix old cooking oil with fresh oil?
It is better not to mix questionable oil with fresh oil. If the old oil is clean and still in good condition, a small amount may be mixed, but degraded oil can reduce the quality of the entire batch.
Should I refrigerate cleaned cooking oil?
Refrigeration can slow quality loss, but some oils may turn cloudy or solid. Let the oil warm to room temperature before judging its appearance, then check its smell and texture.
When should I throw away used cooking oil?
Throw it away when it smells rancid, becomes sticky, smokes too soon, produces heavy foam, or contains mold or excess water. Filtering cannot reverse serious oil breakdown.
Conclusion
Learning how to clean old cooking oil is mostly about safe filtering and careful judgment. Cool the oil, remove food bits, strain it through a fine filter, let it settle, and store it in a clean airtight container.
Do not add water, ignore rancid smells, or reuse oil that smokes and foams heavily. When in doubt, dispose of it safely rather than risking a poor meal or a kitchen accident. Try these steps the next time you fry, and share your favorite oil-saving tip in the comments.