
To use a wet stone knife sharpener, soak the stone, set an angle, and sharpen each side evenly.
A wet stone knife sharpener, often called a whetstone, can restore a dull kitchen knife with more control than many pull-through sharpeners. The process is simple once you understand water, grit, sharpening angle, burr formation, and light pressure. This guide explains how to use a wet stone knife sharpener safely, avoid common mistakes, and create a clean, sharp edge that lasts.
What Is a Wet Stone Knife Sharpener?
A wet stone knife sharpener is an abrasive stone used with water to sharpen a knife blade. Water helps remove metal particles and keeps the stone’s surface from clogging with steel dust. Despite the name, “whetstone” comes from an old word meaning “to sharpen,” not from the word “wet.”
Most sharpening stones have a grit rating. Grit tells you how coarse or fine the abrasive surface is.
• Coarse grits, such as 200 to 400, repair chips and very dull edges.
• Medium grits, such as 800 to 1,500, sharpen a normally dull knife.
• Fine grits, such as 3,000 to 8,000, polish and refine the edge.
• Extra-fine grits, above 8,000, create a highly polished edge but are not needed for most home knives.
A combination stone may have two sides, such as 1,000 grit and 6,000 grit. This setup works well for everyday kitchen knives. A 1,000-grit side can create the edge, while the finer side smooths it.
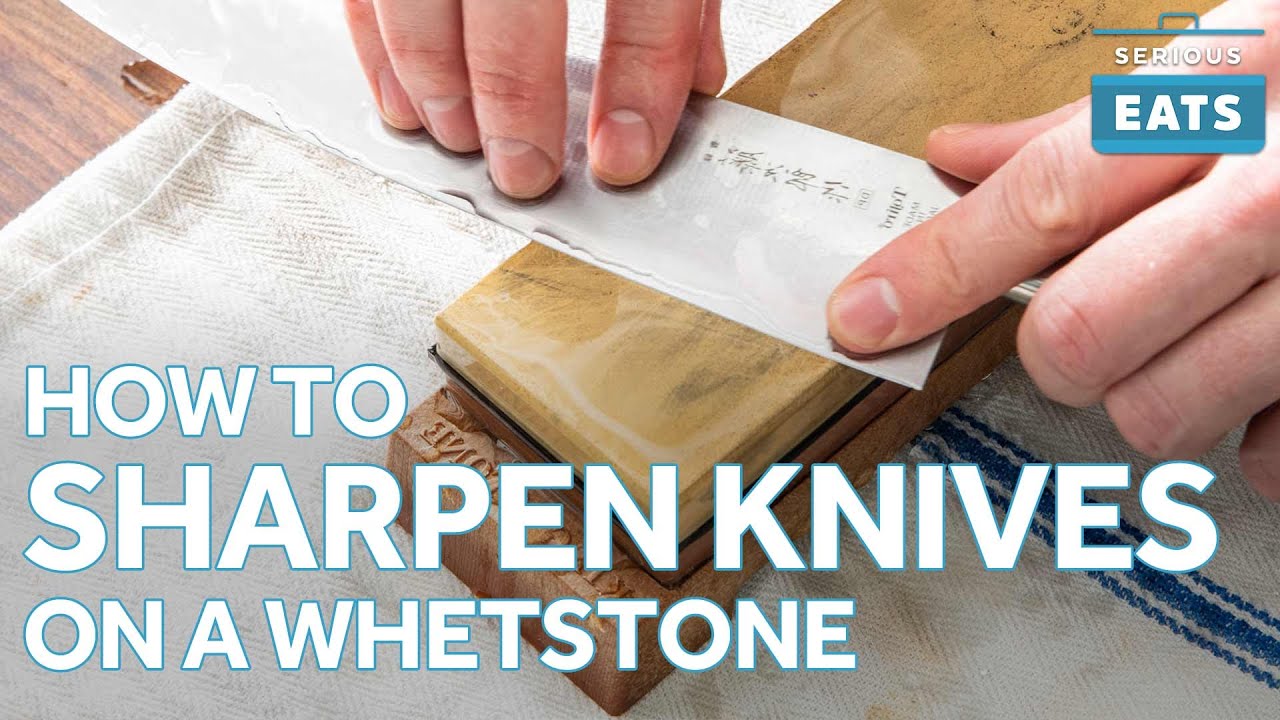
What You Need Before Sharpening
Gather your tools before you begin. A stable setup makes the process safer and helps you keep a steady angle.
You will need:
• A wet stone knife sharpener
• A shallow container of clean water
• A non-slip stone holder or damp kitchen towel
• The knife you want to sharpen
• A clean cloth
• A leather strop or piece of sturdy cardboard, if you want to polish the edge
Check the manufacturer’s instructions before soaking the stone. Some water stones need several minutes in water. Others only need water poured over the surface. Do not soak oil stones unless the instructions specifically allow it.
Inspect the knife first. If the blade has a large chip, a bent tip, heavy rust, or major damage, sharpening may require a coarse stone and extra care. A professional knife service may be safer for valuable or badly damaged blades.
For safety, work on a firm counter with good lighting. Keep your fingers behind the sharp edge, and never test sharpness by sliding a finger along the blade.
How to Prepare the Stone
Proper stone preparation is one of the most important steps in learning how to use a wet stone knife sharpener. A dry stone may produce poor results, clog quickly, or create too much friction.
Follow these steps:
-
Place the stone in clean water.
-
Let it soak for the time recommended by the maker. Many traditional water stones need about 5 to 15 minutes.
-
Watch for air bubbles. When bubbles stop rising, the stone may be fully saturated.
-
Remove the stone and place it in a stable holder.
-
Wet the top surface again before sharpening.
The stone should stay damp during use. If the surface starts to dry, add a small amount of water. Avoid flooding the counter, because excess water can make the stone or knife slide.
Some modern splash-and-go stones do not need a long soak. They only need a thin layer of water on the surface. Over-soaking certain stones can weaken them or cause cracking, so the product instructions matter.
Flattening the Stone
Water stones wear as metal is removed. Over time, the center may become lower than the edges. This is called dishing, and it can make it hard to maintain a consistent angle.
Flatten the stone with a diamond lapping plate or a purpose-made flattening stone. Draw a pencil grid across the surface, add water, and rub until the pencil marks disappear evenly. A flat stone helps the knife edge contact the abrasive surface correctly.
How to Hold the Knife and Set the Angle
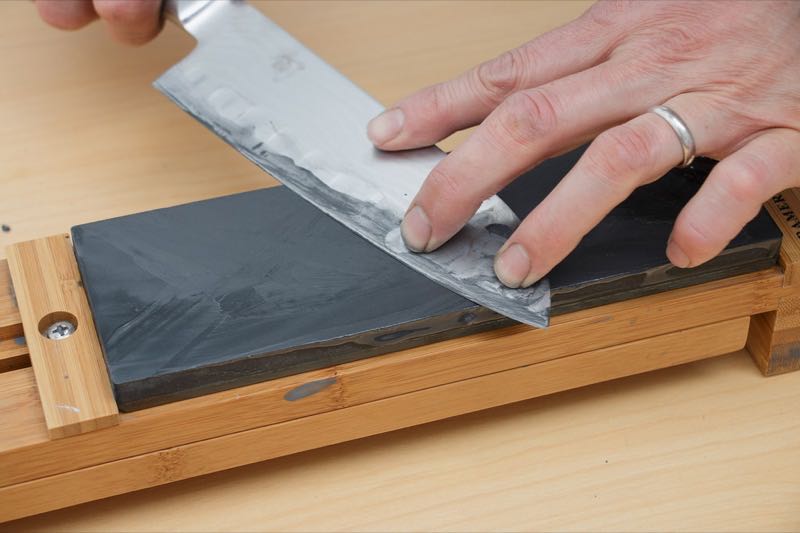
The correct angle is the foundation of how to use a wet stone knife sharpener. Most Western kitchen knives use an angle of about 15 to 20 degrees per side. Many Japanese kitchen knives use a narrower angle, often around 10 to 15 degrees per side.
The best angle depends on the blade. A narrow angle can feel very sharp, but it may be more delicate. A wider angle is often stronger for heavy chopping or outdoor use.
To estimate the angle:
-
Hold the knife so the blade faces away from you.
-
Place the blade flat on the stone.
-
Raise the spine slightly.
-
Aim for a steady angle between 15 and 20 degrees.
A simple visual guide can help. A typical U.S. coin is close to a few millimeters thick, but coin-based angle tricks are only rough estimates. The most important skill is keeping the same angle during every stroke.
Use your dominant hand to hold the knife handle. Place the fingers of your other hand gently on the flat side of the blade near the middle. Keep those fingers away from the edge. Do not press directly on the sharp edge.
How to Use a Wet Stone Knife Sharpener: Step-by-Step
Learning how to use a wet stone knife sharpener becomes easier when you treat the process as a series of small, controlled movements.
1. Start with the Coarse or Medium Side
If the knife is very dull, begin with a coarse grit. For a normal dull kitchen knife, a stone around 800 to 1,000 grit is usually a practical starting point.
Place the heel of the knife near the stone’s lower end. Keep the edge facing away from you. Set your chosen angle, then move the blade across the stone as if you were trying to slice a thin layer from its surface.
Move from the heel toward the tip. Lift the handle slightly as the stroke reaches the tip so the curved section touches the stone. This motion helps sharpen the entire edge instead of only the middle.
2. Use Light, Even Pressure
Pressing hard does not make a knife sharp faster. Heavy pressure can create deep scratches, remove too much metal, and make it harder to hold a steady angle.
Use moderate pressure during the first passes. As the edge improves, reduce pressure. Near the end, the blade should glide across the stone with only its own weight and a gentle guiding touch.
A useful rhythm is slow and steady. Speed can come later. Accuracy matters more than the number of strokes.
3. Raise a Burr
A burr is a thin strip of metal that folds to the opposite side of the edge. It feels like a tiny wire when you carefully touch the side of the blade with a fingertip moving away from the edge.
Do not run your finger along the blade. Instead, gently feel from the spine toward the edge, or use a cotton swab. If the swab catches on the edge, a burr may be present.
Sharpen one side until you can feel a continuous burr from the heel to the tip. The burr should not exist only in one small section. A partial burr usually means your strokes are not reaching the whole edge.
4. Sharpen the Opposite Side
Turn the knife over and repeat the same process. Match the angle and use a similar number of strokes.
The goal is not to create a large burr. A large burr means you have removed more metal than necessary. Once you feel a small, even burr on the second side, move to lighter strokes.
5. Alternate the Sides
Use a few light strokes on one side, then a few on the other. Gradually reduce the number of strokes until you finish with single, gentle strokes.
This helps center the edge and remove the remaining burr. Keep the knife angle consistent. Changing the angle at this stage can round the edge and reduce sharpness.
6. Move to the Fine Grit
Rinse the knife and stone if needed. Then use the finer side of a combination wet stone knife sharpener.
Repeat the same heel-to-tip movement. Use less pressure than you used on the medium grit. The fine side does not need to remove much metal. Its job is to refine the scratches and smooth the edge.
For most kitchen work, a 3,000 to 6,000 grit finish is enough. An extremely polished edge may look impressive, but it can be less useful for foods with tough skins if the edge becomes too delicate.
7. Remove the Final Burr
Finish with very light alternating strokes. You can also strop the blade on leather with the edge trailing away from the direction of travel.
Stropping should not replace sharpening. It only removes fine burr material and polishes the edge. A folded piece of cardboard can help in a pinch, but it will not perform like a proper leather strop.

How to Test the Knife Safely
A sharp knife should cut cleanly, not forcefully. Use safe tests rather than touching the edge.
Try one of these methods:
• Slice a sheet of paper. A sharp edge should begin the cut without tearing badly.
• Cut a ripe tomato. The blade should pass through the skin with light pressure.
• Shave a small section of arm hair only if you are experienced and comfortable. Keep this test away from your fingers.
• Cut a soft vegetable such as a bell pepper or cucumber.
Do not use the “fingernail test,” which involves placing the blade on a fingernail. It can cause injury and is not necessary. Also avoid chopping food immediately after sharpening without washing and drying the knife, because tiny metal particles may remain on the blade.
Remember that sharpness and edge durability are different. A polished edge may feel extremely sharp but lose performance sooner if the angle is too narrow for the task.
Common Mistakes to Avoid
Even careful beginners can make mistakes with a wet stone knife sharpener. Most problems come from inconsistent angle, excess pressure, or poor stone care.
Using the Wrong Stone
A fine stone cannot quickly repair a chipped or severely dull blade. Start with a coarse or medium grit when substantial metal removal is needed. For routine maintenance, a medium stone is usually more efficient.
Letting the Stone Dry
A dry stone creates more friction and may clog. Add water as needed, but do not use so much that the knife slides.
Changing the Angle
Lifting and lowering the spine during each stroke creates a rounded edge. Think of the blade as riding on a narrow rail. Keep that rail steady from the heel to the tip.
Sharpening Only the Middle
Many people focus on the easiest part of the blade. The heel and tip then remain dull. Use a full stroke and lift the handle slightly around the tip’s curve.
Pressing Too Hard
Heavy pressure feels productive, but it often creates an uneven bevel. Let the abrasive do the work.
Ignoring the Burr
A knife may feel sharp on one side but still have a folded burr. Always raise and remove the burr on both sides.
Using an Unstable Stone
A moving stone can cause slips and uneven results. Use a stone holder or place the stone on a damp towel folded several times.

How to Care for a Wet Stone Knife Sharpener
Good care extends the life of your stone and improves future sharpening sessions.
Rinse the stone after use to remove loose abrasive and metal particles. Do not use harsh soap unless the manufacturer recommends it. Let the stone dry completely in a cool, airy place before storing it.
Do not dry a water stone on a radiator, in direct sunlight, or beside a strong heater. Rapid drying can cause cracks. Store it flat on a dry shelf once it is fully dry.
Flatten the stone whenever you notice a hollow center. A warped stone makes it difficult to sharpen a straight edge. If the stone has deep cracks or crumbles during use, replace it.
Keep the stone separate from knives and metal tools. Scratches and chips can damage its working surface.
Which Knives Work Best With a Wet Stone?
A wet stone knife sharpener works well for many carbon steel, stainless steel, and high-carbon stainless steel knives. It can sharpen chef’s knives, utility knives, paring knives, cleavers, and many outdoor blades.
Some knives need special care:
• Serrated knives usually require a tapered rod or specialized sharpener.
• Ceramic knives are very hard and should usually be sharpened with diamond equipment or sent to a professional.
• Scandi-grind knives have a wide bevel that should rest flat against the stone.
• Convex edges need a different technique and may be difficult for beginners.
• Blades with a hollow grind can require careful angle control.
If a knife has a single bevel, sharpen the beveled side as directed by the maker. The flat side may need only a few gentle passes to remove the burr.
Benefits and Limitations of Wet Stone Sharpening
Using a wet stone knife sharpener offers excellent control, but it also requires practice.
Benefits
• You control the sharpening angle.
• You can choose the grit and finish.
• The method removes less metal than many aggressive sharpeners.
• Water reduces airborne metal dust.
• One stone can maintain many types of knives.
• The process can produce a smooth, precise edge.
Limitations
• Learning the correct angle takes time.
• The stone needs regular cleaning and flattening.
• Water can make the work area messy.
• Serious chips may require coarse equipment.
• Some blade shapes need specialized methods.
A pull-through sharpener may be faster for a quick fix, but it gives you less control. A whetstone rewards patience. Think of it like learning to sharpen a pencil with a knife: slow, careful movements produce better control than force.
A Simple Practice Routine for Beginners
If you are new to how to use a wet stone knife sharpener, practice on an inexpensive knife. Do not begin with a valuable Japanese blade or a family heirloom.
Use this routine:
-
Soak or wet the stone as directed.
-
Secure it on a damp towel.
-
Choose a 1,000-grit surface.
-
Practice holding a 15 to 20 degree angle.
-
Make slow strokes from heel to tip.
-
Check for a small burr.
-
Repeat on the other side.
-
Alternate light strokes.
-
Test the knife on paper or a tomato.
-
Wash, dry, and store the knife safely.
A common beginner mistake is stopping too soon. The knife may feel better after a few strokes, but it may not have a complete, even edge. Another mistake is continuing too long after the burr has formed. Once the edge is established, switch to lighter pressure and finer grit.
With practice, you will learn to feel the stone, hear the stroke, and notice changes in resistance. Those small signals make sharpening much easier.

Frequently Asked Questions About How to Use a Wet Stone Knife Sharpener
How long should I soak a wet stone knife sharpener?
Many traditional water stones need about 5 to 15 minutes of soaking, but the correct time depends on the stone. Splash-and-go stones may only need a thin layer of water, so always follow the maker’s instructions.
What angle should I use on a kitchen knife?
A 15 to 20 degree angle per side works well for many Western kitchen knives. Japanese knives often use a narrower angle, but the blade maker’s recommendation should take priority.
How many strokes should I make on each side?
There is no fixed number because blade condition, grit, pressure, and steel type all affect the result. Sharpen until you raise a small, even burr, then switch sides and finish with light alternating strokes.
Why is my knife still dull after sharpening?
The edge may not have reached the entire blade, or your angle may have changed during the strokes. You may also have left a burr attached, so check the heel, center, and tip and use lighter finishing strokes.
Can I use oil on a wet stone knife sharpener?
Do not use oil on a water stone unless the manufacturer says it is safe. Oil can clog a stone designed for water and may prevent proper soaking.
How often should I use a wet stone knife sharpener?
Sharpen when the knife no longer cuts cleanly with light pressure. For many home cooks, a full sharpening session may be needed every few weeks or months, while occasional honing can maintain the edge between sessions.
Is a wet stone knife sharpener safe for beginners?
Yes, if you secure the stone, keep your fingers behind the edge, use light pressure, and work slowly. Beginners should practice on an inexpensive knife before sharpening a valuable blade.
Conclusion
Learning how to use a wet stone knife sharpener takes patience, but the method is practical and rewarding. Wet the stone correctly, hold a steady angle, sharpen from heel to tip, raise a small burr, and finish with light strokes on a finer grit.
Start with a simple 1,000-grit stone and an inexpensive kitchen knife. Focus on control rather than speed, and inspect the edge as you work. With regular practice, you can maintain safer, cleaner, and more useful knives at home. Try the process on one knife this week, then share your results or explore more knife-care techniques.